Learn How to Build a Helmet Cam and See It in Action in This Max Payne 3 Machinima Video
Shane Hurlbut used a helmet cam extensively in his new film Act of Valor, but the advantage of being a Hollywood Director of Photography is that other people can build these sorts of gadgets for you. In the independent world, we've got to work a little harder, and a little cheaper, so thankfully we've got the people at DakaKin to give us a tutorial on making your very own helmet cam that will work with any DSLR-sized camera or smaller.
How to Make the Best Helmet Cam Ever:
Below you can see what the camera is capable of, in this choose-your-own-adventure Machinima series set in the world of Max Payne 3:
Here are links and prices for the specific parts used in the video:
- $44 - Manfrotto Tripod Head
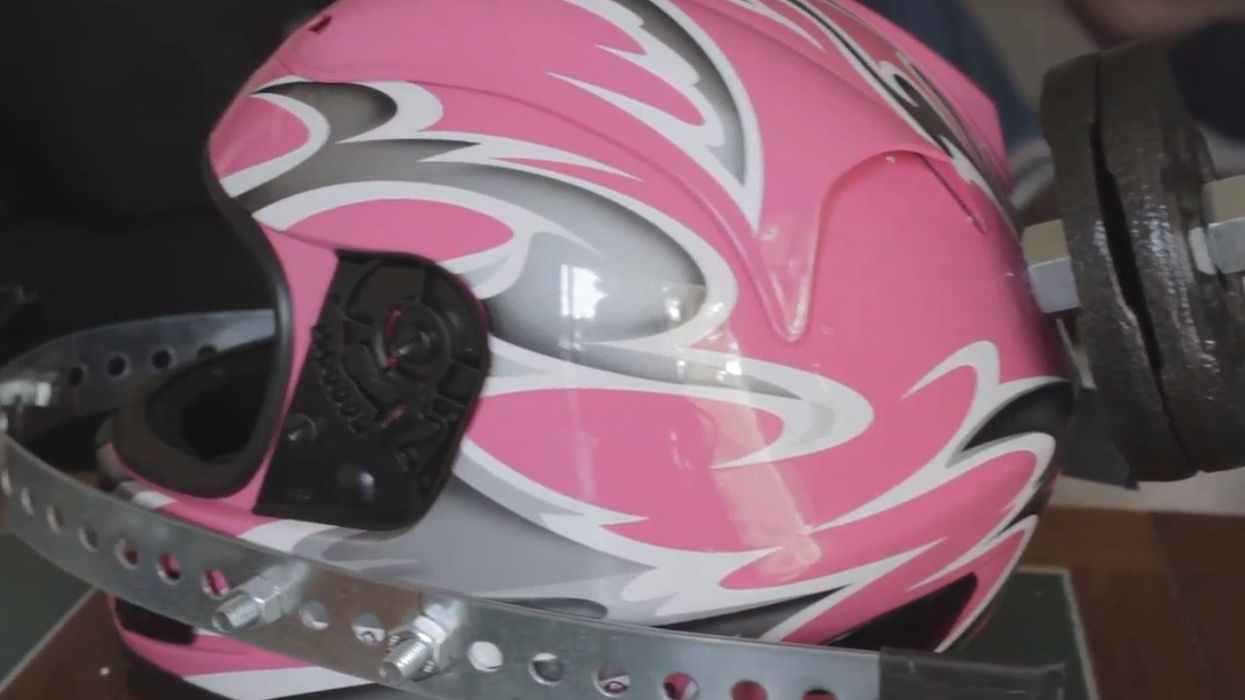
- $40 - Motorcycle Helmet (There are plenty of other options, but this is a slightly different model since the one used in the video tripled in price)
- $10 - Weights/Helmet hardware. This included the metal bar (with 3/8th Inch Holes), 2 toothed lock washers, 5 3/8th Inch Bolts, 5 3/8th Inch Nuts, 5/8th Inch Bolt with nuts and washers for that too.
The guys also had some advice on using this particular design and some improvements they want to make in the future:
The lighter the camera, the better. That seems obvious, but you'd be surprised how much strain a 5D and its equivalent weights can put on your neck. Make sure to stretch it before a long day of shooting. And hold onto the metal bars for stability when trying to do whip pans. You won't want that kind of strain on your neck. Lead with your hands.
I think the tripod head really helps separate this design from other helmet cams. It's not only very sturdy, but you have the ability to tilt the camera at any moment (when you have a full day of shooting, those small tweaks can add up in the day). Many cameras were locked in place with just a screw or would hang upside down, which drove me nuts. I like having everything right-side up, so I can make quick tweaks, and not feel disoriented when I'm framing.
They have also discussed moving the counter-weights lower to put less strain on the neck. For safety, they've cut open a tennis ball and placed it on the back of the large counterweight screw, and have also used gaffer tape on the front metal bar to make it safer to hold and safer for anyone who might get near it. The most important change they'd make is to make sure that the helmet being used fits snugly for the operator. A snug fit will help eliminate strain.
Thanks to the small size of DSLRs, we can now put a camera almost anywhere we can dream of. If you've got any experience building a helmet cam like this, feel free to share your thoughts below.