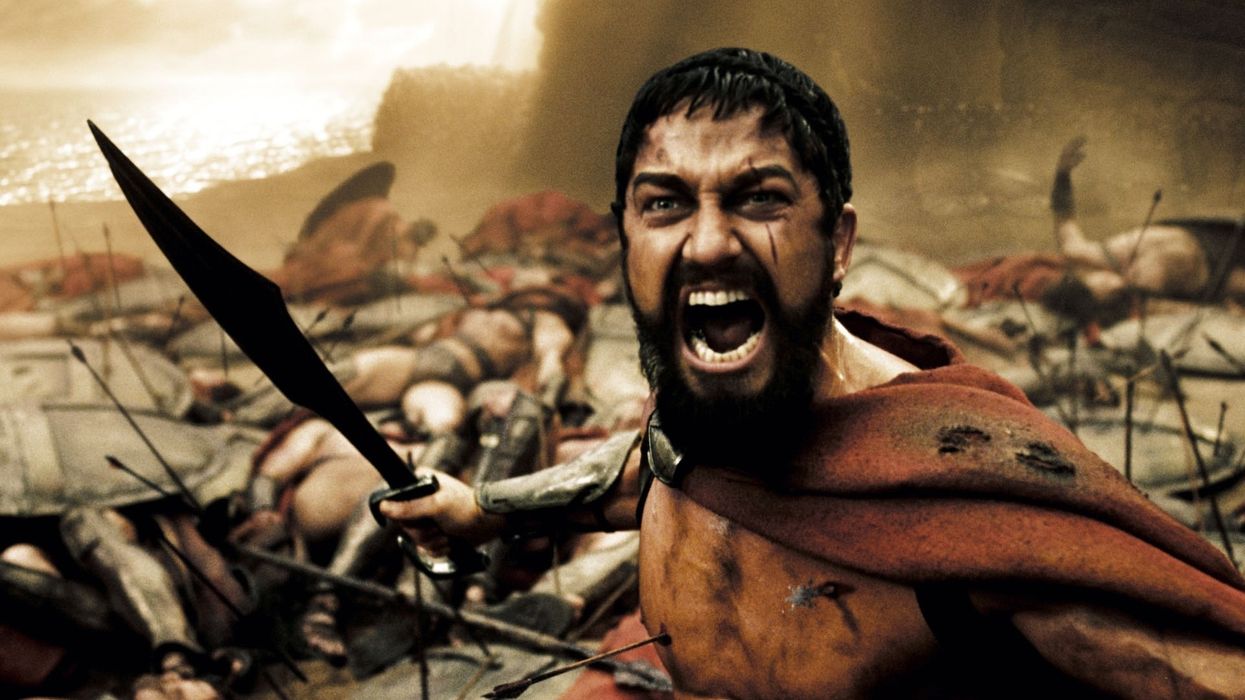
Few shots are more iconic than the epic cliff jump shot in Zack Snyder’s 300 when Leonidas is traveling to meet with the Ephors. The seemingly unreachable ledge that may just be within grasp—given the proper motivation—stuck with me. 10 years later, I was lucky enough to be able to pay homage to 300 when Fractal Visuals was making a short film to Silversun Pickup’s song “Ragamuffin.” This post details how my team at Fractal Visuals accomplished the epic jump shot.
I started by breaking down the shot and figuring out how I wanted to execute each part. I’ve found that separating the shot into pieces always makes things easier to tackle.
- Building the Cliff
- Super Jump (Jumping 15 feet in the air)
- Green Screen and Filming
- Post-Production
1. Building the Cliff
I knew the cliff was the most important part of the build because it needed to feel realistic and match the rest of the film. A lot of care had to be placed into matching the stone texture. While we were on location, I grabbed a small rock that I could later use as a sample to recreate the color and texture of the cliff.
The shape of the “rock” cliff was very important to me. We nicknamed it “The Wall” because of its obvious resemblance to a rock climbing wall, but we tried very hard to look natural. I wanted it to be rough and aggressive but also give my talented actor, Brent J. Reed, a reason to have to make the epic jump. If it was too jagged, then it could just be climbed up like any rock climbing wall.
To create the shape of the wall, I used a combination of 2x4s, ⅛ inch plywood (reinforced with cross bracing on the back) and a ton of Great Stuff (spray foam insulation in a can).
Build Challenges
The first challenge I ran into was that the wall had to be very tall. It wouldn't make sense to have the wall end at 10 feet in height because that’s easily within reach of a non-assisted jumper. For VFX purposes, the actor should not be able to outreach the top of the wall because blending would be problematic.
I thus decided to make the wall 16 feet tall and 4 feet wide, the height of two standard sheets of plywood stacked on top of each other, which made things easy.
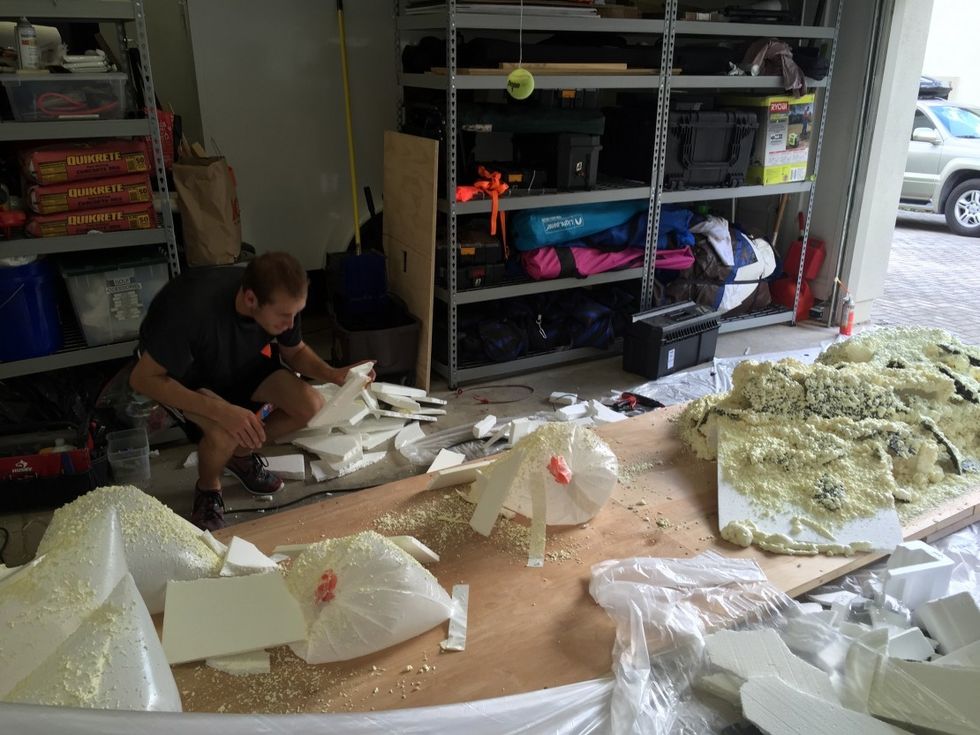 Building the shape of the wallCredit: Fractal Visuals
Safety, part one
Safety is always a huge factor in every aspect of the filmmaking process, so the primary concern while building the wall was making sure that, no matter what happened on set, the wall would never break. It had to act as a safe installation for the actor to interact with. This meant ultra-reinforcing everything.
The entire build used 3.5 inch torx deck screws and more cross beams than were necessary to ensure security. It’s always worth it for peace of mind. We built the main frame in two sections, one for each of the two pieces of 4 ft x 8 ft plywood. After the sections of the main frame were built, we connected them and added 2 x 4’s and screws on each of the joints. We made sure it was strong enough to support its own weight and moved on to the next step which was creating the rocky face with spray foam.
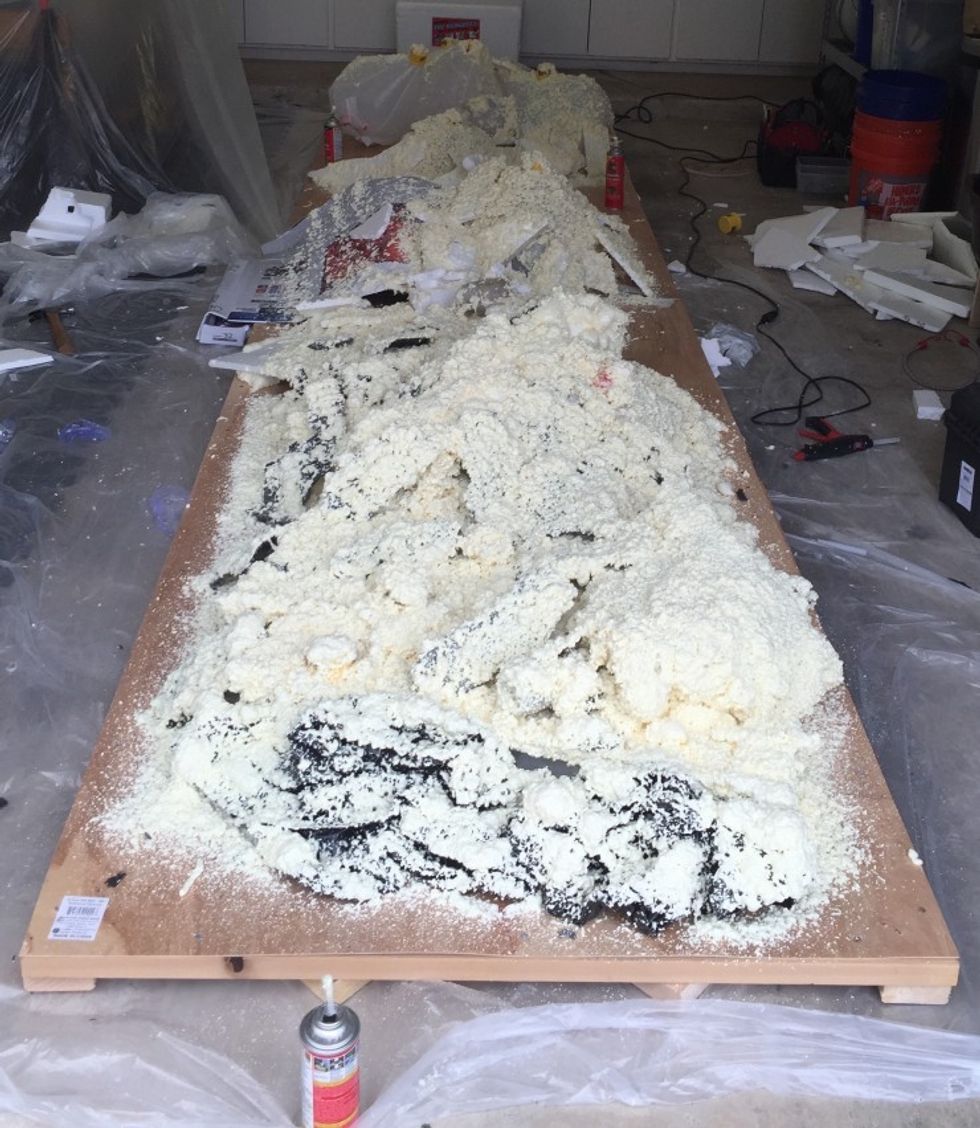 Spray foaming the wallCredit: Fractal Visuals
Creating the rock face
Spray foam is incredibly light weight but, in the quantities that we would have used to give volume to the entire wall, the weight would have been too much for the frame to support. It also would have been insanely expensive. We opted to use filler objects, like card board and empty water bottles, that would take up volume, give the wall a dynamic texture, and provide a base structure for the spray foam to take on.
Fractal Visuals cares about the environment, so we grabbed all the packaging foam and boxes that we had in our recycling bin and nailed them to the frame. As we approached the top of the wall, we wanted to reduce weight as much as possible to ensure that it would not be top heavy. Once we ran out of recyclable materials, we decided to use trash bags filled with air. This was optimal because it provided a ton of volume and almost zero added weight.
In total, we sprayed around 30 cans of Great Stuff on the wall. It took a few hours. After the foam was finished curing, the next step was to make the wall looked “rock like.” The spray foam was too nodular to pass as rock so we took an old muslin white screen that had ripped and attached it to the foam using spray adhesive.
This worked great for smoothing out all of the bumps. However, the cloth was flexible and not “rock like.” To fix this, we diluted some Elmer’s white craft glue with some water, placed it in a spray bottle with a little bit of coloring (so we could see where we sprayed), and soaked the entire thing. After a day of drying, we were left with a hard, strong, oddly colored rock.
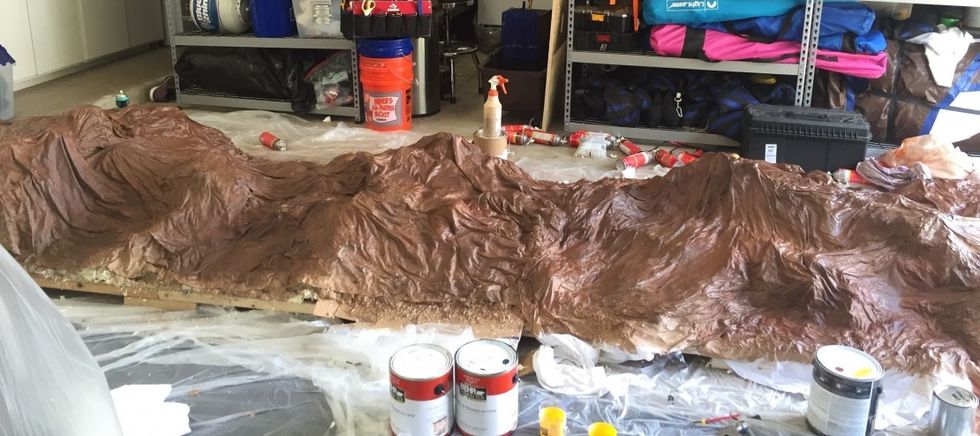 Initial base coat of paint on the wallCredit: Fractal Visuals
Painting
I went to Home Depot and bought four gallons worth of paint all in different shades of red, brown, and orange. Over the years, we’ve become good friends of folks at the local Home Depot, and I asked if they could give me some of their raw paint tints in seven other colors. These tints are what are added to the acrylic base paint to give you the color on the swatches. I did this because a rock isn't made up of only four colors, and the realism comes from having a wide range of shades.
After I applied a base coat in each area of the rock, I added some of the tints to a smaller batch of each color, just to give it a slightly different color, and went back over the areas with a dry brush to give the rock face some additional contrast.
After all the painting was done, I mixed up a solution of water, glue, and the remaining tints (all of which were darker colors), and placed it into the spray bottles. This allowed me to create a weathering effect on certain portions of the rock where peaks and valleys were formed.
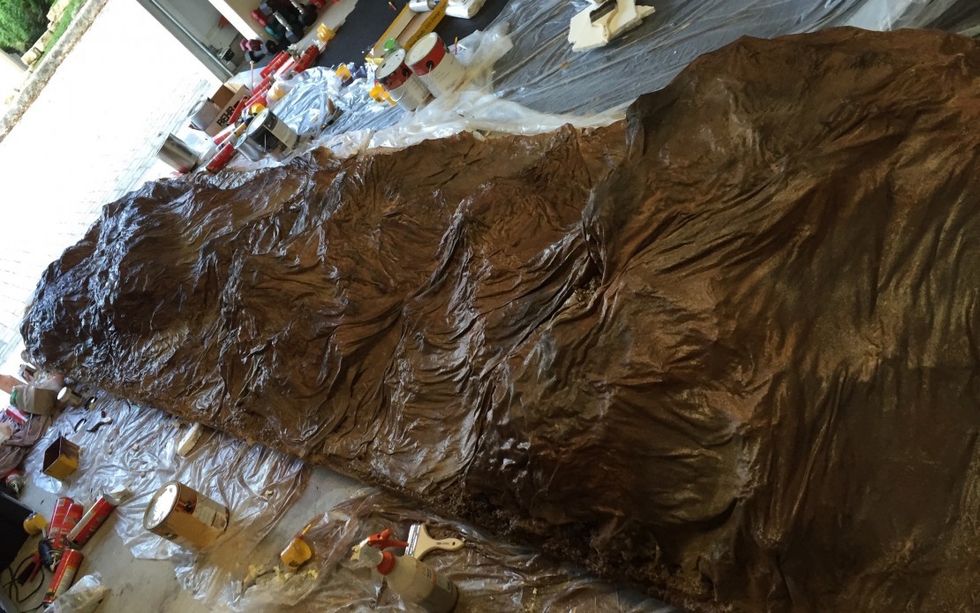 Final painting detail work completedCredit: Fractal Visuals
Installation
We used our exterior green screen concrete wall and mounted some beams to the concrete using .22 cal concrete/stud nails. This gave a solid mounting point to attach the wall to. We then added a bunch of support beams, some sand bags, and again, used way too many ultra-strong deck screws to make sure nothing would break or move. With everything installed and secured we moved onto phase 2: the jump.
2. Super Jump
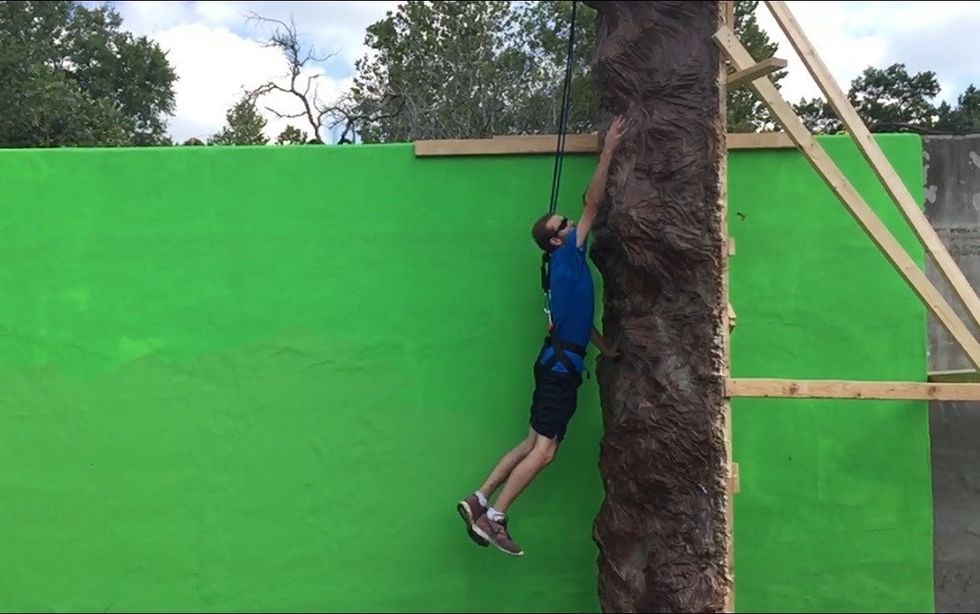
Enabling someone to jump 15 feet in the air was surprisingly easier than the rest of the build. We used some elastic exercise bands, a rock climbing harness, and a few carabiners. The elastic bands were always tensioned when attached to the person so we would clip them up right before I called “action” and then they would jump. But before we could move forward we needed to make sure it was safe.
Safety, part two
Safety was key throughout the entire shoot and it is always very important to make sure everything the actors would touch or interact with was explained to them and tested before they did it themselves. I decided to be the guinea pig (because it looked super fun, but also because I’m a certified stuntman and a Third Degree Blackbelt with close to 18 years of training in Tukong Moosul Martial Arts.)
Knowing how to mitigate dangerous situations is critical for achieving the best safety possible, and it is always beneficial (and smart) to consult someone with stunt experience when doing anything “dangerous.” After doing a number of test jumps with the elastic bands and checking the durability of the wall and the frame it was mounted to, everything was ready to go.
 Director/Stuntman John Byron Hanby testing the wallCredit: Fractal Visuals
In addition to testing the safety, we also used this opportunity to explore different styles of jumping. We used the slow-motion feature on my iPhone to be able to more closely match what we would see when shooting 100fps on our RED Dragon. Once we decided on a style of jumping, I delivered a safety brief for everyone on set to make sure they were all up to speed on how things would work. We were ready to start filming.
3. Green Screen and Filming
The wall was so big that none of our indoor green screen setups were large enough to accommodate it, so we opted to use our outdoor green screen. Lighting a green screen outside with the sun is an efficient and cost-effective way of maintaining smooth, even lighting throughout the screen—Just make sure you choose a wall that is facing north or south to avoid shadows on the wall.
Filming was relatively straightforward. Once our camera settings were locked in, we did a few takes where some feedback was given to Brent (whose enthusiasm to do this made it a lot easier) about his jumping style. Shortly after that, we were finished! The massive amount of planning that went into getting that shot paid off with the efficiency and final product we were able to achieve.
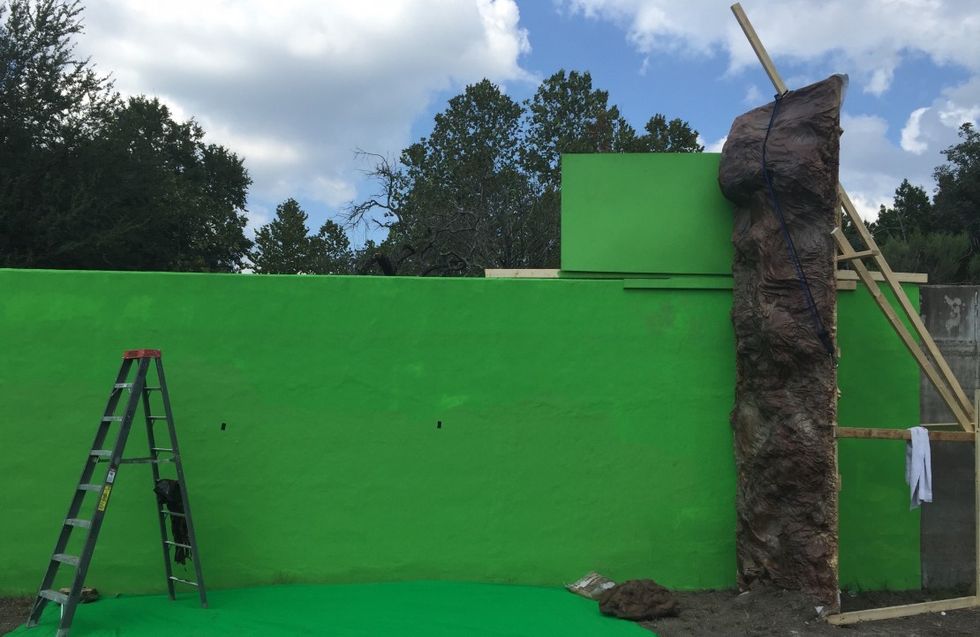 The whole green screen and wall setupCredit: Fractal Visuals
4. Post-production
While the actual creation of the wall was incredibly rewarding, the coolest part was seeing everything come together the way I wanted it to in post. I use the Adobe pipeline for all of my editing work because of the simplicity of Dynamic Link between After Effects and Premiere Pro while working with R3D footage.
After selecting the best jump and trimming it to fit, I used Adobe’s Dynamic Link to replace the exact duration of the clip with an After Effects composition and began the compositing. The first step was keying the green screen, which was super easy because the screen was evenly lit.
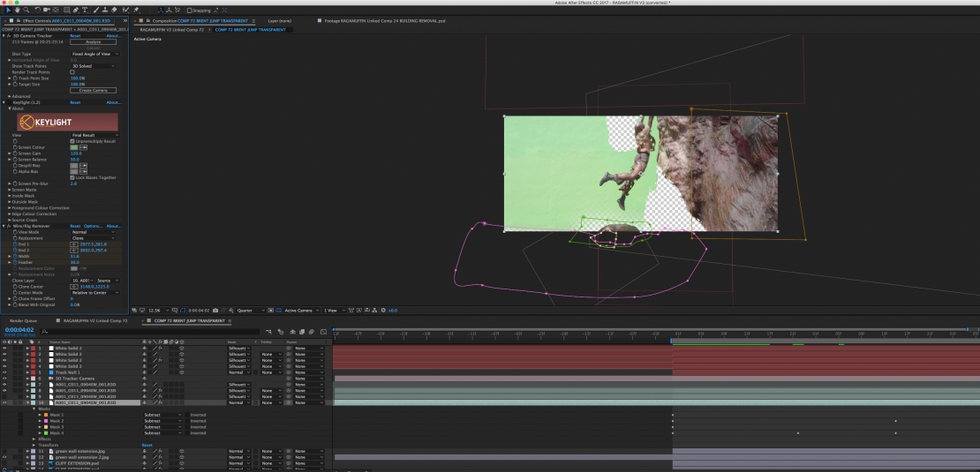 After Effects compositionCredit: Fractal Visuals
Next, I cleaned up the key and removed any debris in the scene: tracking points, the ground below Brent, and the wire rig. With the scene cleaned, I began work on the stylistic elements: shaping the wall, adding the smoke, and extending the wall to match the perspective using 3d camera tracking.
While all this work can be summed up in just a few sentences, it took almost 12 hours to finish all of those steps. The key to making it look good is taking your time, taking breaks, coming back to the shot with a fresh eye, and never settling for almost good enough.
Now take an EPIC jump and go make something amazing.