I've seen dozens of videos sharing "Premiere Pro Secrets" online. While they are great tips for any Premiere Pro user, the unfortunate thing about most of the "secrets" is that they are quite obvious. Things like "you can display safe margins" or "you can create and attach proxy files." They're quite common to anyone who has worked with the program. So I decided to create a three part series of tips for anyone seeking more advanced techniques in Premiere Pro. Here's are 15 tips you may not already know.
1. Increase Playback Speed
Most people know that J, K, and L shortcuts can be used to play backward, pause and play forward respectively. If you hit J, or L twice the speed will increase to 200%. If you hit it three times it will go to 400%, etc.
Now to the secret part. If you use a shortcut Shift + J or Shift + L you’ll increase the speed by only 10%. For example, if you want 120% playback speed you need to hit L once and Shift + L twice.
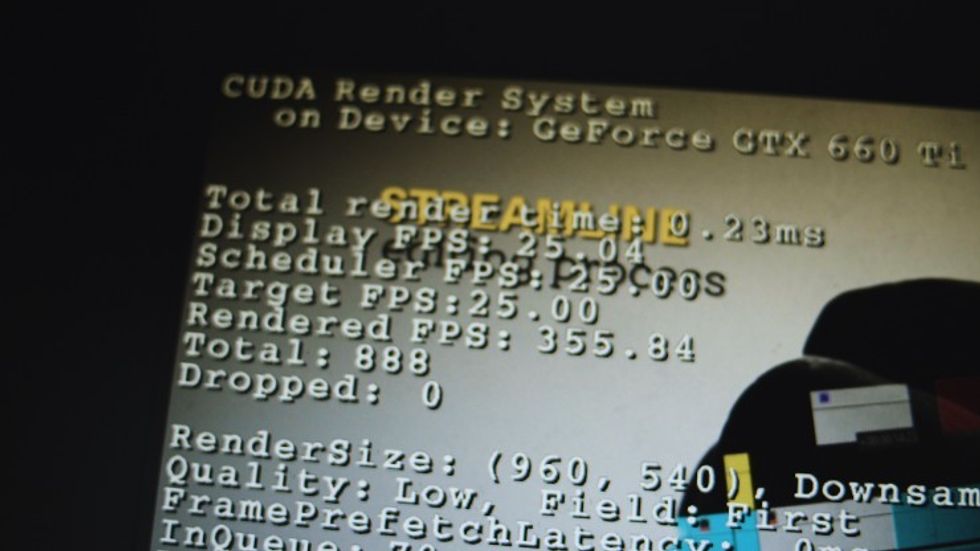
2. GPU Render System
Whether you're using CUDA, OpenCL or Metal, you can display some additional information about the footage in the Program Monitor. Simply hit Ctrl + Shift + F11 (Cmd + Shift + F11 on Mac) and press play to activate GPU Render System. It will show you various information like dropped frames, color encoding information, etc.
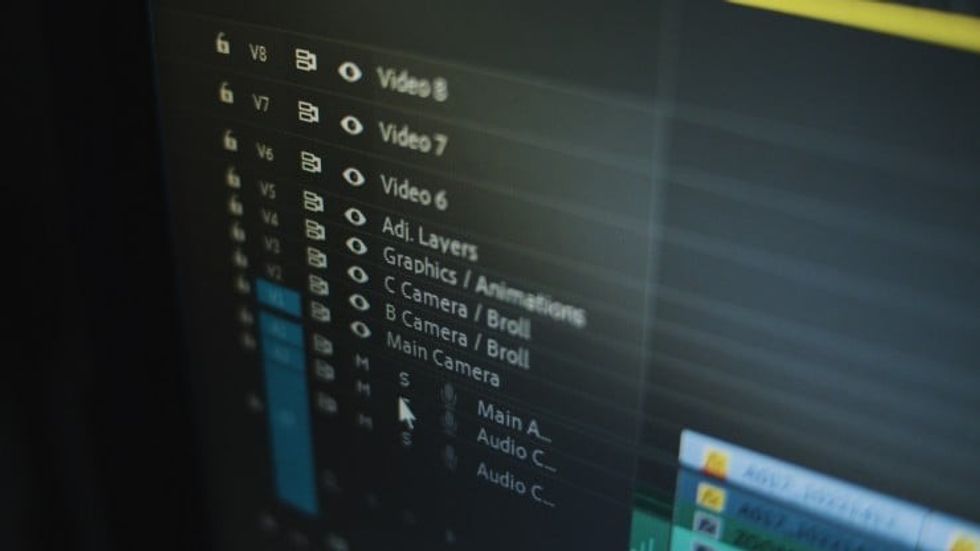
3. Track Names Always Visible
By default, if you minimize a track height (use a shortcut Shift + “-”), the name of the track disappears. There's a way to keep it, though.
Vashi Nedomansky explains the whole process in more detail in this video. It goes like this:
- Right-click on track area where the name should be
- Click Customize
- In Button Editor, grab and drag the Track Name button (V1, A1, etc) out of the dialogue box to the end of the top row of icons where you want the name of the track to be. Do it both for video and audio tracks.
4. Play Around
Do you want to play around a specific point on the timeline? Just hitShift + K. Preroll and post-roll time can be specified in Preferences in the Playback tab. If you activate Loop in the Program Monitor the portion of the timeline will play endlessly.
5. Change Increments
Do you need more control when changing the value of a parameter in Effects Control or Lumetri Color panel? Use Shift when dragging to go by increments of 10 or Ctrl (Cmd) for precise changes with 0.1 value increments.
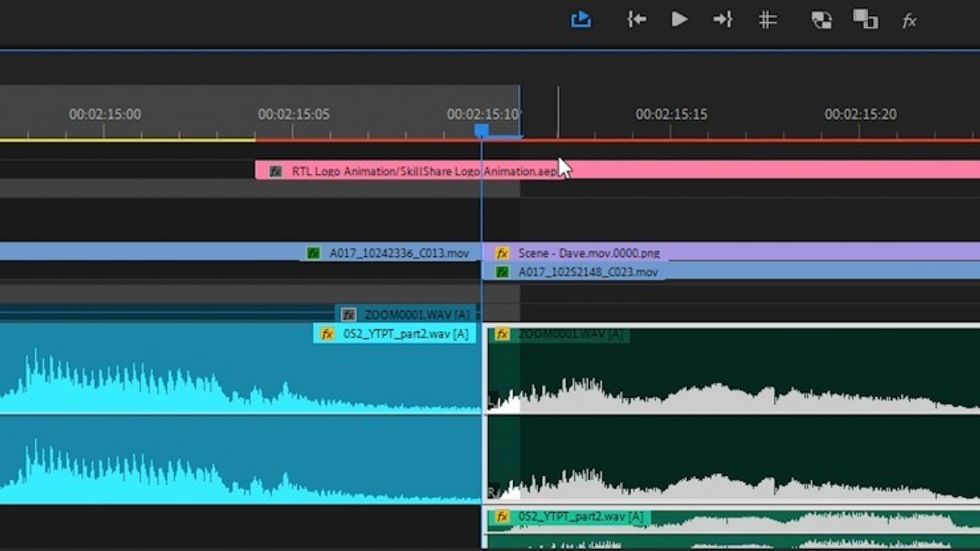
6. In & Out Point Selection
If you want to render a part of a timeline you can add In and Out point with I and O shortcuts. The problem is that we end up with one additional frame at the end that we don’t want in our export.
Luckily there’s a great shortcut that doesn’t cause that problem. It’s a forward slash. It will add In and Out point for any selection on the timeline. You can select one clip or a whole range of clips. It will work just fine.
7. Instant Slow Playback
There's one more thing you can do with J, K, and L shortcuts. If you hold KL or KJ simultaneously you’ll get slow playback right away. Precisely, it's 1/4th of the regular playback speed. Now, if you release K first, you’ll get the regular speed playback again. And if you hold L or J, you can toggle between a regular and slow playback mode pressing K whenever you wish.
8. White Balance Sampling
By default when you use an eye-dropper tool in the Lumetri Color effect it uses a pixel under the cursor to set the While Balance. If you happen to click on a pixel affected by a sensor’s noise or just not the one that appropriately represents the color, you end up with worse White Balance than from when you started.
If you hold Ctrl (Cmd) while using the eye-dropper tool, you get 5 by 5 pixels sample area. It's indicated by a fat picker cursor. Average chrominance and luminance will be used for calculations which in most cases will give us better results.
9. Paste Attributes
If you want to copy effects from one clip to another it's best to use Paste Attributes command. The fastest way to do it is with shortcuts. We can simply select a source clip and hit Ctrl + C (Cmd + C) and then select destination clips and hit Ctrl + Alt + V (Cmd + Opt + V). Paste Attributes dialog box will appear to specify what's supposed to be copied.
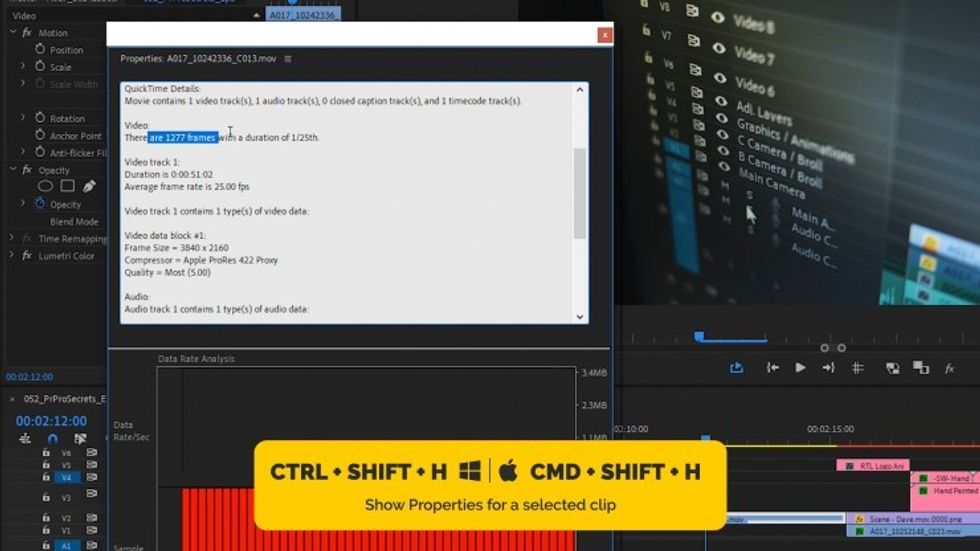
10. Clip's Properties
If you want to quickly check properties of any selected clip on the timeline (or in the Project panel) use Ctrl + Shift + H (Cmd + Shift + H) shortcut. The resolution, file size, codec, audio format information, and much more useful information in one place.
11. Apply Transition to One Side of the Cut
By default when you drag a transition between clips it’s applied to both ends. Even if it looks like it’s only on one side. To apply it to only one side of the cut for real you need to hold Ctrl (Cmd).
12. Zoom to Frame
You probably know slash key lets us zoom out to see the entire timeline in the view. However, there’s a command that does the opposite and zooms in to the frame level. It’s not mapped to any key combination by default. To do it, we go to Edit > Keyboard Shortcuts and type “Zoom to Frame” in the search area. Now you can map it to any keystroke you want.
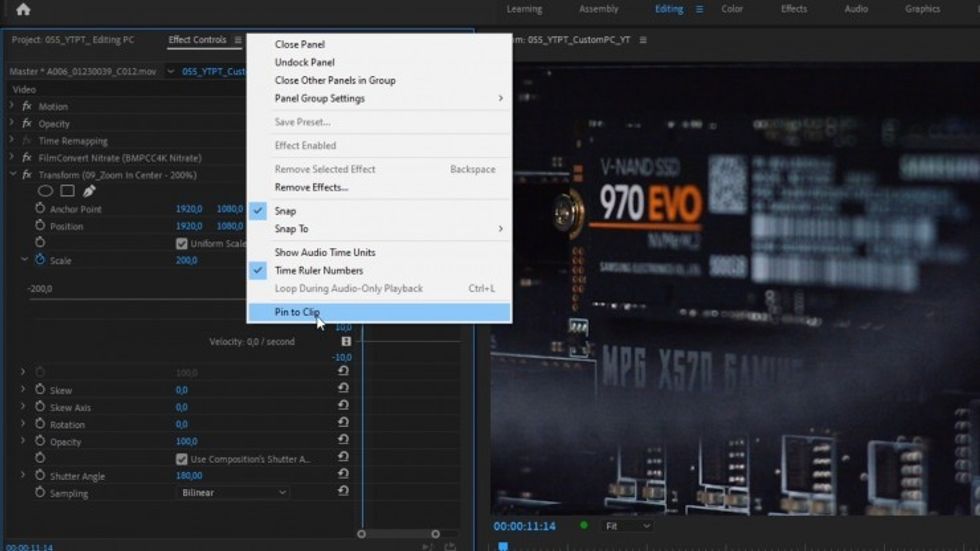
13. Pin to Clip
Let's say I've applied a preset from Essential Motion pack (more on that in a moment) to a clip on the timeline. If I navigate to the Effects Control panel to modify keyframes, I can see the timeline for a whole sequence. For long sequences this makes no sense and turns customizing keyframes into a nightmare.
To narrow down this timeline section to the duration of the selected clip in the Effect Controls panel, we go to the hamburger menu at the top and choose Pin to Clip option. Now we can deal with keyframes more precisely. Focusing on the clip rather than the whole sequence.
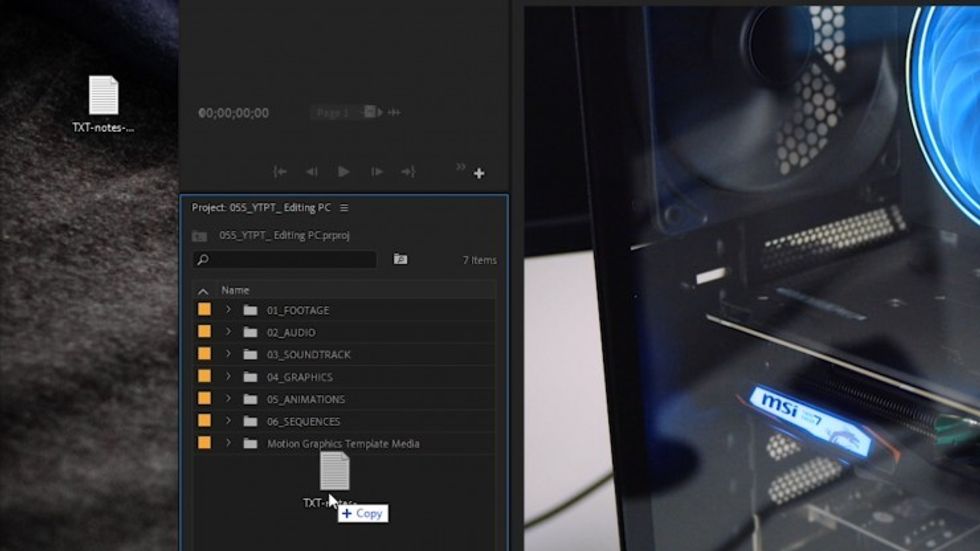
14. Import .txt File
You can drag and drop .txt file in the Project panel and double-click it to open it. Very useful to add notes for yourself or your collaborators.It’s not possible to import it in a regular way even if you have All Supported Files selected. You just need to drag and drop.
15. Split Video and Audio in Source Monitor
If you hold Alt (Option on Mac) and drag In or Out point in the Source Monitor panel, you can adjust it separately for video and audio of the source clip. A great way to create an L-cut or J-cut.
Bonus: Essential Motion Pack
In December 2019 I released Essential Motion, a pack of presets for adding digital motion to any shot. I worked on this pack with my friend and freelance editor Joel Barthel from Germany. The Essential Motion pack contains 15 resolution-independent, easy to use and customizable presets. We love them and use them on almost every project. We believe you'll find them extremely useful as well.
Download a free copy of Essential Motion Pack.
How do you like these secrets? How many did you already know? Let us know down in the comments.