They just released the first Public Beta for Davinci Resolve 12, which you can download here. Resolve 12 brings over eighty new features to the popular color grading tool, with a host of editing, audio, workflow, and of course, color grading improvements.
First, here's a video from Blackmagic that gives us a great rundown:
Now let's get a little more in-depth with some of the more exciting improvements.
Editing
Resolve is one of the leading color grading platforms, especially among indie filmmakers who can’t afford a Baselight, Pablo, or Quantel system. Having primarily focused on color grading for over two decades, the DaVinci team is now switching gears to develop and push Resolve’s editing capabilities. Its aim is to position the software as a full-fledged editing platform that competes with Premiere, Avid, and Final Cut. Many of Resolve 12’s new features revolve around editing, perhaps because the color grading tools are already so sophisticated.
Several of the tools at the heart of all professional editing systems have been ported to or improved upon with this version, including the familiar overlay that displays options on whether a clip will be inserted, overwritten or fit-to-filled when placed into the timeline.
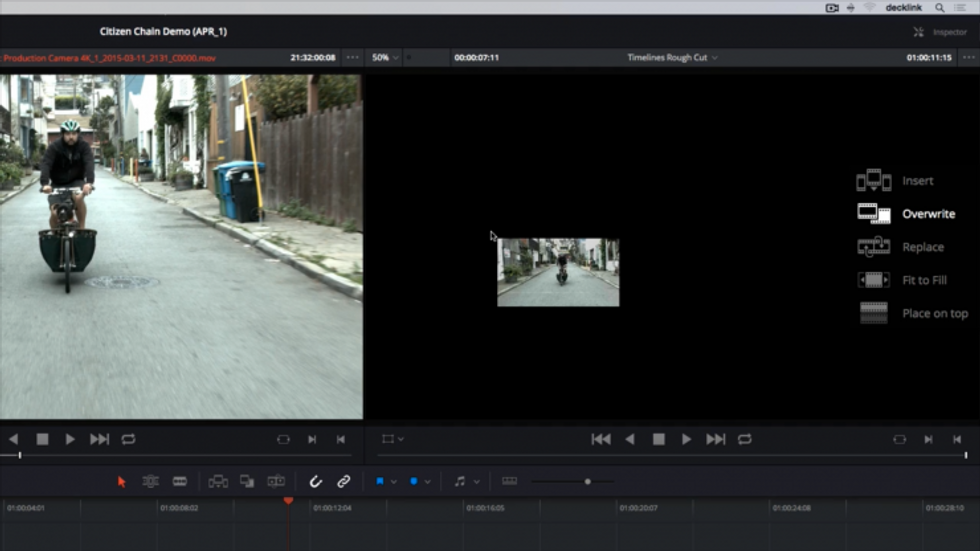 Dragging a clip to the source monitor functions much the same way as popular NLEs.
Working in the timeline is much faster. Context-sensitive trim tools avoid the need to constantly change tools to make a precise edit. The trim tool transforms into a ripple, roll, slip or slide tool depending on where the cursor is positioned over the clip. Multiple clips can also be trimmed at the same time.
Asymmetric trimming allows changing multiple clips in opposite directions from each other simultaneously. This can be performed on multiple clips on the same track as well, which was previously not possible. A dynamic trimming option allows you to use the standard J, K, and L playback keys to scrub for an ideal edit point. Just like other NLEs, the audio can play back along with the video. Once you get how these controls function, editing clips in the timeline is a cinch.
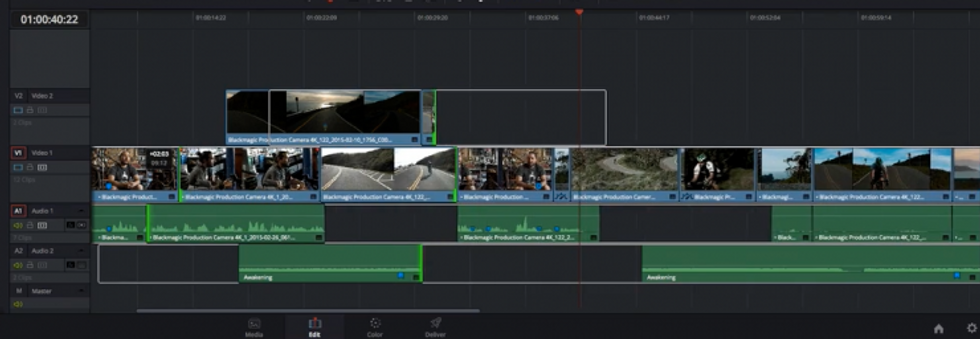 Adjusting multiple clips is a snap in Resolve 12.
The brand new multicam feature in Resolve 12 features a straightforward implementation of working with multiple angles in a project. Grouped angles are clustered together on the source monitor, and editing together a video is as simple as selecting the appropriate angle when it's needed in the timeline. The timeline gets chopped up accordingly, leaving the editor to further refine edits from there. The multicam clips can also be expanded into their constituent video layers for working in a more traditional, layered approach. This mode also enables slipping of individual tracks in case they weren’t synced properly.
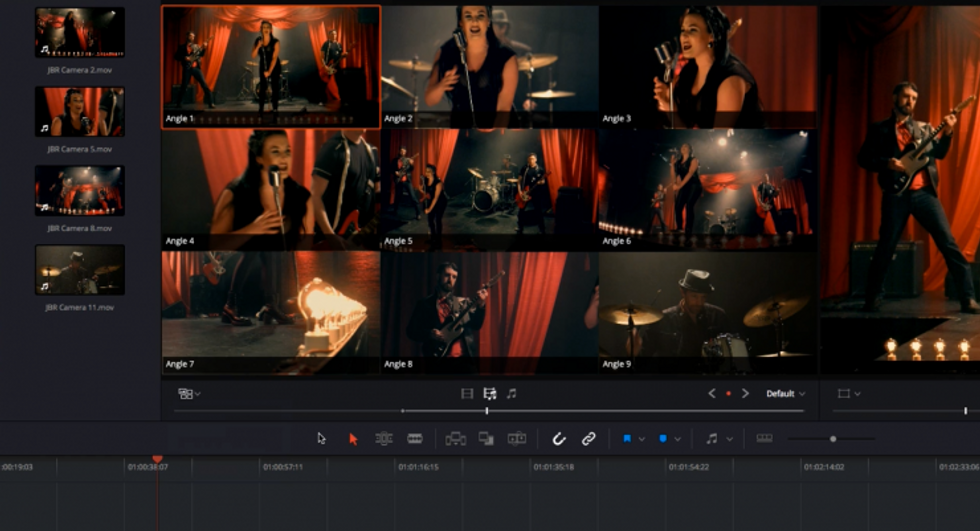 The brand new multicam feature allows you to select from a handful of angles when editing.
One of the biggest additions in Resolve 12 is the completely new media management system which collects all assets with handles for archiving or exporting to another system. The interface should come familiar to anyone used to Avid or Final Cut, and copying, moving, transcoding, consolidating, and deleting unused media are all available options.
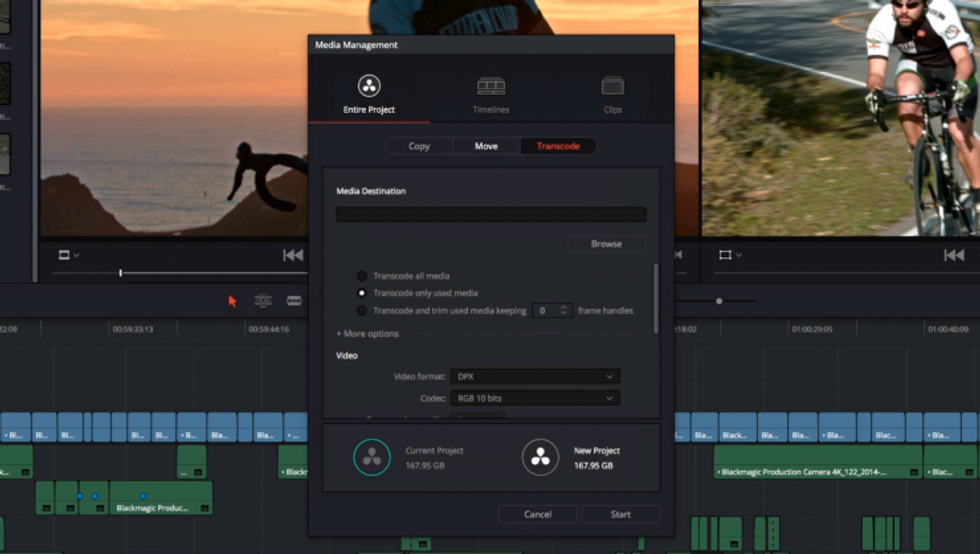 The new media management function allows for easy project consolidation or copying.
Color
Resolve's focus has been on being one of the leading color grading tools on the market, so its tools for controlling color are already pretty sophisticated — but there are still some significant improvements in the newest version.
A new color management system allows for quickly setting input and output color spaces at the timeline, project, and even at the clip level. This is great for editors who aren’t as adept at coloring and want to show clients a more pleasing image than a flat, log-encoded capture. The system is different than a LUT transformation that can clip values. Instead, Resolve uses a mathematical application that preserves dynamic range throughout. That means you can grade on top of the transform or underneath it, giving you more flexibility as you work.
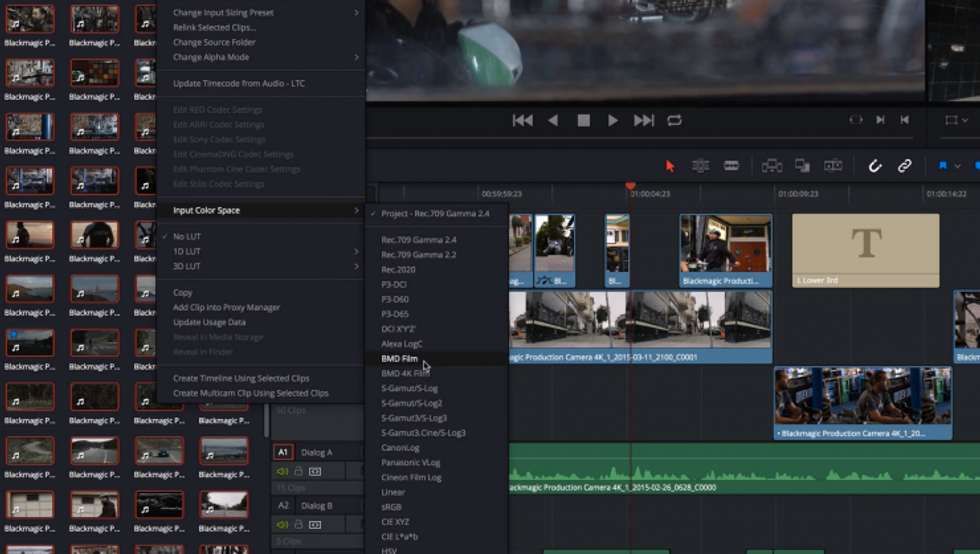 A wide variety of color space options are available to transform footage quickly.
Resolve 12 introduces a new 3D keyer which is especially helpful for chromakeying. Similar to the normal qualifier we know and love, the 3D keyer works by dragging across areas of interest to select a range of values. According to Blackmagic, the sampling performed in a 3D color space, essentially a color cube, is more accurate. These values are collected as "swatches," a bit different than the hue, saturation, and luminance interface Resolve colorists are used to. Each of the swatches can be affected independently, leading to the most refined qualifications.
 The new 3D keyer allows for even more precise qualifications than before.
The 3D keyer takes care of spill suppression with a Despill checkbox to clean any residual chromakey color on the talent. In addition to the usual tools that adjust the qualification, Clean White and Clean Black have been added for further matte finessing, giving even finer controls than what was possible in Resolve 11.
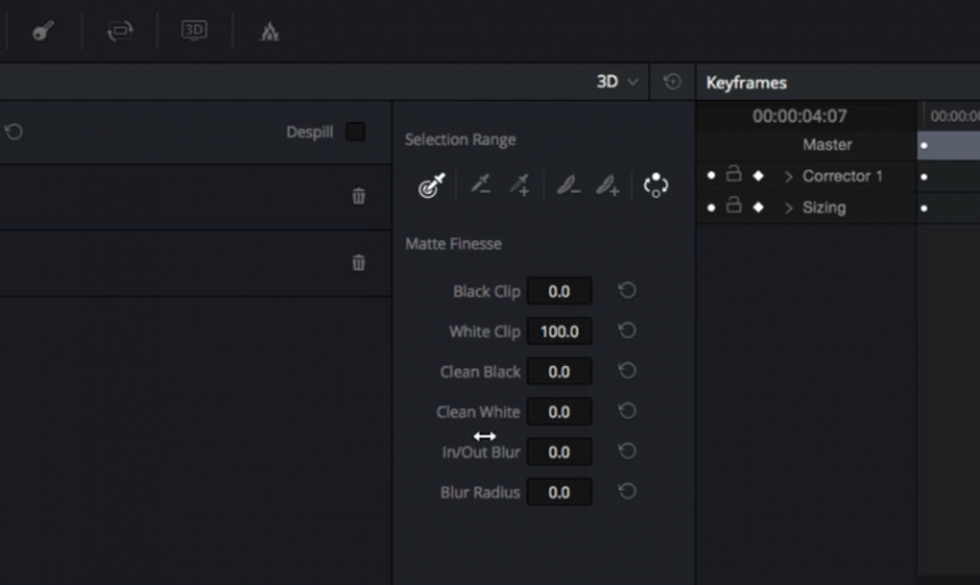 Further refinement of qualifications is possible through the Clean Black and Clean White parameters.
There are also improvements to the already awesome tracker in Resolve 12. The new 3D Perspective tracker fixates on objects whose perspective changes over time throughout a clip’s duration. It's a great tool for tough shots with extreme camera moves.
There’s a new shot matching tool which I’m honestly skeptical of, since an algorithm is attempting to replace a largely subjective practice. In Blackmagic’s demo, only slight moves are made on shots using this feature. Still, the feature is there, ready for battle testing. In practice, it may be useful to get shots in the general ballpark of each other before tweaking further.
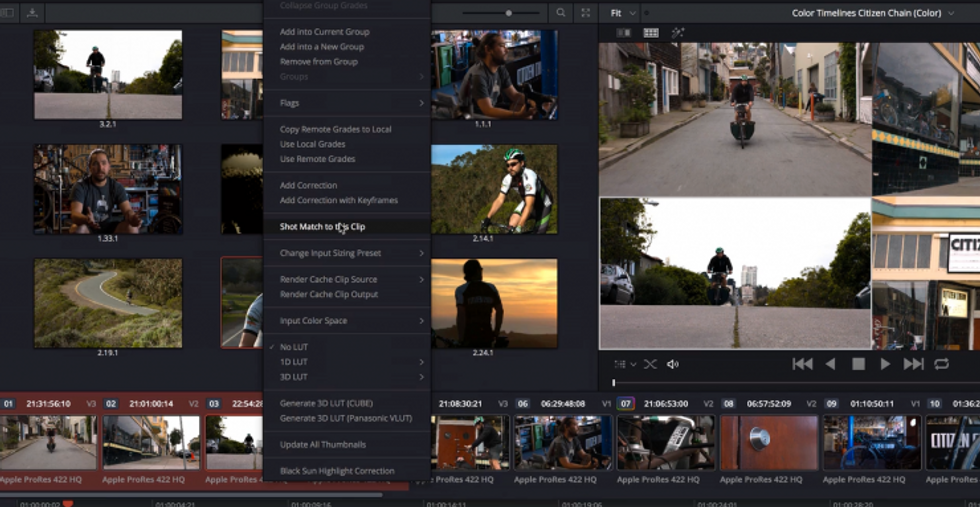 The new shot matching feature can bring disparate shots closer together.
Audio
Resolve 12 comes with a new audio engine that supports higher bit depths and sample rates, allowing for more accurate audio editing. Audio filters which come as standard VST plugins are included. It’s my hope that audio playback won’t stutter anymore.
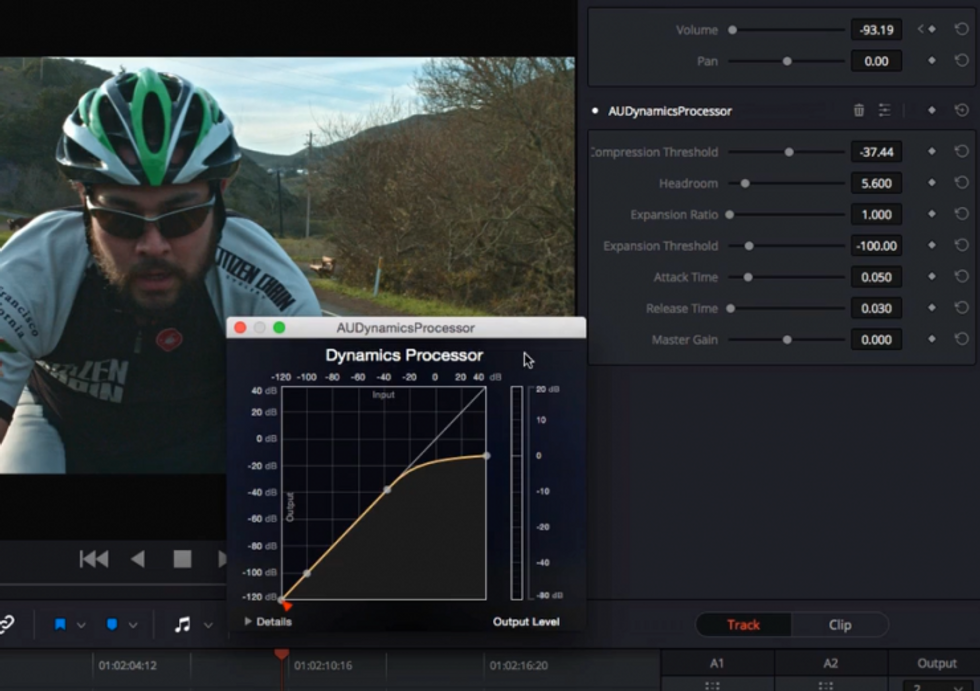 Standard VST plugins are now available in Resolve 12, allowing more complex audio processing.
Timelines can now be exported as AAFs for mixing in Pro Tools. Resolve packages the AAF with a flattened video track and all discrete audio elements needed for the mixing process. Without this feature, Resolve could never compete with existing non-linear editing systems, where audio mixing is a necessary step in the post process.
Resolve 12 adds a curve editor in the timeline so dissolves can be finely tuned, similar to the way many professional audio tools handle fades and transitions.
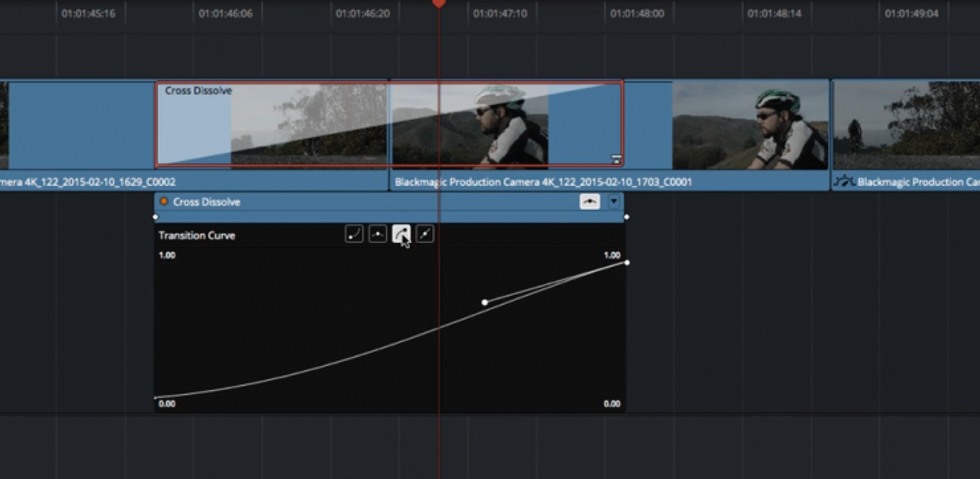 Dissolves can now be customized and tweaked with much more flexibility..
In Resolve 12, you can automate audio mixing by moving mixer sliders. Moving in Track mode will create keyframes, allowing you to dial in a rough mix as you play through the timeline.
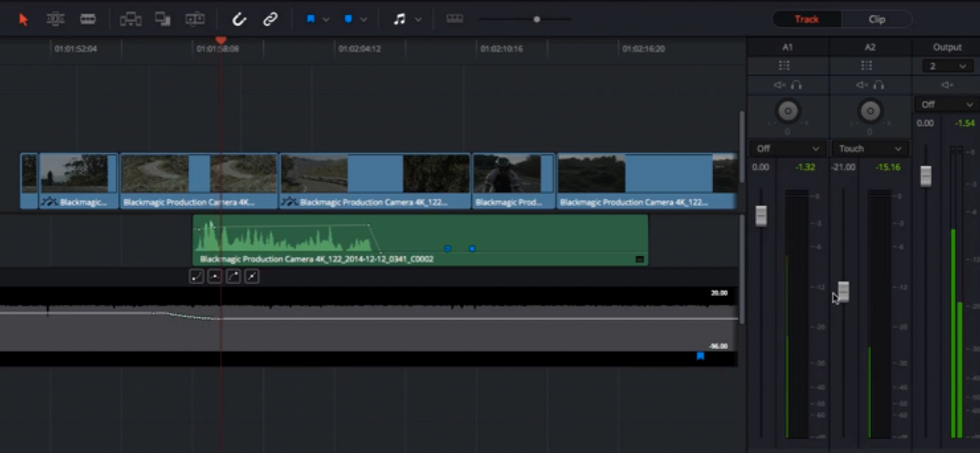 Audio can now be automated just like in most professional audio software.
Aesthetic
Several aesthetic considerations have been taken into account for the new release. The color wheels and qualifier ranges are more minimal, and small adjustments like spacing between buttons have been optimized to ease eye strain during lengthy grading sessions, subtleties I’ve always appreciated.
Resolve's interface can now be resized by the user, ending the frozen interface which wasn’t optimal for all screen resolutions. We take these kinds of things for granted in other applications, but it's good to see they're finally here in Resolve. These small changes make the application friendlier, sure to entice a whole new user base.
Other Features
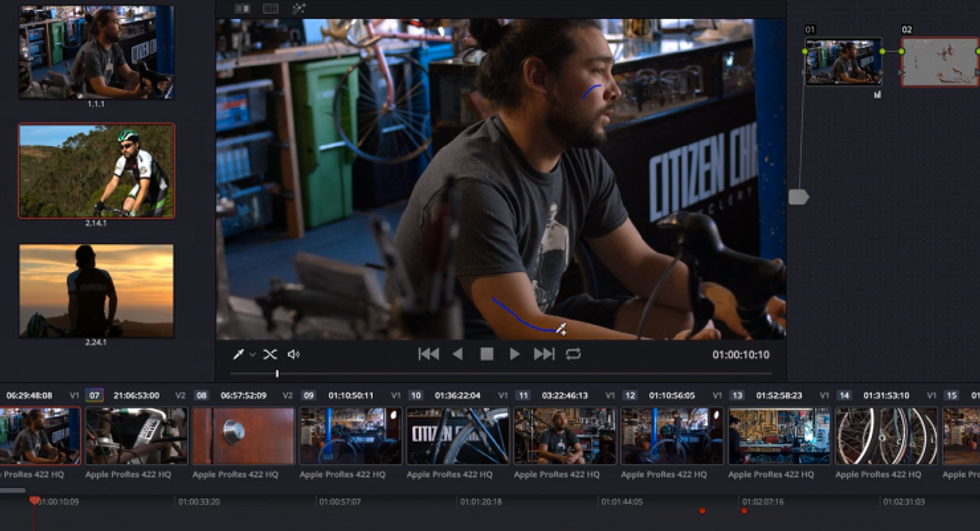
Controls to move objects around the timeline come complete with Bezier curves. You can also create Bezier points from the basic power window shapes to add variation to the standard circle or square shapes.
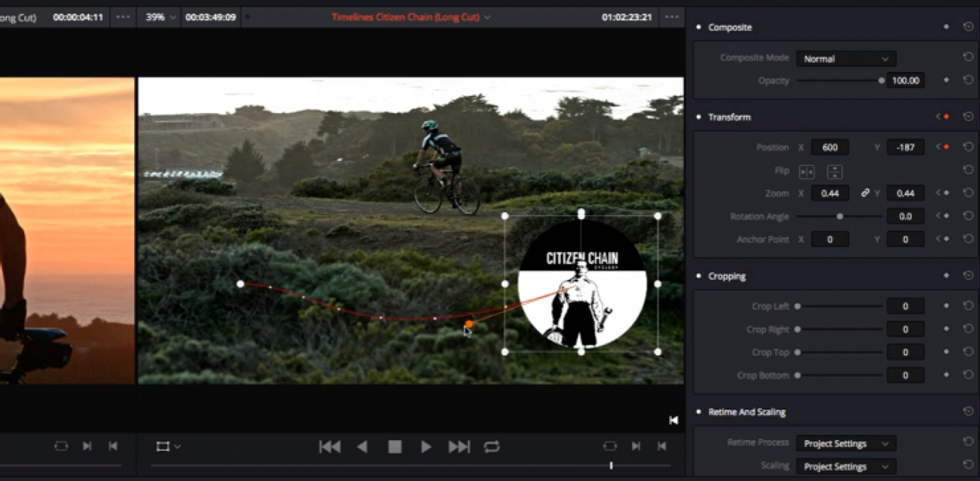 Standard Bezier curves allow for creating complex and fluid moves for elements in the frame.
Smart Bins will allow you to tag footage to make it searchable later.
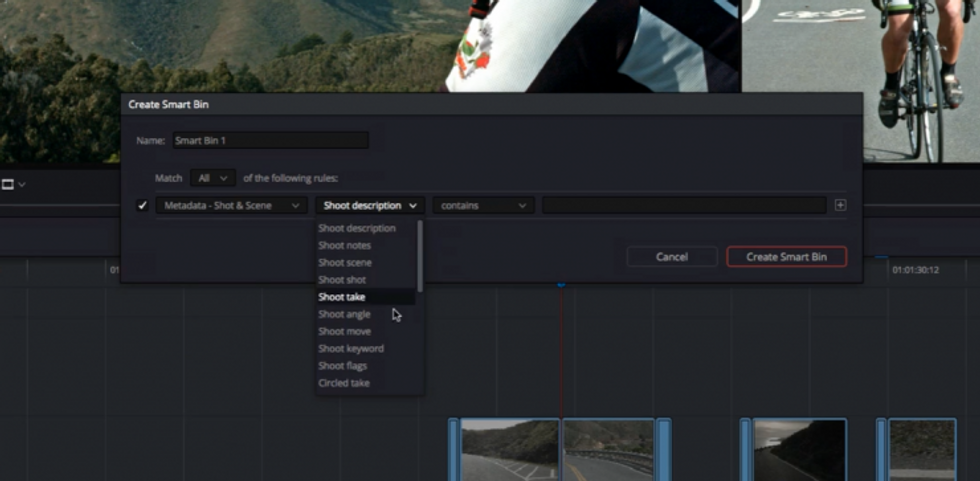 The creation of smart bins allows footage to be organized as well as searchable.
Clips will also be draggable into Resolve directly from the operating system, another feature that’s long overdue. Nesting sequences makes it easy to collapse chunks of clips, great for working with longer material. Similarly, large node trees can be compressed so the workspace isn't so cluttered. Of course, these nests can be decomposed as needed. Lastly, support for the ACES 1.0 color space has been added.
Resolve 12 is a free upgrades to existing users and will run you a grand for the full Studio version. The barely-limited free version will be an option for those still learning the craft of grading (or for those who really don't need some of the advanced features that the Studio version offers). You can download the Public Beta for Resolve over on the Blackmagic website. You can find links to the hardware configuration guide and the manual below.
What are your favorite Resolve 12 features? What other features do you want to see?
DaVinci Resolve 12 Configuration Guide
All images courtesy of Blackmagic Design.