John Ford, director of photography at UK-based video production company Contra, is no stranger to beautiful, cinematic commercial work, whether it's a portrait of a young woman combating homelessness, or describing why film editing is like building a guitar from scratch.
Today, John is going to share some behind the scenes insight into how he lit a recent promotional video for Coleman Douglas Pearls. The shoot features some absolutely gorgeous soft lighting, making John's commentary a must-read for anybody intent on making their lighting as flattering as possible. So without any further ado, here's Contra's video for Coleman Douglas, and John's post.
This is a guest post by John Ford.
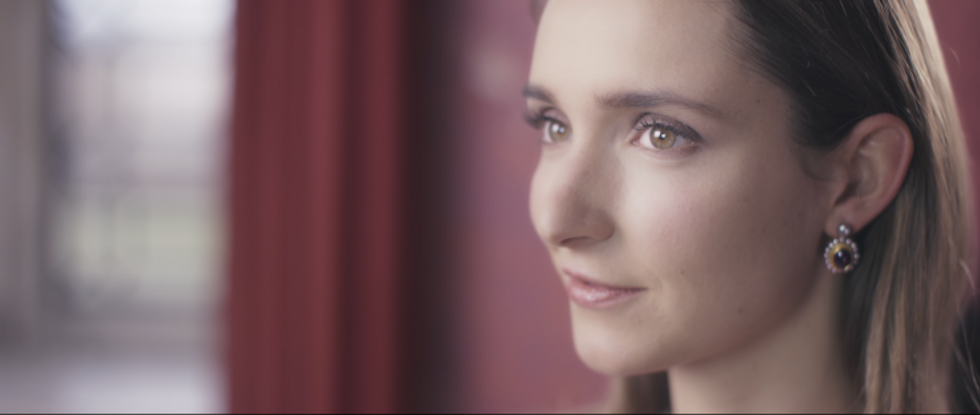
When approaching any form of beauty lighting, it is important to know your subject's facial structure, skin texture, and color. How does the light naturally fall on their face? What is the shape of their forehead, nose, chin, etc.? How does the light change as the subject turns?
You’ve probably built up a few default lighting setups that you can rely on, and that’s fine. However, since every face is different, you will need to tweak your setup and create a "rulebook" for the shoot. Then you can adjust your setup to suit narrative decisions and atmosphere, all the time knowing how to bring out the best from your models.
Research
The first port of call is to check previous shots of your talent — either still photography or video — to see how other DPs or photographers have approached them. You don’t necessarily have to like the way they’ve been photographed in the past, but it will certainly help inform your lighting decisions. How are shadows cast across their face? Are they generally front lit, side lit, top lit, or does it vary? In some ways, video can be a more helpful reference since photos for fashion will most certainly have had at least a little Photoshop.
So, study their characteristics and get to know as much as you can about their facial structure prior to meeting, and start to develop a sense of what has, or will, work for them.
Test light
The next stage is to set up a test shoot. This isn’t always possible, but I strongly advise getting some time with your models/characters if you can. It’s a chance for you to study how light falls on them and make informed lighting decisions on your shoot. It’s all about getting to know what does and doesn’t work so that you can reduce the guesswork or variables on the shoot day.
In this instance we were lucky enough to get an afternoon with our model. I broke the test shoot into two sections. Shape and Colour.
Shape
The first test was all about studying the way light worked for her. In this instance I had the Red Dragon on hand so I filmed the session. However, it’s not always necessary to film the test.
The main thing is to hold a light and move it around your model's face, studying how the light changes. Where are the most flattering light positions? What light positions cause awkward shadows? How does a side light affect skin texture?
Move the light in all angles from left to right and top to bottom to get a sense of their facial structure. Study the texture of their skin when you hold the light at harsh side angles. By using a single light source — in our case a single light panel or a single 300w fresnel — you quickly identify problem areas, and also positions that are particularly flattering. Make sure you also study the effect of an edge or kick light and see how the texture of her skin is affected by varying angles.
Colour
The next stage was to choose which beauty filters would work best. I use both the Roscoe Beauty and the Lee Cosmetic sets. For me, this is all about finding which filters match the skin tone of your model. These packs contain a wide range of colors and clearly not all will work, so it’s good to try out a range making a note of what seems to flatter her skin. Some scenes may well require a different tint, so it’s always good to know if there are a few different tones that flatter your model.
In this instance we went for Roscoe 184 Cosmetic Peach and NCR6 Rosey Accent, as well as Lee #184 Cosmetic Peach, which had a gentle diffusion as well as both a matte brown/peach and a pinker peach. This gave a subtle flattening effect on the skin and worked with both tungsten and daylight sources.
We tested these beauty filters for both daylight and tungsten using our LEDs — however we also set up our Chimera soft-box on an 800w tungsten source. LED panels are great in many ways, but often suffer from a slightly lower CRI than a pure tungsten source, and this is a vital consideration when dealing with the subtleties of beauty filters. LEDs can suffer from a green spike. When shooting portraits I would tend to avoid LEDs for front keys where possible and go with tungsten/HMI or Kinos.
Lighting Diagrams and Planning
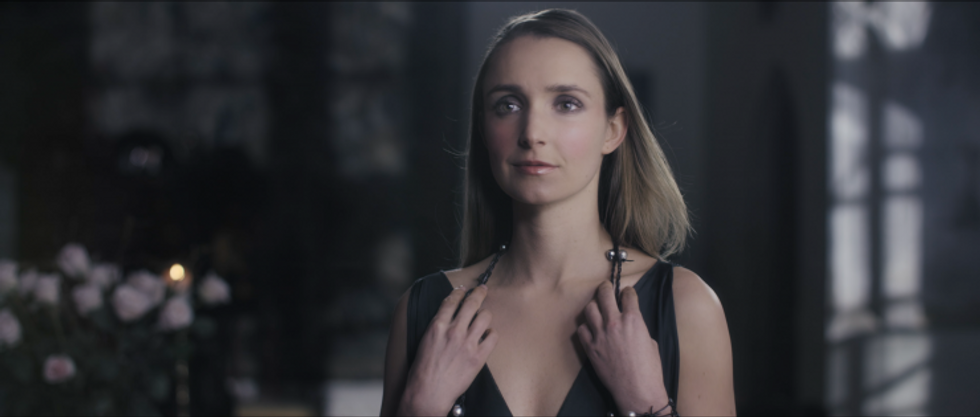
Having spent a good couple of hours testing out various lighting positions and filters, I could see that our model would benefit from a broad source side light, combined with a more gentle soft front fill, such as a Chimera.
I opted to double diffuse the broad side light source. This is a great technique for really softening the light and reducing shadows. The principal is simple: if you punch an HMI straight into a frame — in our case a 4’x8’ — you tend to get a hot spot in the center, so it’s not making the most of the broad frame. However, if you pass it through a sheet of diffusion or frost placed between the source and the frame, the light is more scattered, meaning that the light is much more even across the frame, giving a softer source.
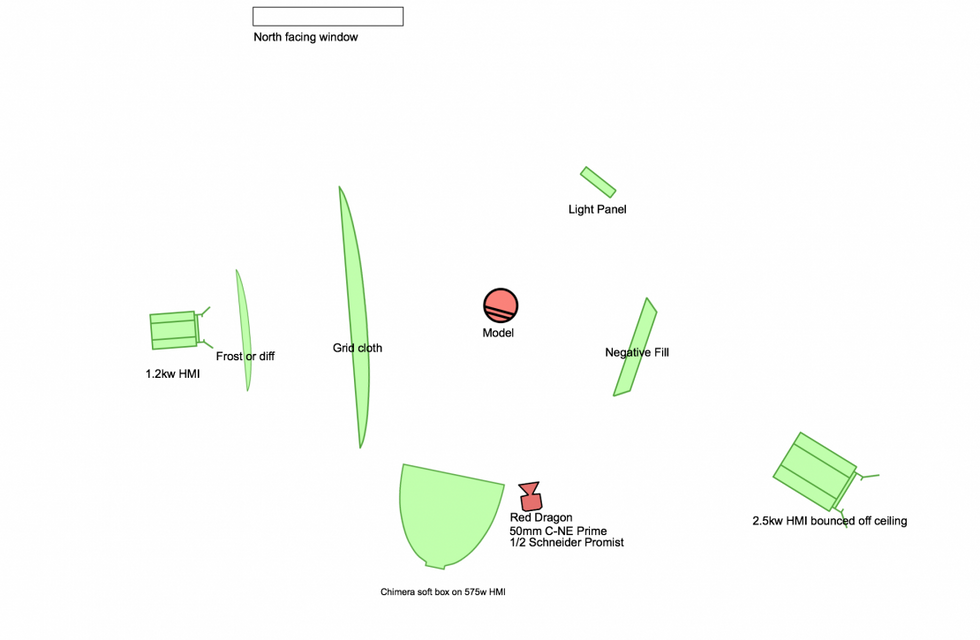
I attached the beauty filter to the barn doors of a 1.2k HMI, nice and flat. I then placed a small frame, about 2’ square with a sheet of #103 Opal Tough Frost quite close to the HMI, maybe 2’ away and again, nice and flat. Then between that and the model I placed my main 4’ x 8’ screen with full grid cloth. This gave a beautiful soft broad source with a very even light quality.
For the soft frontal fill, I used a 575w HMI with a Chimera soft-box with full diffusion. The same beauty filter was used clipped close to the HMI. In order to preserve the lifespan of the filter and to give a softer source, always make sure the light is fully flooded. Finally, we added a hair light, which was just a 1x1 light panel, again with a beauty filter. This was generally kept quite dim.
Drawing on the results of our lighting test, we had worked out the optimum height for both these lights and could quickly shift these frames around as necessary for the various setups.
So now that we had our rulebook for lighting our model we could adjust the contrast by adding negative fill — black non-reflective material — where necessary and control our contrast ratios. This is really a creative decision that you can tweak to suit the overall mood of the piece.
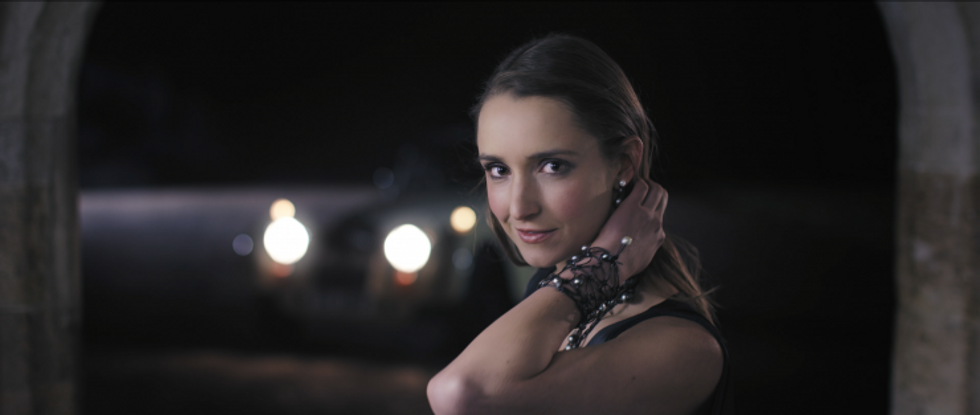
Lighting the rest of the scenes obviously varied a touch but I stuck to this plan for all portraits or key model shots as much as possible. I’m a firm believer in trying to iron out any unknowns ahead of the shoot and the last thing you want to be doing on a set is making the model feel uncomfortable. The worst thing you could do is make them feel as though they aren’t looking good on camera.
Doing a lighting test ahead of schedule makes them feel flattered and looked-after, as well as give you the confidence to draw up your lighting plans knowing what will and won’t work.
Other Tips
Always make sure you have some kind of storyboard and shot list so you can prioritize your schedule and tick off the shots as you go. This should ensure you have enough time to implement your lighting rules and have enough time to spend on the most important shots.
Always make sure you have a thorough location report, keeping sun positions in mind. We knew ahead of time which windows would work at what time of day and where we would need to add ND or CTO gels. I get great confidence from the Sun Surveyor app, which is available on both Android and iPhone. Do all that you can to work the schedule and setups to fit with the best lighting. I also recommend getting a few sheets of plain voile, should you have any problem windows that you can’t avoid!
Re-storyboard: when you get back from your location scout, check your storyboards and make sure they still make sense!
Then make sure you draw up lighting diagrams, even if these are just sketches. It helps a great deal to show your crew where and when fixtures should be placed. This just saves time and helps get you ahead of the schedule! I find Shot Designer a very helpful app that can be synced with your phone and desktop.
My final tip is to make sure your lighting compliments the art direction and makeup. For me, so much of my approach to a project comes from the locations we’re using and working with the Art Director to set the tone. I’m always very keen to ensure that the makeup artist has plenty of time on set for their checks. Great makeup really does help make great lighting.
Finally, if it’s a fashion shoot, make sure you concentrate your efforts on the main portrait or hero shots. You will need coverage, including small details and textures, but not at the expense of the main portraits. So focus on these and try to stick to your plans, evolving them when necessary!
We'd like to thank John for taking the time to share his expertise with the NFS audience. If you have any questions for him, be sure to leave them down in the comments!