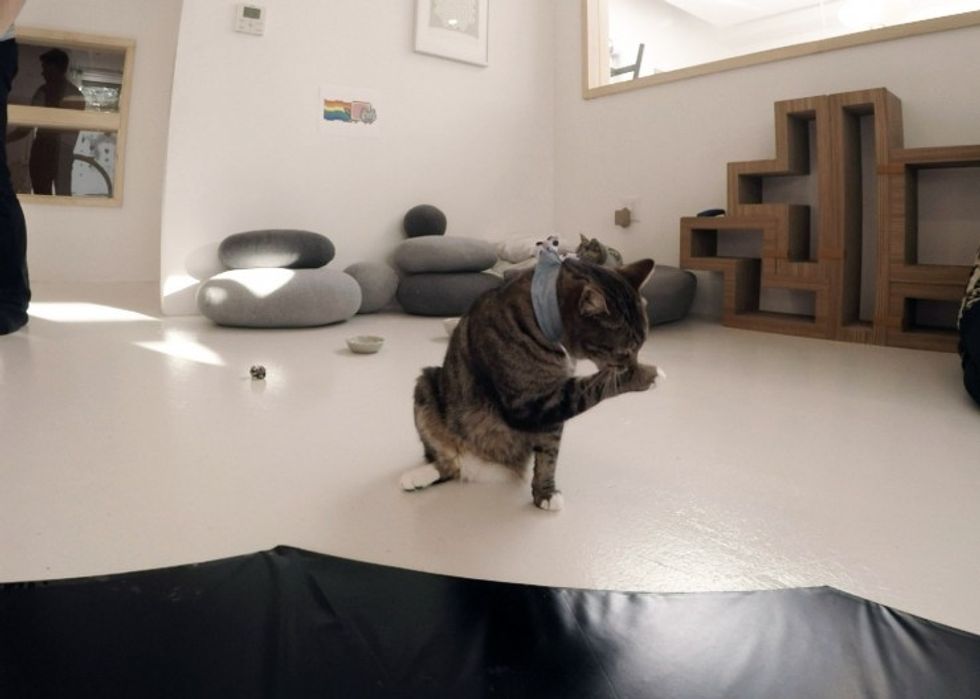
Yesterday, we released the biggest cat video ever made: the #Catquarium. It’s a 2-hour virtual reality experience of San Francisco’s KitTea cat cafe. We launched on YouTube’s 360º video platform, which provides a virtual reality experience even without goggles — your phone acts as a window into the cafe, and by moving it left, right, up, and down, you can see all parts of the video.
Weighing in at 1 trillion pixels, it’s the longest 360º video uploaded to YouTube to date. It took almost two months to complete. Below, I detail the complex process of its creation.
Why a two-hour VR cat video?
I remember stepping into an Oculus at Sundance 2015 and being in a room with a man. That’s how I remember it — not as a video, but as a room. When I moved my head, the man didn’t move — the Oculus created the illusion that he was in front of me. He smiled and I unconsciously mirrored his facial expression, just as I would in a real room. That’s when I became fascinated with what this technology could bring.
In the right environment, virtual reality can hit you with a power that non-immersive video can’t, evoking empathy and wonder.
Cell phones — right now, at least — are not that environment. The YouTube 360º player does bring you to another environment, but the lack of immersion makes the experience more like looking through a pane of glass than entering another world.
My other films are narratives which seek to understand the human experience — YouTube 360º isn’t quite ready for that. What it is ready for is an lulz-filled environment with something interesting happening in every corner, where people can watch for thirty seconds or two hours.
Set-up: 12 Go-Pros
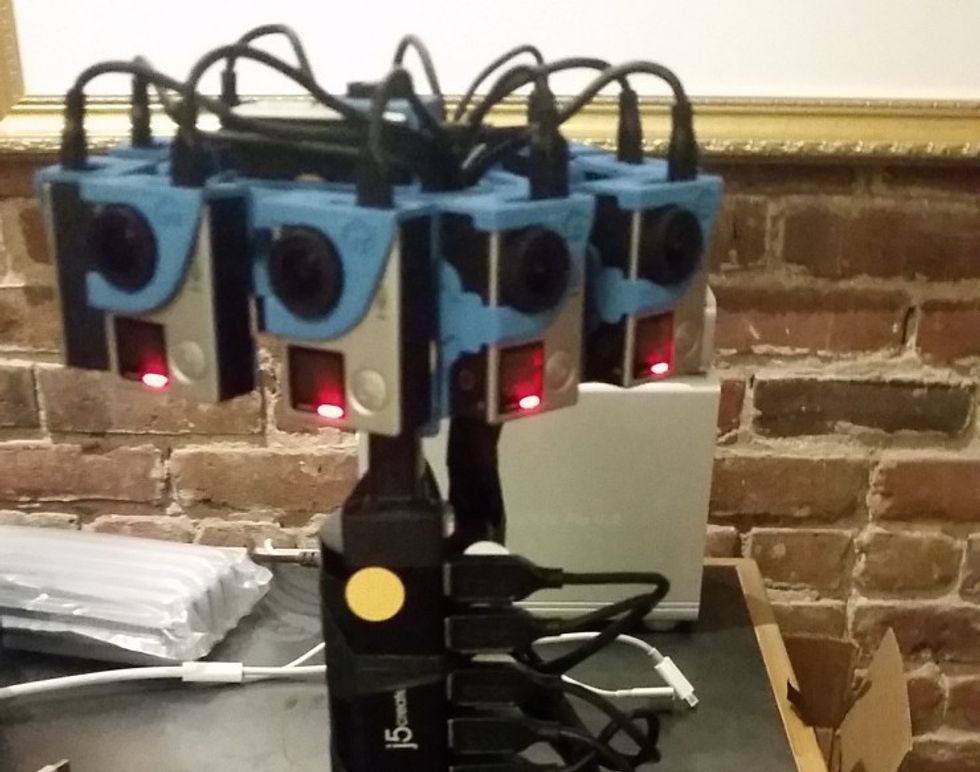
We filmed the video with 12 borrowed GoPros and a stereoscopic rig. The rig places cameras in a pentagonal pattern, with two on each side to record the left and right eye images, plus one facing up and one facing down. The 12 images get stitched into two panoramas, one for the left eye and one for the right.
We rigged up the cameras to draw power from two USB hubs (a GoPro lasts about 40 minutes without being plugged in). We called it the Medusa because it has cool hair and steals your soul:
 Credit: Michael Morgenstern
When stitching the images together, things get really glitchy if a subject comes too close to the camera, unless this is specifically planned for. As much as I wanted the curious cats to come up to the lenses and explore, we had to keep them back, so we put a 5' circular piece of sticky paper around the rig.
GoPros are tricky to work with. They’re single points of failure, have tiny buttons and tiny microSD cards, and don’t allow for a great degree of control. In a few months we’ll have more options, but for now they’re still the best available — unless you want to strap seven RED Epics to each other.
 Credit: Michael Morgenstern
Settings
60fps - important to get high temporal resolution, as discussed below
1440p - uses the full 4x3 sensor (on GoPros, shooting 16x9 crops the sensor’s image
ProTune - gives a flatter LOG image for greater latitude and color correction
We hid a light around the corner to balance the daylight coming out of the window. Then we pushed 12 tiny "on" buttons, 12 tiny "record" buttons, and the video began.
Filming
The participants, Forrest, Danger, Anna, Connor, Karen, and Aly, got a few instructions:
The video is about the cats. We are only props.
Try to get the cats to do interesting things.
Don't come too close to the camera.
There are no outtakes. We're not editing. Whatever happens will be in the video.
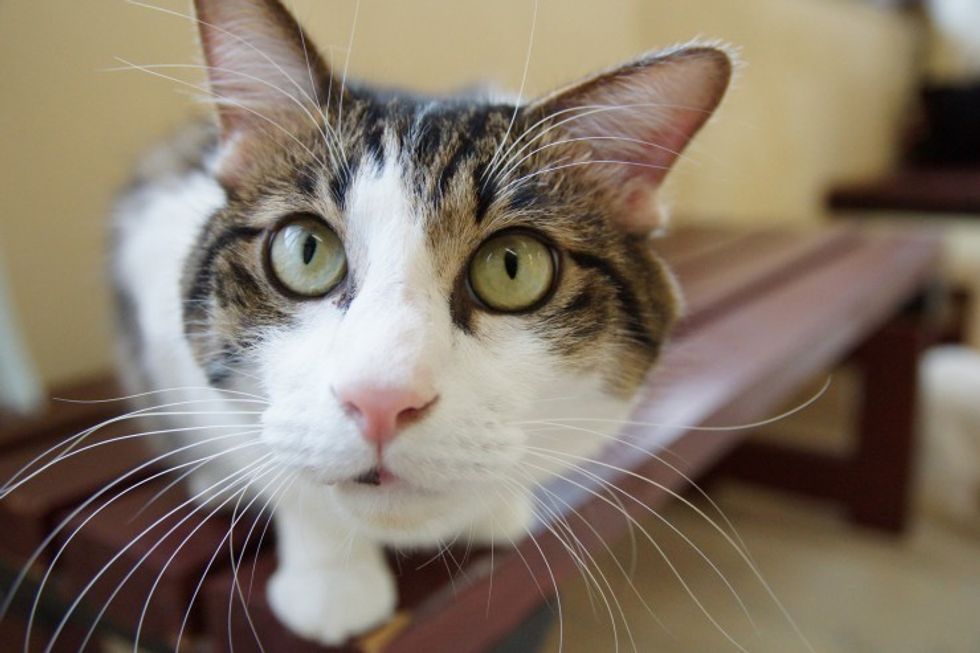
If you watch the beginning, you’ll see our initial confusion about where to put our bodies and how to move. It took a few minutes to feel comfortable in the space and learn how to engage the kitties without becoming the subjects of the video — some of us were better at this than others. After about 15 minutes, the cats were happily playing with us. By 45 minutes in, they were highly engaged in all the sweet toys we brought them.
The #Catquarium is intentionally banal. We used the extended length to play out a few super-long narratives and arcs, and hide a few cool things, but overall there’s not much going on. That’s how life is sometimes.
When the MicroSD cards were full, we pulled each out with tweezers and copied them twice to two separate hard drives. We had 768 GB of footage and were ready to begin.
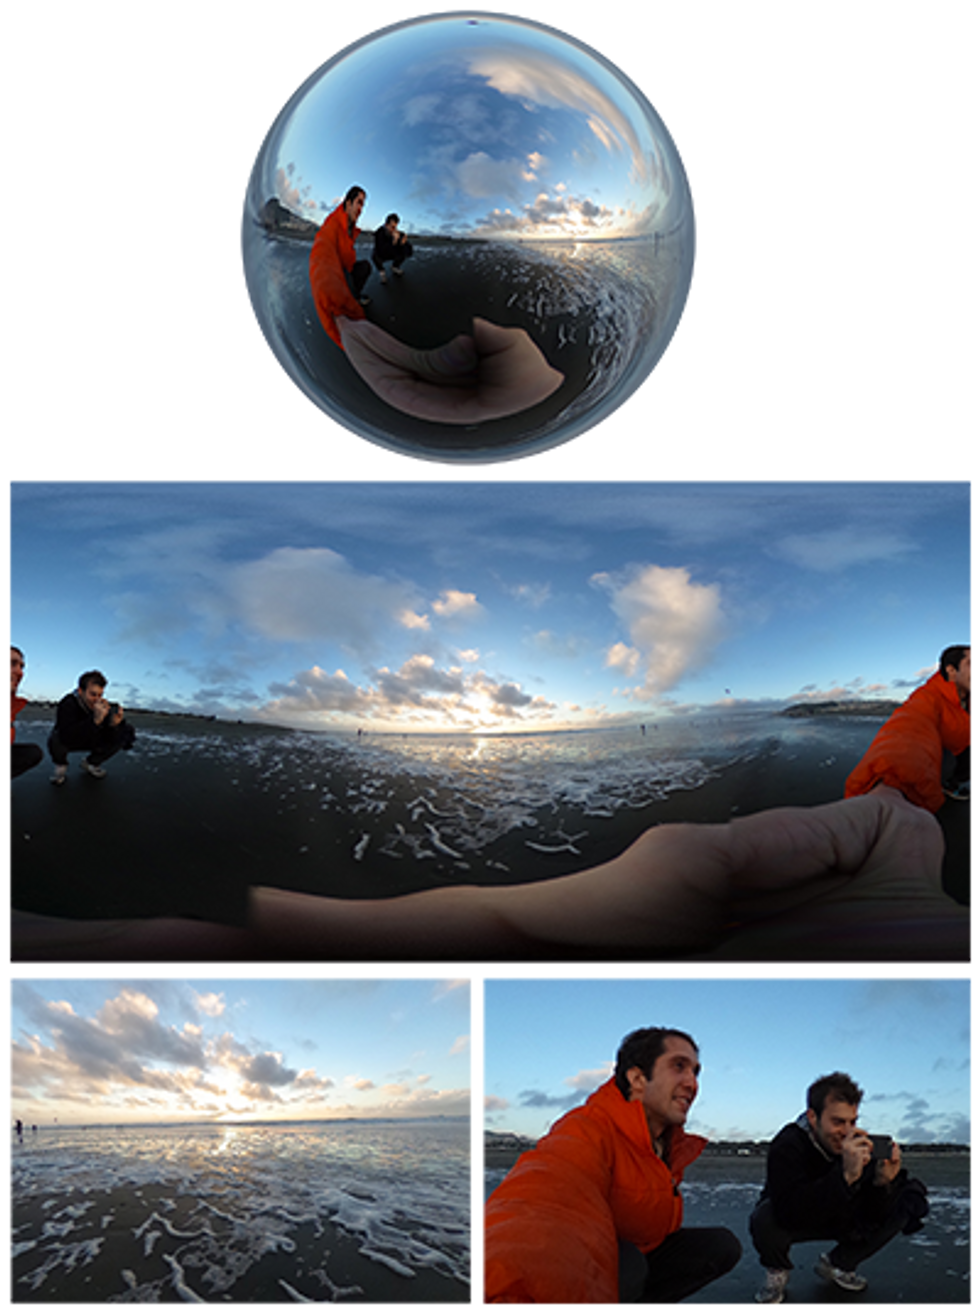
So wait, how does 360º video work?
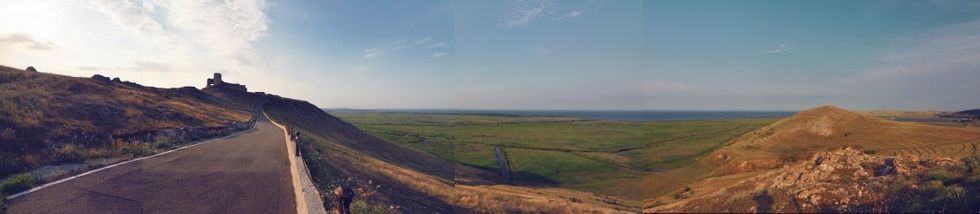
I’m glad you asked! During the stitching process, software matches corresponding in each image to each other, and stitches them into a spherical image. The image is mapped onto an equirectangular projection, which is quite similar to the Mercator projection. It represents a sphere by mapping it into a 2x1 rectangle, with the X-axis representing 360º of longitude and the Y-axis representing 180º of longitude. (Notice that the top row represents only a single pixel!)
 Credit: Michael Morgenstern
To create these stitched images, a video rig arranges cameras so there is enough overlap between images. Most 3D rigs have pairs of cameras, each separated by the average distance between human eyes. By stitching half the cameras into one panorama and the other half into another, a left and right panorama are created, which can be fed into each eye. 3D rigs create many more stitching errors, which I explain below in the parallax section.
There are a wide variety of GoPro rigs, and you can also build your own — we used the 360Heroes 12-camera stereoscopic rig. For mono video, you can get away with 4-5 cameras. There are also cameras which record 360º video all on their own, like the $350 Ricoh Theta S, which is smaller than a cell phone and creates low quality video quickly; it’s a lot of fun!
I’m excited for the Google Jump Cam, which will have all its lenses integrated and do the stitching for you (using computer vision to fix stitching errors), and the IllumLitro, a light-field camera which will capture information about light rays that will allow for far better stitching.
Stitch lines and parallax
You can see five stitch lines in our video, which sit between the border of each source image. They’re the vertical wormholes the cats walk in and out of. With today’s technology, these are mostly unavoidable because of parallax — the phenomenon where objects at different distances move at different rates as the camera moves— between the lenses.
To see how this works, close one eye and look at the world around you. Now move your head five inches to the right. Imagine that you had to stitch those two images together — it wouldn’t be too hard. Next, hold your finger two feet from your eye. Now move those same five inches: the finger lines up with the background in a different place than where it did before.
Any camera rig where the lenses aren’t in the exact same place will have parallax, therefore stitch lines. The farther apart the lenses are, the greater the parallax will be, which is why 3D rigs have worse stitch lines. The closer to the camera objects are the greater the parallax will be, which is why we had sticky tape to keep the cats away.
For professional videos, stitch lines can be painted over. A green screen can also be used to stitch the foreground and background separately. We had no budget and two hours of video, so I decided to embrace our glorious stitch lines.
For more nuts and bolts about VR tech and theory, I can’t recommend the Elevr blog enough — check out their entry on Stereo Polygons to start.
 Credit: Flickr Creative Commons
Let the stitching begin!
The first step to a good stitch is to line up the video properly. If you’re stitching frames from different moments in time, it’ll never look right.
To get a better sync, we recorded at 60 frames per second, synced, and then exported our source footage at 30fps. (60fps captures an image at around 1/120 of a second, 30fps at 1/60sec, so the higher frame-rate means our average timing error is halved.)
We clapped to sync all the cameras, but because GoPro doesn’t sync audio perfectly within its files, that didn’t work too well. We also shook the rig, but it was impossible to identify on which frame the shake began or ended. To get the sync perfect, I manually looked through each pair of videos for points when, for example, a paw touched the floor or an eye opened or shut, and lined up the footage on a timeline. Then I exported 11 ProRes source files. (I threw out the 12th camera, which was looking down and recorded only two hours of sticky paper.)
I used Kolor Autopano Video to perform the stitch. It quickly guessed how the videos fit together, a process which required only extremely minimal tweaking. I told it which cameras represented which eye, checked a few boxes, then just clicked “Render” and came back the next morning and....
Haha.
Hahahahahahaha.
If only. Yes, the set-up was easy, but stitching is slow. The process ended up taking 12 computer-weeks (3 weeks on 4 computers), and it took a lot of steps to simply manage that much data. Once I realized how long things were going to take, I borrowed two Mac Pros and two iMacs. I put a copy of all the source files onto each computer and set them to render different segments of the video.
I came into the office at least twice per day to check on the computers. It felt like watering plants. One was faster and was always done with its render assignment. One had a small disk, and I connected it by Ethernet to the one with a large disk, moving frames off the computer in the nick of time before it ran out of space. Sometimes I came in and it had run out completely, like a helpless puppy who had peed on the floor while I was out.
Each segment was rendered as a sequence of .png files, so if the computer crashed or we lost power I wouldn’t lose work. (Never do a multi-day export to a single video file; it’s asking for trouble.) When the computers started to run out of space, I converted the image sequences into ProRes files, which were about half the size.
At last, we were ready to output the video. I lined up all the little pieces that had been created, added music and a few goodies and exported it out to a timeline, which took 60 hours to output.
Exporting
I wanted to export in the maximum resolution possible, and settled on 5870x5870 pixels (two 5870x2935 panoramas stacked on top of each other). On the one hand, this seems like a huge file size. It’s 3.8x more pixels than a movie theater-size 4k image, or 15x more pixels than a 2k image. But consider that this 5870px represents 360º of horizontal field of view. The YouTube player displays 100º at a time, or less than 1/3 of the image.
To get a full HD image at this narrow field of view, you want about 6,000 pixels on a side. YouTube encourages you to upload videos in the absolute highest quality you have them — you want your videos to look good on tomorrow’s technology as well as today’s.
 Credit: Flickr Creative Commons
#Catquarium by the numbers
(Keep in mind: a TB is 1,000 gigabytes)
- 0.7 TB: Source material, 2hr15min of source footage at 60fps, 1920x1440px, h.264 encoded
- 1.2 TB: Source material, 30fps, ProRes encoded
- 3.8 TB: Stitched PNG stills, 5870x5870px
- 1.9 TB: Stitched ProRes video
- 0.2 TB: Multiple versions of final video
In total, the video represented over 7.8 terabytes. That’s bigger than the size of the entire Library of Congress. Cats take up a lot of pixels!
Bitrate breakdown
YouTube and Facebook both accept 360º 3D videos. You have to use the 360º Metadata app to add a bit of data at the beginning of the file which indicates that it’s 360º. You can’t do this after the upload.
The 5870x5870 video was 7.4 trillion pixels and took up 85GB (YouTube’s size limit is 128GB.) My friend Todd has fiber internet, and I went to his place to upload it on a Saturday morning, in a blazing 35 minutes.
I’d thought the whole post process was going to take two weeks max. Now I know better. Waiting for the 35GB video to stall was a mistake. By the time I realized it wasn’t going to get through it was already Wednesday. I hurriedly encoded a 4096x4096 16GB version to upload — it was going to take over 30 hours and I didn’t know whether it was going to work. As a total emergency I also uploaded a tiny 2048x2048 2GB version that I’d made a week ago to demonstrate the video to some people.
Monday night came and and the 4k video was stuck in a low-resolution chrysalis, while the 2k one had blossomed into a fully functional 360º butterfly. It was time to let go of my ravenous desire for pixels: 1 trillion would have to be enough. It was time to let the cats fly.
Every filmmaker knows the gratification of seeing a project finally hit the light of day, and I’m thrilled to finally have this one out in the open. So much modern technology is push-button simple, and it felt great to work with something that had tremendous complexity to it.
Lessons learned
For future 360º work, I plan to do several things differently:
Shoot mono. 3D is cool, but it means more parallax and worse stitch errors. If it’s not strictly necessary, I won’t do it.
Use custom built computers with plenty of disk space and powerful GPUs.
Use professional cameras. GoPros are fun and small and easy to get, but they’re also potential points of failure and not as reliable as more pro cameras.
Budget for visual effects to correct errors. I’m hoping that future software will do this better.