In the first article of this series, we went over several practical effects concepts you can use to create creatures. This time, we're taking the gloves off and getting into the nitty gritty of gore.
Horror films have upheld the tradition of special effects since their inception. And in film history, there is a very special place for low-budget gore. As long as there are B-horror movies, there will be gore makeup. However, this isn’t just B-movie territory. Some of the greatest Hollywood movies of all time have used these techniques, and now you can too. When it comes to great gore, more often than not, practice and skill are the limiting factors—not money.
A great low-budget trick is using beige stockings to make organs.
Below, we’ll explore some gore techniques that look horrifying, even on a tight budget.
 Liquid blood used to frightening effect in “The Shining.”Credit: Warner Bros.
Blood
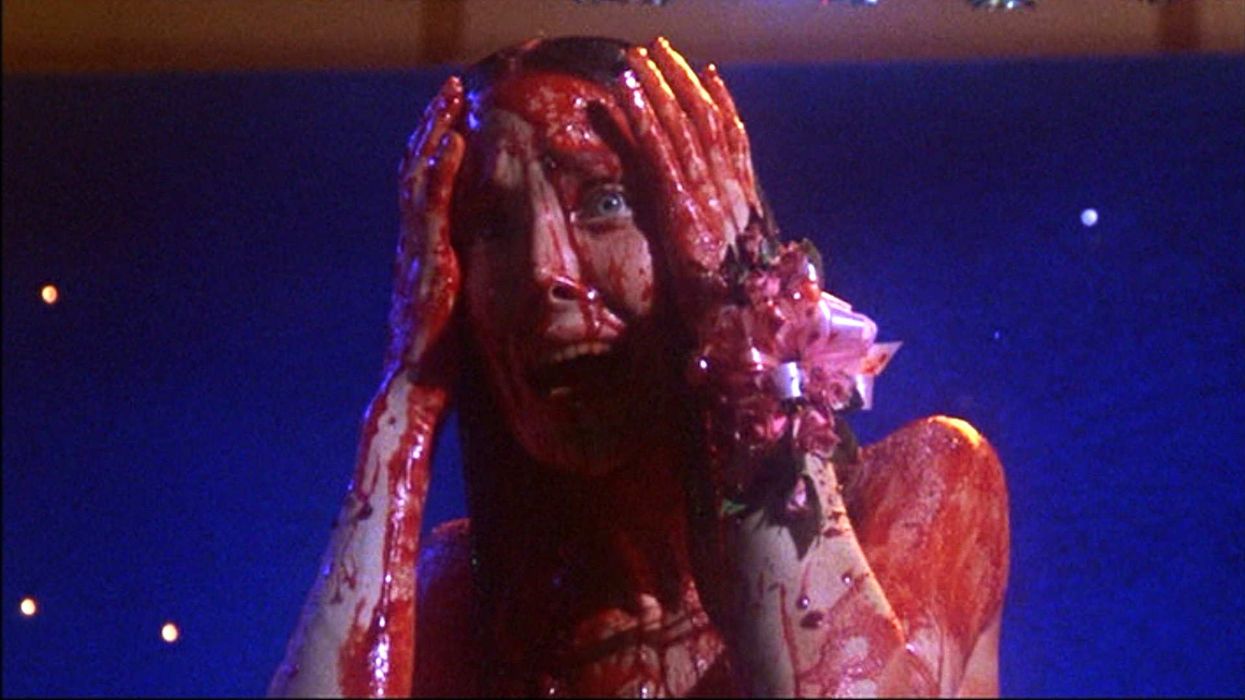
A truly bloody shot can pack a serious punch in your scene. Think of how people responded to the memorable scene pictured above in The Shining, or when Carrie was doused at prom. Though renting out The Overlook Hotel may not be in the cards, it actually doesn't cost much to bring your horror sequence to the next level.
If you want a lot of blood...
There are many different recipes for blood, and each has a special use. This is a great recipe for large amounts of liquid blood:
- For the base, use a light corn syrup paired with powdered dye. You can get this dye at cake stores or online. (It’s preferable to liquid food dye for its vibrant color.)
- When you have around the amount you need, whisk in cornstarch. Be sure to mix thoroughly.
- Slowly add water until you’ve reached the right consistency.
- You can also play with adding chocolate syrup or cocoa powder to add some depth to your color.
If you want a little blood...
For a more discreet blood effect—best for wounds—try a mixture of paint and synthetic blood. Sy Fy’s Face Off contestant and effects artist Frank Ippolito walks us through his techniques for wound painting in this article.
You will almost always be painting a prosthetic, so the textures you've built will guide you. It’s important to remember that wounds have many dimensions. Blood has hues of brown and yellow; it’s not just cherry red. Play around with layering various tones and textures in your paint. Ultimately, as Ippolito says in his tutorial, getting this right will come down to practice.
 Behind the Scenes of “An American Werewolf in London”Credit: Courtesy of Universal
Fortunately, practice is cheap. Do it enough, and you might get as good as renowned effects artist Rick Baker, whose prosthetic wounds in An American Werewolf in London had a deep emotional impact on actor Griffin Dunne. Dunne says, "It was quite an unsettling experience. I became profoundly depressed, because you got a very strong sense of what you would look like if you were dead." He wasn't the only one disturbed by that makeup.
To get started, you'll need to build your kit. Alcone Company offers a wide array of synthetic blood, "bruise wheels," and other FX supplies. They tend to be cheaper than what you can find at Halloween stores. Remember, if you’re planning a zombie scene—or anything that involves ingestion—make sure to check whether the blood you choose is edible.
Some favorite (cheap) brands: Mehron Stage Blood, My Blood, and Fleet Street Bloodworks.
If you want to see it in action…
Here are a few easy-to-execute techniques for showing your blood onscreen. One easy way to spatter blood is with a spray bottle. Just fill a standard spray bottle with your chosen recipe and go to town. This is especially effective in shots where an injury happens off-screen, like a reverse shot of a stabbing or explosion. Use your spray bottle in sync with the action, and watch as your actor is misted with red corn syrup. You can use this method for set decorating as well—just adjust the pressure of the spray for a little control over your spatter.
For more of a spurt effect, try a sprayer. Home Depot and other garden stores sell empty gallon sprayers at cheap prices. They can be a little cumbersome, but certainly get the job done out of frame (or snaked through an actor’s costume).
 Angelina Jolie wore prosthetic cheekbones and ears in “Maleficent.”Credit: Courtesy of Disney
Prosthetics
Once you've learned the founding principles of molding, it can be tempting to go all out. And sometimes that yields great success. In our previous article, we mentioned the Severed Spider Head in The Thing—a sequence that, in addition to puppets, used copious amounts of prosthetics and gore makeup. Though scenes like that will always get a rise out of your audience, gore techniques can also be used in discreet ways to heighten your film's reality. For example, subtle makeup was used to stunning effect in Maleficent to mold Angelina Jolie's cheekbones and ears.
For 127 Hours, a film grounded firmly (and disturbingly) in realism, director Danny Boyle brought in Tony Gardner to execute the effects. There were three prosthetics used in all, with complicated veins and musculature designed to show off all angles and stages of the character's self-amputation. Though many complex pieces were used to pull off such a realistic effect, learning the basics is not too difficult.
To build a human body part, it’s best to make a cast from an actual human. This is called "life-casting." For practice, try this on a (patient) friend’s hand. There are several ways to build life casts, and the materials come at different price points. Most molds are built out of silicone with a plaster support shell. Be sure to find a breathable, lightweight, and skin-safe silicone for your mold. After the mold sets, add paint to make the cast look realistic (and pay attention to small details, like moles and freckles, if you're matching to an actor).
Smooth On is an excellent resource for both supplies and tutorials for pretty much anything build-related. Watch the video below for an example of the life casting process:
Another great low-budget trick is using beige stockings to make organs. Fill the stockings with any kind of stuffing (this will vary depending on what kind of look you’re going for), tie at the ends, and coat two or three times with liquid latex. Then paint! You can stretch and shape the stockings to the general look you want. If you’re going for a more specific or rounded organ, try cutting off a smaller length of stocking. This trick works best at a distance. For close up shots, you’ll need to add some silicone-molded details.
For small skin prosthetics, America’s favorite cereal could be your savior. Crushed Corn Flakes, cotton, and liquid latex make a great textured combination for emulating different injuries, such as burns or road rash. Apply the latex to the skin and layer in bits of cotton. Use a toothpick (or other tool) to shape the cotton. Now apply the Corn Flakes for texture. Coat it all in latex again, let it set, and paint! You'll have yourself a great and gory injury for about $15.
Working with prosthetics can be easy, but making them look good takes years of honing your talent. You can learn some finessing techniques in this article, where Rick Baker offers some crucial tips to get you started on your path to special effects mastery. But as with any department in the film industry, apprenticeship is a large part of learning the trade. So while these tips can kick off your career, consider finding a special effects professional to mentor you.
Tune in for the final post in this series, where we’ll be discussing Action.
Featured image is from "Carrie"