{Editor's Note: No Film School asked John Byron Hanby, IV to walk us through the technical process of "painting" his music video with UV fluorescents.}
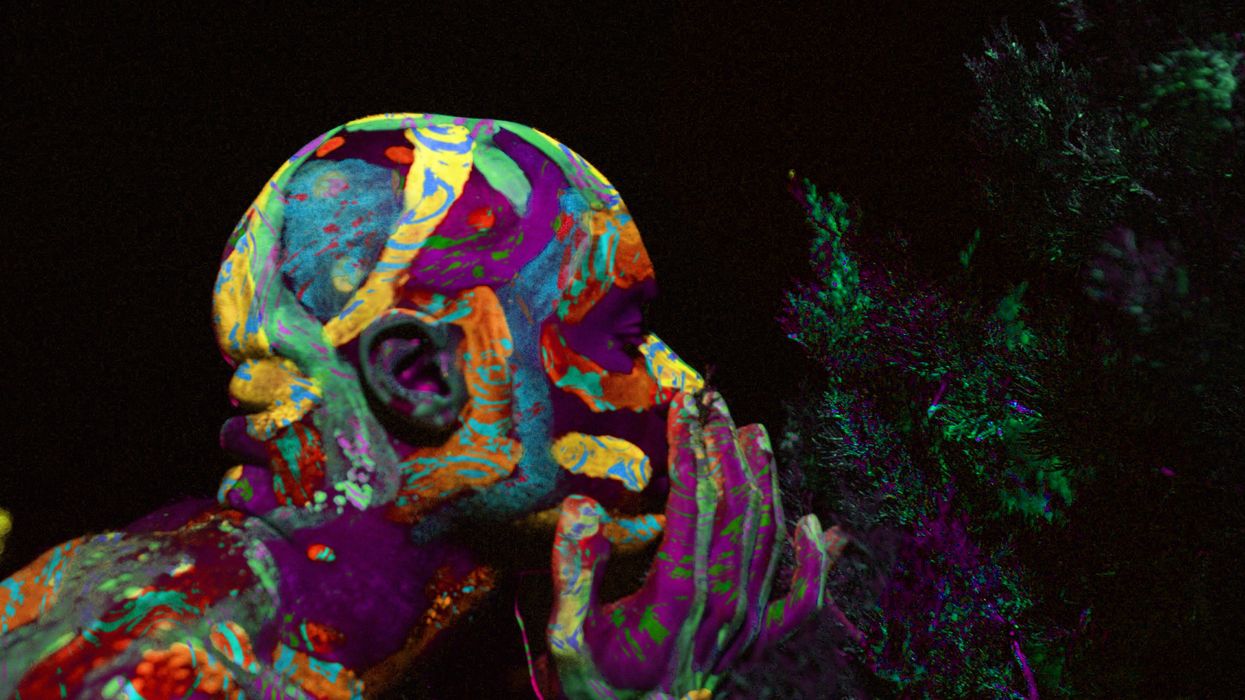
Last year, I decided to paint a real-life forest with UV fluorescent paints for a music video Fractal Visuals was making for Noveller. I wanted to create something beautiful and otherworldly that would perfectly capture the feelings created by Noveller’s song “Glacial Wave.”
The idea originated a few months before we began production; the process to get it from a concept to a practical application involved lots of testing, much trial and error, and some rather unique solutions.
The first step in the process was to break the concept down into multiple manageable chunks. In this case, the main chunks were:
1. Paint: Source the right kind of paint for the trees
2. Application: Create a delivery system to get the paint onto the trees
3. Lights: Find lights that would output enough UV to make the fluorescence show up on camera
Here's how we did it.
1. Paint
I have had some experience with UV fluorescent paints in the past. However, the volume I required for the project far exceeded any kind of realistic budget: just six 2 oz bottles cost an excess of $30. I needed to go wholesale. After hours of online searching and calling, I found a wonderful company called Glow! Inc., where an employee named Connie was kind enough to give me some info on the types of products they offered and which would be best suited for my needs. In the end, I found that a raw UV fluorescent pigment Glow! Inc. sold was perfect for my needs and could be purchased in bulk. I ordered a sample to do some testing.
I was surprised by how potent the pigments were; they far exceeded the concentration of anything that was commercially available by a factor of at least 10. It was just what I needed for the project. There was only one problem: it wasn't water-soluble. I needed to figure out a way to turn the powder into a liquid.
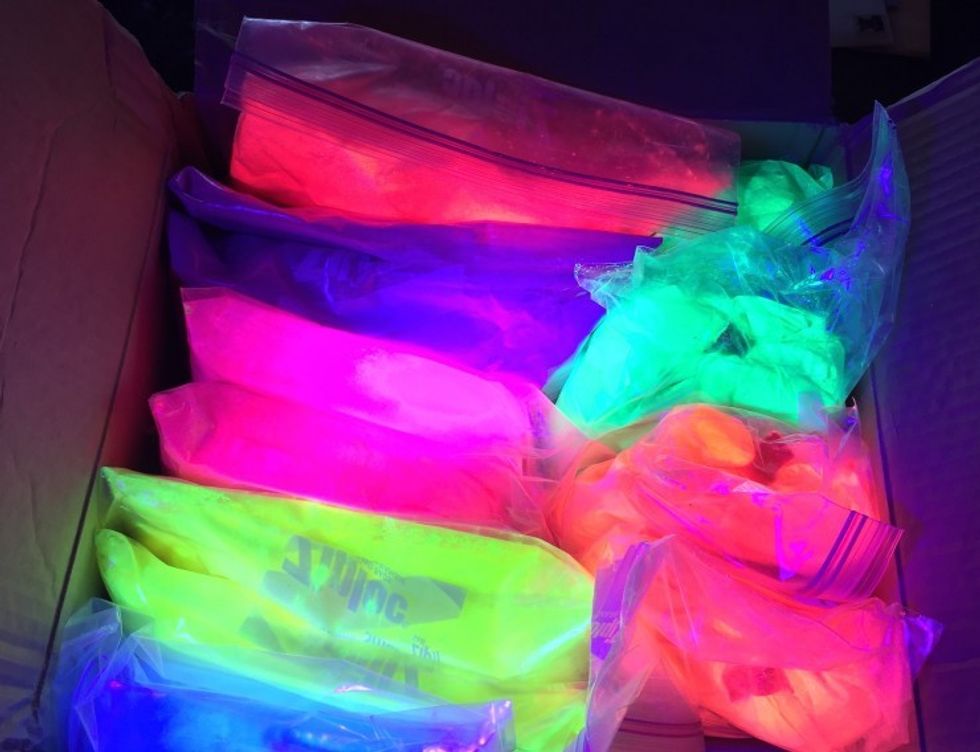 UV paintsCredit: John Byron Hanby, IV
The key turned out to be in the MSDS (Manufacturer Safety Data Sheet). I discovered the pigment used a finely powdered melamine plastic as a base, which explained why it didn't mix with water. After some careful research, I tested a few alternatives. My biggest concern at this point was being conscious of the environment. I didn’t want to kill trees as we were painting them for our video, so I needed to use a solution that would not cause lasting damage.
91% Isopropyl Alcohol was the winner. It was relatively inexpensive, would evaporate quickly (no lasting effects on the trees!) and was able to keep the pigments in solution (with a little agitation every 30 seconds). At this point, I knew that we were almost at the finish line for this first step of the project. The last step was to turn the concentrated liquid solution into something that could be distributed via water through a garden hose.
Mixing the alcohol and pigment solution directly with water caused issues with clumping. I played with a few options as an additive to combine the alcohol and water together and found that ivory soap worked as a bridge between the two substances. With the experimentation complete, I had a recipe for UV paint:
- 16 oz (volume) of Fluorescent pigment
- 32 oz (volume) 91% Isopropyl Alcohol
- 2 oz ish (volume) Ivory Dish Soap (or just a really big squirt)
- Add desired amount of water to taste
A few days later, I had more UV fluorescent pigments in my possession than I could have ever imagined (16 lbs worth, in fact).
 Credit: John Byron Hanby, IV
2. Application
The next step was to create a distribution system. I experimented with several different systems to get the paint onto the surroundings: liquid fertilizer attachments, garden hoses, and even repurposed fire extinguishers pressurized with the liquid. The garden hose worked well for spraying the trees. Looking back, however, a power washer would have also worked nicely.
In some cases, we needed a higher concentration of pigment than what the hose could provide, so we opted to take a concentrated batch of paint and manually throw it on the trees. This was especially satisfying.
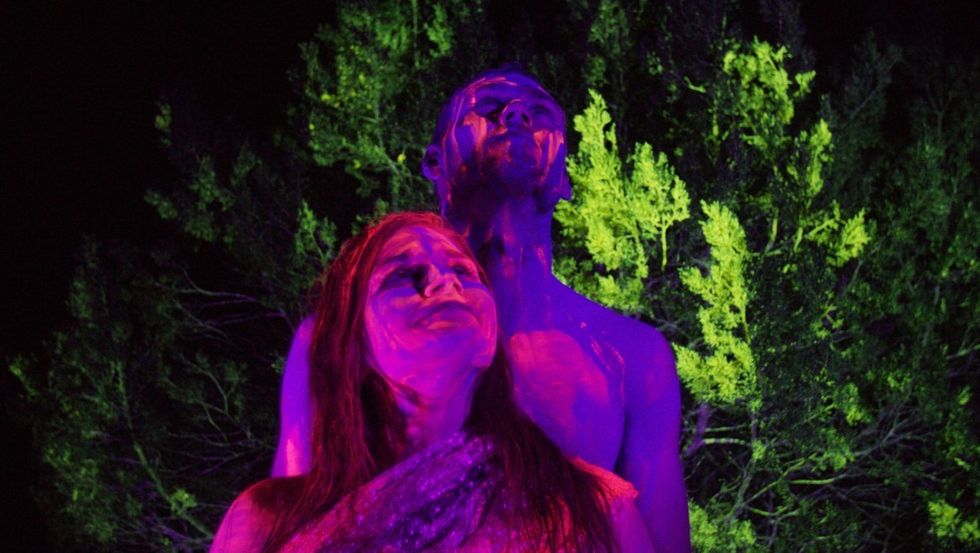
In addition to painting the forest, I wanted to create a primordial soup setting. This meant I needed to test how much pigment would be necessary to color a large body of water. It turns out only a surprisingly little amount was needed, which was great news, since it reduced environmental impact. (For those who care, we used a location that was free of life and took necessary cleanup measures once we were finished.)
For the river scene, I found that using fire extinguishers was the most portable way to efficiently deliver the paint at rapid volume. More details on how this was accomplished will be found in another article, as it would fall under the DO NOT TRY THIS AT HOME category.
 Credit: John Byron Hanby, IV
3. Lights
With both the paint and application figured out, the last step was the most important: to make it camera-ready. Working out how much light was needed to make this work was an even bigger challenge than the paints. I had attempted to make a project using UV paints once before, and it ultimately resulted in a less than desirable final product because there was not enough light for the fluorescence to show up well on camera. This project’s failure ended up being a huge benefit for the forest project because I already knew the key component for success was volume of light.
I already knew the key component for success was volume of light.
Unfortunately, knowing what I needed to make it work only got me about 10% of the way there. The next challenge was that not a single retailer sold super-bright UV LEDS. When I say super-bright, I don't mean the 100-watt incandescent equivalent. I mean 1,000 watts.
Luckily, eBay had what I needed. 100 Watt UV LED Chips are manufactured to be used in large fish tanks and aquariums to sanitize the water. I decided to get six of them. A week later, my LEDs arrived.
 Lighting rigCredit: John Byron Hanby, IV
Disclaimer: You must wear UV eye protection while working with these LEDS, as they will blind you and cause severe headaches. Also, make sure you are experienced working with electricity. Use extreme caution.
Over that week, I did a bunch of research about how to use the LED chips most efficiently. The most important part of making them usable: they put off 100 watts of heat, so if the chips get too hot, they stop working.
I decided to use CPU heatsinks to easily dissipate the heat. To connect the LEDs to the heatsink, I used a thermal plaster compound. DO NOT USE CPU THERMAL COMPOUND. CPU thermal paste contains silver, which is conductive. Because the LEDs are sensitive to electricity and needed to be secured permanently, I chose a non-conductive permanent epoxy compound.
 LEDSCredit: John Byron Hanby, IV
With the chips attached to the heatsink, the final step was to get it powered. I sourced a 36v 100-watt LED power supply that is used for these kinds of LED chips.
 Credit: John Byron Hanby, IV
At this point, I was so frustrated from accidentally flashing myself with the ultra-bright lights that I knew I needed to add a double safety to each beyond the wall plug. I added some light switches, stuck the whole assembly into paint cans (thin metal allowed for protection and good heat transfer), and put two into halogen flashlights for more concentrated beams. And boom, the lights were done.
 On setCredit: John Byron Hanby, IV
The Shoot
A few days later, my crew and I ran a 23.5-hour day. Daylight was spent getting the location set up and making sure the entire path to our location through the forest was safe. When the night came we began to paint the trees, and then proceeded to film until 6:30 AM.
Brent J. Reed, Megan Mitchell, Michael Castoro, Taylor Vasquez and others were incredible to work with, and their dedication to the project was fantastic. For Brent and Megan, this included getting into a 40-degree pool of water. As a result of their work, the film looks phenomenal.
Here's the bottom line: If you have an amazing idea that seems too far out there, do it anyway! Regardless of whether it fails or succeeds, it will make you a better filmmaker. Now, go paint a forest!
Video Credits:
John Byron Hanby, IV, Director
Michael Castoro, Director of Photography
Noveller - Glacial Wave
For more of John Byron Hanby, IV’s work, visit his website.
To hear more of Noveller's music, check out her website.