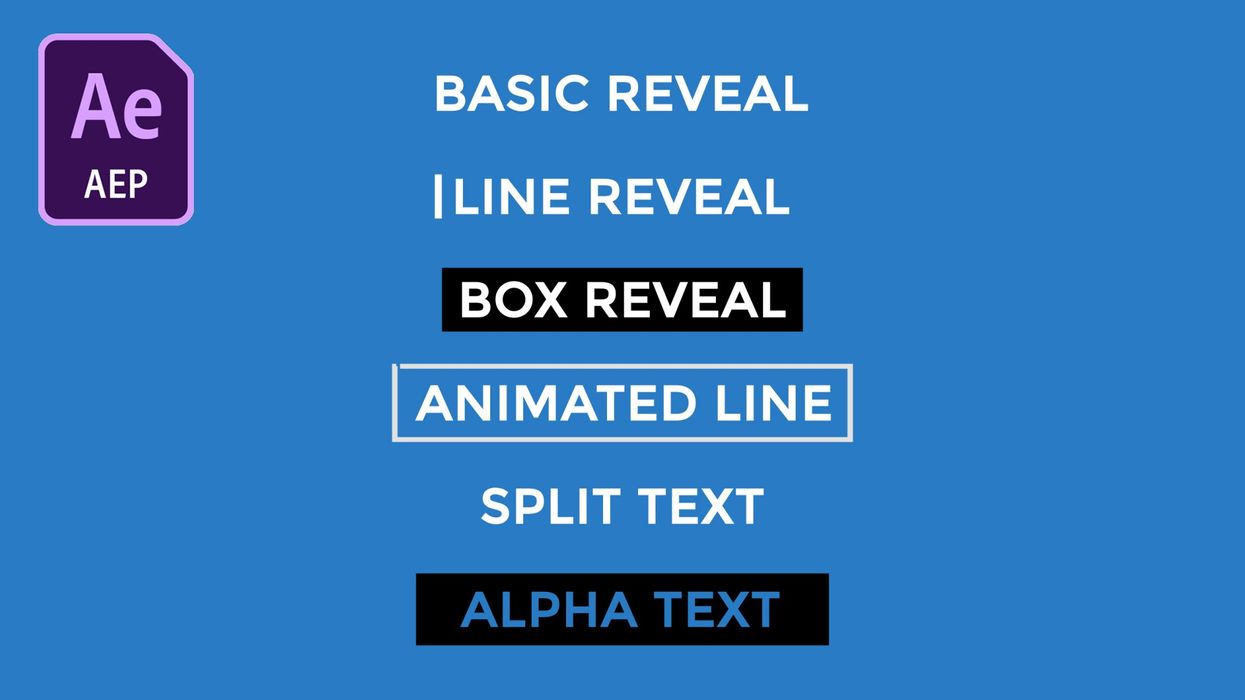
In this tutorial, I will go over the tools and tricks that go into creating some of the more popular lower third designs. In particular, I’m going to show you six different techniques (some basic and some more advanced) which you can use to create your own lower third graphic. Use each of these techniques individually or combine them to create a more complex design. Let’s take a closer look.
*Download the After Effects project file here.
#1 - Basic Reveal

If you want to get good at creating lower thirds, you’ll need to learn how to use Track Mattes. For example, to create a basic reveal animation, I can utilize a simple shape layer as a track matte.
First, I’ll use the Rectangle Shape tool to create a rectangle just below the text in the composition panel. To keep things organized, I’ll go to the Timeline and rename my shape layer “Text Matte.” Next, I’ll place the Text Matte layer just above the text in the timeline. Now I can change the Track Matte (TrkMat) column of my text layer to Alpha Inverted Matte “Text Matte”. This will make the shape layer transparent in the composition panel while giving its alpha information to the text layer.
Now it’s as simple as animating the text to reveal from behind the invisible shape layer.
#2 - Line Reveal


A popular look for modern lower third graphics is the line reveal, where the text is revealed from behind a line. Working with the same text matte reveal technique, this method is as easy as attaching a line shape to the text matte layer.
To do this, I’ll use the same rectangle tool to create a small vertical line, roughly the same height as my text. Next, I’ll center and right align my line to the edge of the text matte, parenting the text matte to the line via the text matte’s Parent pick whip. Once again, now it’s as simple as animating my line to reveal the text.
#3 - Box Reveal


Boxes and rectangle shapes are popular background elements when creating lower third graphics. As you saw earlier, you can use shape layers to create Track Mattes that will help reveal text. They are also very popular background elements for lower thirds. In this example, we will use a rectangle to not only reveal the text but also serve as a background element.
First, I’ll create a rectangle shape directly behind my text layer. I want this particular lower third to animate on screen from left-toright. To do this, I’ll use the Pan Behind tool to move the rectangle’s anchor point to the left edge of the shape. Hold the Cmd (Ctrl) key to enable snapping. Next, I’ll unlink the Scale attribute and keyframe the X value to bring the animation to life.
To have the rectangle reveal the text as it animates on screen, I need to create a track matte. To do this, I’ll duplicate the animated rectangle and place it just above the text layer on the timeline. Next, I’ll change the Track Matte (TrkMat) column of my text layer to Alpha Matte. My rectangle is now animating on the screen behind the text while revealing it at the same time.
#4 - Animated Line


While this particular graphic is probably the most complex lower third on the list to create, it’s also one of the most popular. Once you learn the technique, you can apply it to countless other iterations.
All this design requires is a text element, one simple shape layer with a path operation, and a few keyframes. First, I’ll add a rectangle behind my text using the shape tool. To create the line from the shape, I’ll set the Fill option to None and bring the Stroke width to ten pixels. Now I can add the animator to bring my line to life.
The animator or Path Operation that I’ll use is called Trim Paths. I’ll add Trim Paths via the Add menu in the shape layer. Once on my layer, I can keyframe the End and Offset attributes of the Trim Paths operation to make the line animate on-and-off screen. This can take a bit of practice to get the animation exactly the way you want it.
#5 - Split Text


This is a popular look that is very easy to create but is still extremely customizable. It consists of two basic text layers and two track mattes.
For the first step, I’ll duplicate my text. Again, I’m a fan of organization, so I’ll rename my text LEFT and RIGHT. Now I’ll add a rectangle shape across half of the screen, and then duplicate the layer. These two layers will act as track mattes, so I’ll move each one of a corresponding text layer on the timeline. Now I’ll change the Track Matte of each text layer. To make sure the text splits properly, set the top text layer’s track matte to Alpha Matte, and the bottom text layer to Alpha Inverted Matte.
Now when I animate the X position of each text layer, the text will split at the edge of the track matte.
#6 - Alpha Text


This look is one of the most simple to create, even more so than the basic reveal, as this design doesn’t require any animation. All you need is your text layer and a simple shape background. Place your shape layer above the text in the timeline and then, you guessed it, change the Track Matte (TrkMat) column of the text layer to Alpha Inverted Matte.
Now the text will be transparent and the edges revealed by the shape layer. This is a very interesting look, and you can actually swap the shape out for a video clip if you so desire.
What’s your favorite lower third look? What did I leave off the list? Let me know in the comment section. Also, you can download the After Effects project file I used in this tutorial here. It includes all six of the lower thirds I created, so feel free to take a closer look at what I did and even use these graphics on your own projects.
And remember, while you can create some interesting designs with the individual techniques above, the real versatility comes with using them in unison.


