The Jurassic Park & World movies have always been huge spectacles: giant dinosaurs smashing everything in their path, fight sequences that crash through multiple sets, and volcano eruptions that destroy entire islands.
The first movies are renowned for their blending of practical effects and cutting-edge computer animation. And these days, CGI (and enormous budgets) make anything you can imagine very achievable. But a recent project of mine presented an interesting challenge: could we remake scenes from a giant, high budget, CGI-heavy movie on a small, inexpensive, and fully practical scale?
Mattel, the current makers of the Jurassic World action figure toy line, and Universal wanted to remake iconic movie scenes from Jurassic World: Fallen Kingdom using action figures. The idea was to bring to life the creativity and imagination of kids playing with these action figures (kids who, apparently, had amazing production designers as parents…)
Shooting miniatures brings a specific set of challenges, even when you use every filmmaking trick you can. But we wanted no green screens, no stop motion, and no visual effects (though we did use a rain overlay for one part of a scene). Action figures would be puppeted by hand, sticks, or string. Volcano explosions would be cotton balls glued to cardboard. And dinosaurs would roar and attack using the built-in toy functions.
It looked to be a challenging project, but I knew it’d be a fun one. So, alongside producer Grant Willsea, DP Nate Cornett (https://cornettdp.com), production designer Evi Elias (https://eviellias.com), and a severely talented crew, we dove in to make it happen.
Here’s how we did it.
Filming
Nate and I chose the Sony FS7 and Sony A7S cameras for this project. It was important to have cameras with a cinematic look, 4K capture, and a high degree of flexibility. We knew we were delivering in 1080p, and we made good use of some subtle reframing of the 4K footage.
Nate: "One advantage of the FS7 is it's high native ISO, which let us shoot at a deeper stop with less light. We tried to stay around an F/11 or higher to keep some depth of field in our close up shots."
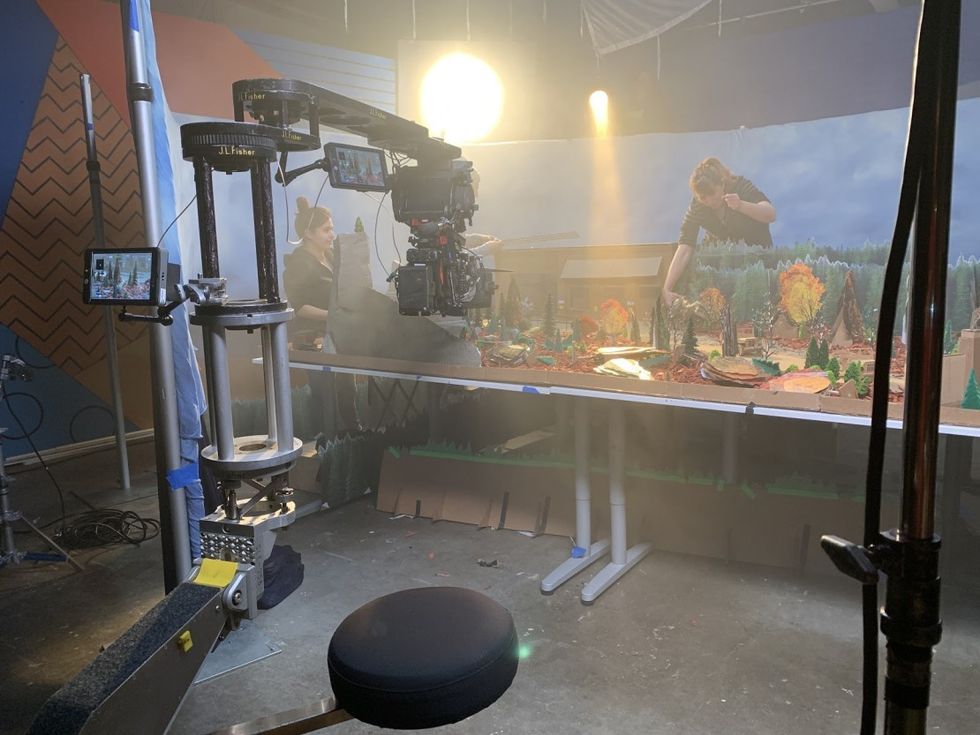
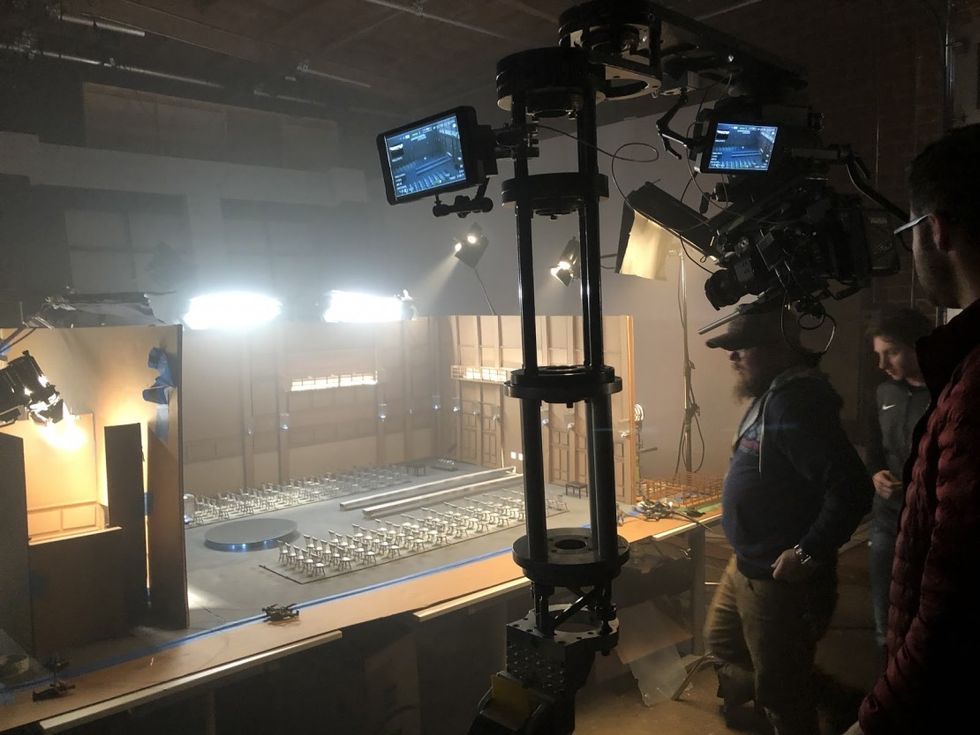
We mounted the camera to a Fisher 11 dolly so we could arm in over set walls, get into tight spaces, and still make dynamic dolly and jib moves.
For smaller interior scenes, we used the A7S with Teradek wireless monitoring, wireless follow focus and smaller prime lenses. Shooting these action figures was a game of centimeters; the tiniest bump from anyone’s hands could throw off a shot, set, or blocking entirely.
We mounted the camera to a Fisher 11 dolly so we could arm in over set walls, get into tight spaces, and still make dynamic dolly and jib moves.
For the larger sets, where we weren’t constrained by tight spaces, we used the larger FS7, and a couple different PL zooms. The zooms we used had a very close minimum focus, which allowed us to get nice and close when needed (and when those lenses couldn’t get close enough, Nate pulled out the +2 diopter). We also had a combination of wide tilt-shift lenses, and macro lenses in our kit to achieve specific shots.
With a working F-stop of F/11 at ISO 2000, we were able to get less depth of field. Shooting at a wider aperture, of course, would throw everything in the background into a mushy blur, and we’d lose depth, details, and the toys would be out of focus even if they were ¼” off. For a couple of shots, we blasted the toys with lights and stopped down as far as F/22 to get the desired shot and maintain focus.
So, having the set lit up, nice and bright let us close down and control the focus. It also helped give our 1st AC, Allen De Leon, a little wiggle room for focus marks when doing the most epic of four-inch dolly moves.
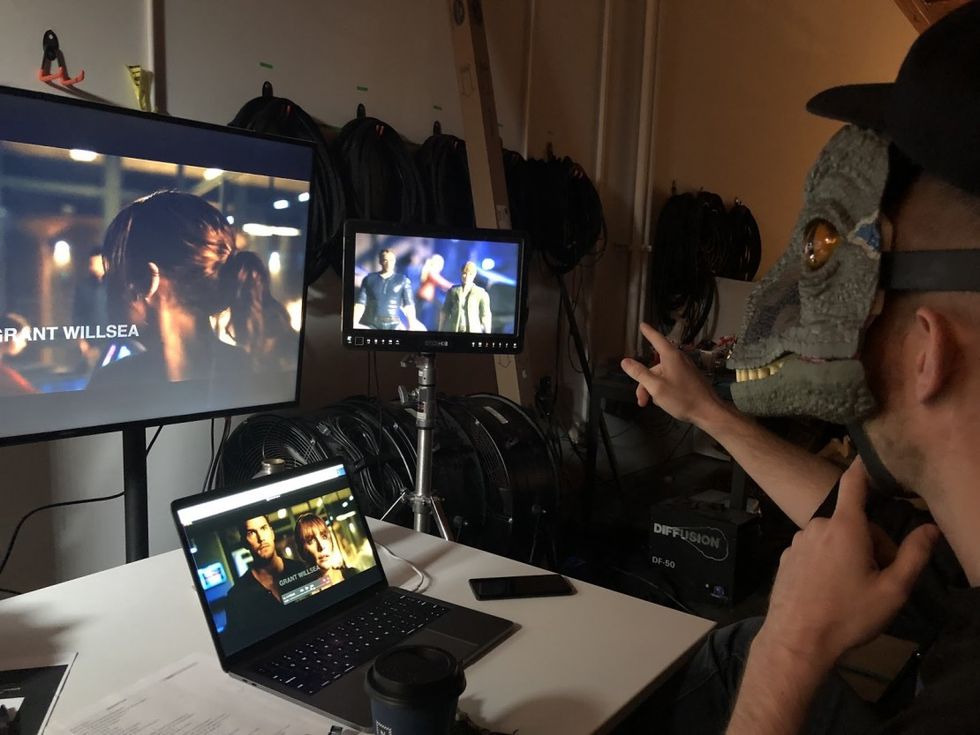
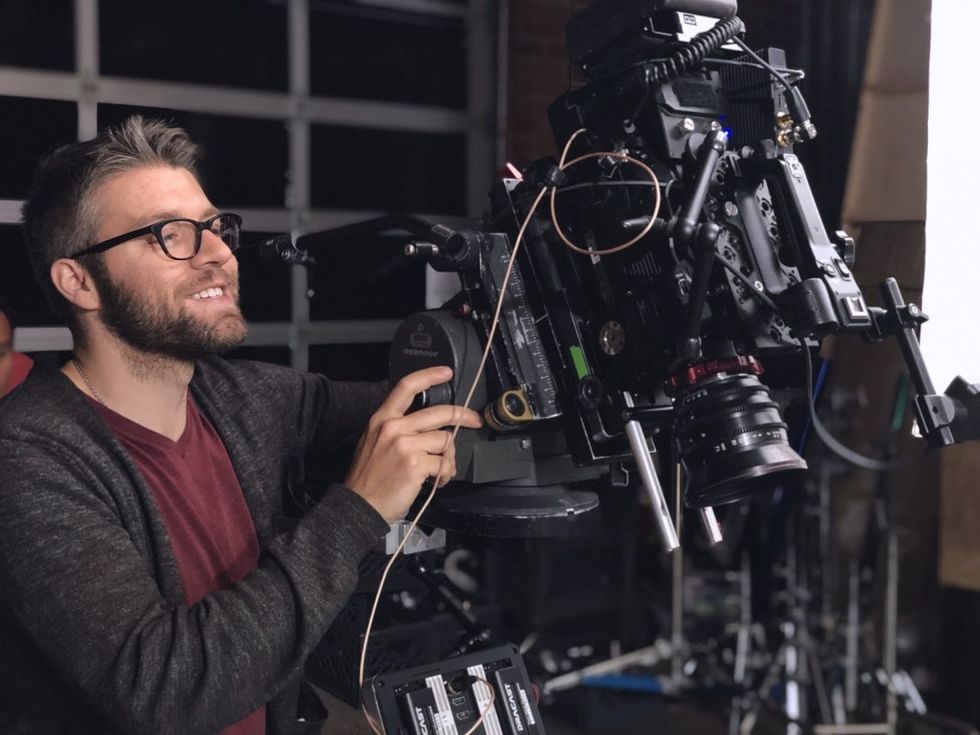 DP Nate Cornett on set.
Camera Gear List
Sony FS7
Sony A7S
Red 18-50mm PL Zoom
Canon 50mm Macro
Canon 100mm Macro
LAOWA LW-FX 15mm F4.0 Wide macro
TERADEK Bolt 500 3G-SDI/HDMI
It was important that we were able to craft a similar tone to the real movie. And even though we were a much smaller crew working on much smaller sets, the general lighting principles stayed the same.
We had screen grabs from the movie that we would use as reference, and once we were in the ballpark, looks-wise, Nate and our Gaffer Jen Cohen-Harriman could have some artistic freedom to bring their own vibe to the lighting.
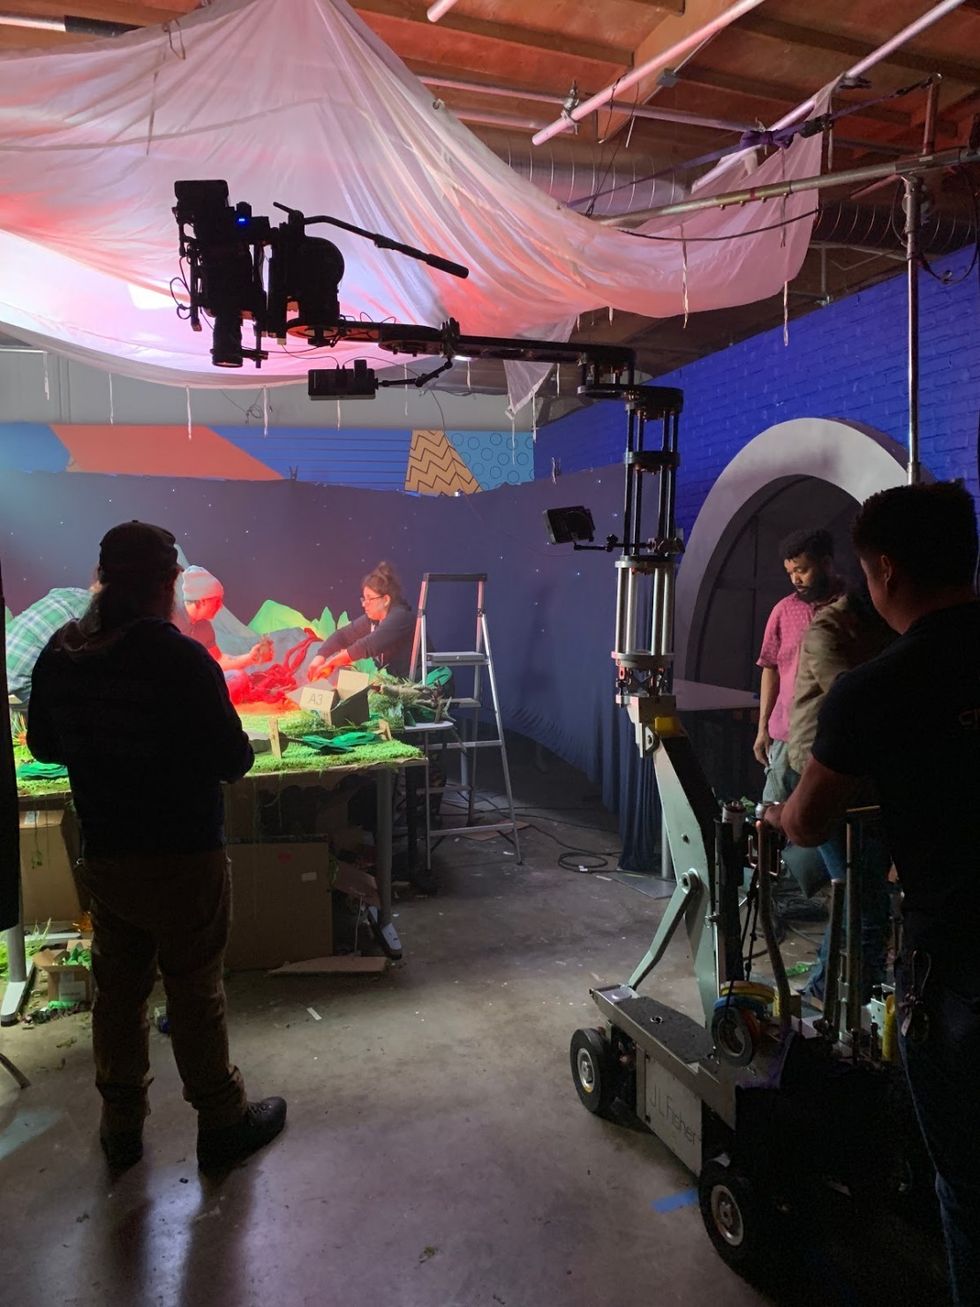
For the rest of the sets, we relied heavily on LED light strips, practical cheap battery powered Mini LEDs and small fresnels. By using different combinations of these lights, we were able to shape and bring our small sets to life.
Nate: "We used two Arri Skypanel S-30 lights for our main sky source, rigged to the ceiling grid, and pushed through a half silk. They were also useful because of their built-in lighting effects such as lighting for the storm scene. For small interiors, we used dedolights, 150w units that can focus and dim. We had a set of 2' Quasar RGB tubes that could do any color as well as lighting effects. For the volcano scene, we hid them in the smoke clouds to act as fire and lava. Additional lights were Joker HMIs and 2k fresnels."
The Jurassic World toys are all built to scale among one another. An action figure T-Rex will tower over an action figure Owen in the same relative scale that the CGI movie T-Rex towers over Chris Pratt.
Movie footage was studied frame by frame to make sure that we could cram as many details into each set as possible. And while the real movie could possibly cheat the size of sets between shots to fit the dinos, we’d be locked into whatever dimensions we built them.
We wanted these videos to have a hand-crafted, “sweded” feel (the movie Be Kind Rewind coined this term for their cardboard and tinfoil recreations of famous movies).
Production Designer Evi Ellias designed our cardboard sets to have flyaway walls and removable ceilings: “We watched the scenes over and over. We counted windows and doorways, cage doors and light fixtures and came up with relative scale markers...like this loading dock is twice as tall as a T-Rex in the shot, or the control panel is as long as three desk chairs in front of it. We took these and created relative measurements, drafting and 3D models from which to build our miniature sets.”
We wanted these videos to have a hand-crafted, “sweded” feel (the movie Be Kind Rewind coined this term for their cardboard and tinfoil recreations of famous movies).
Evi was particularly inspired by a short film me + herthat used incredibly detailed all-cardboard sets and puppets to tell a tragic story. She wanted to use something monochromatic like cardboard so as not to steal the thunder from the toys. It’s also very cheap and easy to work with in miniature.
So, green Ikea bath mats became grassy fields, plastic strawberry containers were cut apart and turned into cages, and cardboard was crafted into the foundation for anything architectural. In the end, all of these little details added to the fun vibe, charm, and texture of the videos.
Editing
Editing in Adobe Premiere was a fairly straightforward process. We shot in 4K, and I edited with 720p proxies, and finished in 1080p with a Resolve color session.
Before we shot, I took the original movie scenes and cut them down to around two minutes in Final Cut Pro X
Sidebar: I really like FCPX. When I’m doing a personal project that doesn’t need to be passed to other editors, I’ll do everything in FCPX. It really does feel like the future of editing, and it may be if other editors would actually give it a chance. Then when we were on set, our Assistant Editor, could use the cut-down scenes to crash edit our miniature footage, by laying the sweded footage overtop of the actual movie footage.
This way we could quickly see that all of our sweded footage was working, timing out, and cutting together. It also let us see if something wasn’t working, and we could go back for an insert shot before the art department thew the sets into the recycling bins.
Sound design
These videos really started to feel epic in the sound mix. Universal provided us with the raw Jurassic World dinosaur sound library. And, wow. It was so cool to see the level of detail that their designers went into.
Every single dinosaur had a variety of effects: roars, cries, “conversation”, walks, runs, breaths, and more. Even though we were using stiff plastic toys, moved by strings, hands, and wires, the dinosaurs came to life with sound.
The more detailed we got with the sound design, the more fun the pieces became. We could craft story beats using a scared dino sound in the beginning, ramping up into an aggressive roar effect as they attacked.
By the end of the edit, we’d have one track of video in the timeline, and about 45 tracks of audio. Erich Rettermayer waded through all of those tracks, and did an amazing job with the final sound mix. Mickey Rodriguez at Wild Woods, a toy commercial colorist pro, handled the Resolve color correction.
As a kid who spent way too much time in his room playing with T-rex’s, this was a fun project that combined my love of filmmaking and my love of dinosaurs. I can remember as a kid, sitting in the theater and watching Jurassic Park and having my little mind blown.
And now 25 years later, I’m, like, 1 director’s degree away from one of my heroes, Steven Spielberg. Sort of. Kind of.
 No Film School's coverage of


