DISCLOSURE: This is a three-part sponsored series by Rev.com.
In this series, we will be exploring Rev's approach to editing with transcripts in post-production, and how Rev transcription can help elevate your work.
Whether you’re editing interviews or producing a full-length documentary series, you or your team is wasting hours upon hours scouring through video footage to find the right moments to tell the best story. If you’re not currently using them, your workflow will become much more efficient by using transcripts.
While there are many speech-to-text services that can provide you with a video transcript, many of them require editing to fix misspellings, names, timecodes for hours on end that you honestly don’t have time for.
However, Rev provides you with the most powerful transcription tool used in post-production with 99% accuracy and only at $1.25 a minute to make your video editing faster and more efficient.
The best sound bites don’t find themselves!
Not sold yet on the idea of using transcripts in your video editing workflow? Let’s explore the real-life benefits for your projects.
Introducing Transcripts for Video Editing
Using transcripts for video editing dialogue and interviews is no industry secret. In fact, it’s a common element used by Hollywood professionals to make sure they’re using the best takes, quotes, and bites to tell the story at hand. In post-production, transcripts help filmmakers:
- Save time finding soundbites
- Increase collaboration with team and clients
- Eliminate the need to transcribe in-house
With all your dialogue in a digital transcript, you can quickly find what you need without having to scrub through footage in an editing room. It allows you and your team to focus on the narrative, not the process.

At a minimum, transcripts should provide you with an accurate speech-to-text version of your footage. However, you want to get a transcript that also provides:
- Timestamps
- Speaker Names
- Glossary and brand terms
- Verbatim speech (uh, etc…)
- Punctuation, spelling, and grammar
- Video/audio filename
You’ll find advantages and disadvantages between human-powered and automated AI-powered transcription services. While Rev offers both, it’s recommended that you have a human transcriptionist complete your transcript for the best accuracy and time-savings.

Integrating Transcripts in the Editing Workflow
Using transcripts in post-production is essential when working with unscripted dialogue. Instead of scrubbing through hours of footage and listening for the best quotes, you have a searchable transcript to quickly read, search, and find the best bites. While editing, transcripts can give you the ability to:
- Speed up the editing process
- Cut with focus and efficiency
- Find quotes and phrases faster
- Split clips on specified timecodes
- Collaborate on your transcripts
Finding the Right Bites
With a digital transcript in hand (Word, PDF, Text file, or Rev’s Transcript Editor), you can quickly search for the best soundbites. You might want to search for keywords, phrases, names, data, or something from your notes that stood out when conducting the interview.

With Rev’s transcript editor, it’s easy to share the project transcripts with your team, stakeholders, and clients. Collaboration can be a very useful strategy when reviewing all your interview transcripts to finding the best bites to tell your story.
To search your transcript use the find function, ⌘+F for Mac users or Ctrl+F on Windows, and enter your search term. When looking for the right quote, you can also continue searching your document to see if your interview subject said the same thing a different way so you can choose the best phrasing.
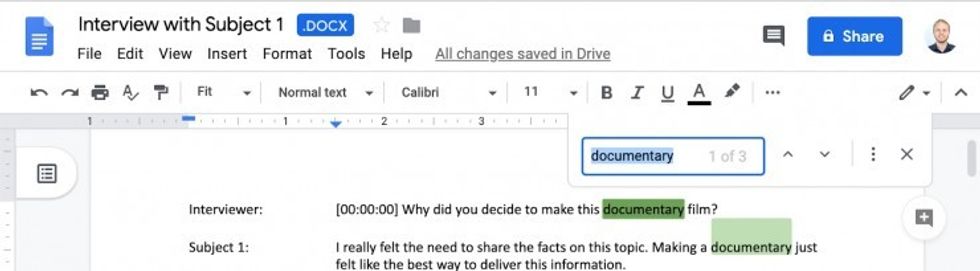
Once you find a bite that you like, you can simply highlight the dialogue and timecode in your transcript, or copy and paste them all to a selects doc.
Making A Paper Edit
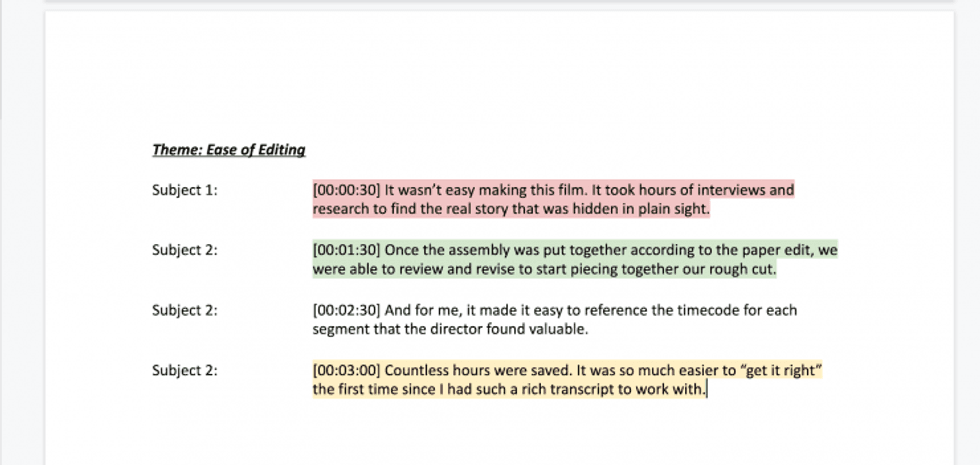
With all your selected quotes into one document, you can begin to assemble these elements into an order that makes sense for telling your story. You can create a basic paper edit in several ways:
- Compile quotes into main ideas or themes
- Create a timeline of events
- Note b-roll footage or music you might use
- Make a detailed shot list
Don’t forget to include the timecodes with each of your quotes. This data is going to then help you identify the footage in your timeline and compile your first cut.
Create the Rough Cut
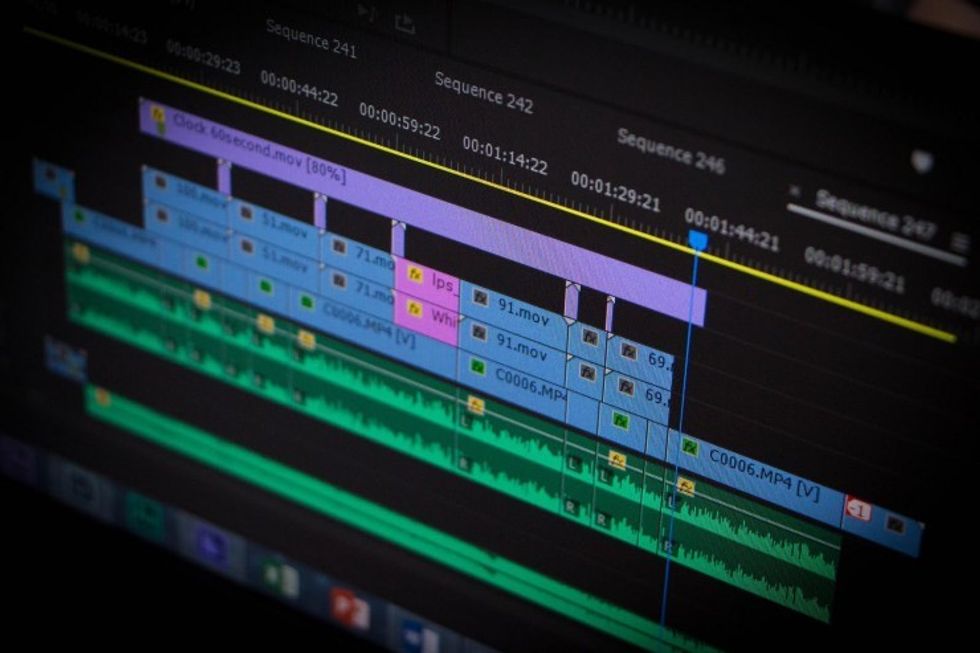
Now that you have a paper edit, you can start cutting your footage in your video-editing software like Adobe Premiere Pro or Final Cut Pro. You might have the project timeline open on one side and the transcript on the other to quickly find your bites.
The first step is to locate the timecodes in the footage for all the clips that made it in the paper edit. Split each clip at those timecodes at the beginning and end of each selected quote.
As you go through your footage with your paper edit, copy and paste the clips into a new timeline sequence to begin forming the first assembly.
With your assembly sequence of (somewhat) organized clips, you can begin polishing it into your rough cut. Start pulling in some b-roll clips, trim the dialogue a bit, and add some basic transitions.
Upon reviewing your rough cut, you can refer back to your transcripts with your team to see what you can find that can fill in the gaps to make your story as well rounded as possible.
Getting Transcripts For Your Footage
You’re likely shooting in HD or 4K at this point, which means large, slow files. Luckily, your interview audio files are much smaller and faster to export and upload to transcription software. Before submitting your audio files to a transcription service like Rev, we recommend that you consider two methods of submitting your order:
- Submit the master audio files for your interviews
- Edit and upload an assembly sequence audio export
If you submit the master audio files, you will have a transcript that matches those original files, timecode for timecode. You’ll just need to make sure you sync all of your camera angles with that file when importing it into your project timeline. While this method might be more costly, it ensures that you have a raw transcript with timecodes that match the original file.

By editing and uploading an assembly sequence, you can guarantee that you’ll only get a transcript of the “usable” stuff. Use waveforms to quickly identify quiet spots or places where it’s obvious the subject is not talking into their lav or main mic. This means you’d cut out silence, downtime, and anything you know you’re not going to use from the interview like icebreakers or side-talk. Your transcript timecodes will match this sequence, so this is now your “master” reference for the rest of the project. This method will save you some money, but may not save you much time, so keep that in mind!

Ordering Your Transcripts from Rev
With your footage ready, it’s time to get it transcribed! Go to Rev’s transcription page to get started. You can upload your files from Google Drive, Dropbox, Vimeo, YouTube, and directly from your computer in the following audio formats:
- MP3
- AIF
- M4A
- AMR
- WMA
- OGG
- WAV
You can also upload your video clips in the following formats:
- MP4
- WMV
- MOV
- AVI
- VOB
After you upload your files to Rev to be transcribed, be sure to specify that you want timecodes and any other additional features that may help you get your project done faster. Once ready, you can submit your order and you’ll get your transcripts delivered to your email soon!
This sponsored post was authored by Austin Canary, Video & Content Marketing Manager at Rev.


