This post was written by Sean Alami.
Budget becomes the most inevitable question when producing high-quality commercials. When specifically talking about car commercials, they can cost anywhere between two to three hundred thousand dollars to shoot. I managed to do one for just 50 dollars.
A few weeks ago I was inspired by an incredible Audi car commercial. As you will see, the Audi video has stunning cinematography and impeccable editing. Although you can’t hear the audio, the music and sound effects were marvelous too.
As a YouTuber, I’m always looking for inspiration for my next video, and this commercial was just the catalyst needed to stimulate my creative juices. So I decided to make my own car commercial in order to provide a couple of valuable lessons:
- In this day and age, you don’t necessarily need cinema gear to achieve good results.
- You can absolutely do this at home!
Before I start this breakdown let me clarify a couple of things. There were facets of this project that I didn’t have to worry about. Coming up with the idea and executing a storyboard were two aspects already in tandem. All I had to do was take this template and recreate the same commercial for less money.
Also, a couple of assumptions have to be made prior to gathering the gear. You have experience in operating a camera and a gimbal. And you have a good understanding of cinematography.
Check out how I did it below.
Prep
Let’s jump into the essentials in preparation.
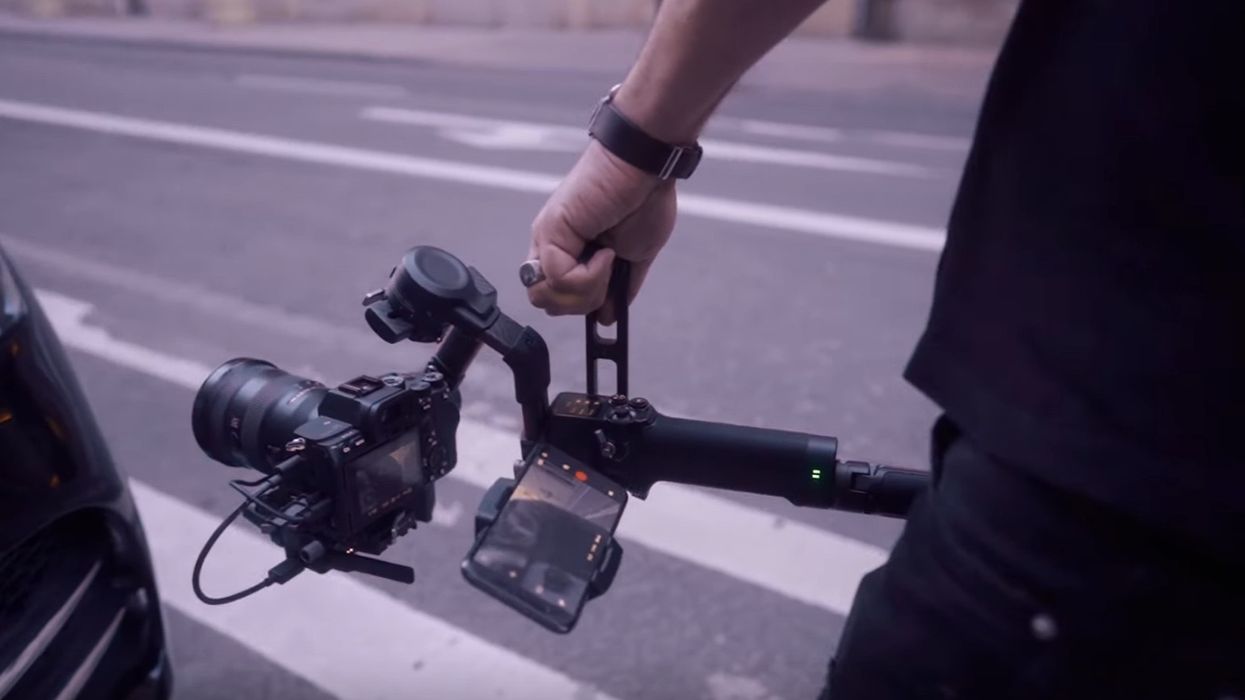
- You’ll need a gimbal and a 10-bit 4K camera to compare with the cinematic look of the advert. A Sony A7SIII or a Canon R5 are what I recommend.
- Without a budget for proper car rigs, you’ll have to adapt to something big enough to shoot from another car. I used a van that had adequate space.
- You have to have FPV shots. Obviously, I do my own, but I don’t expect that from everyone. Source a friend or a colleague who has the ability to achieve this. In my opinion, normal drones won’t have the necessary impact.
- Finally and most importantly, you need a great team. We all have different expectations and standards.
When assembling a crew, just focus on ensuring they are reliable. Reliability is the single most important element to a good crew. In my case, I couldn’t afford to pay them, however, they had to trust me that this would lead to something else, just like I trusted them to do a good job.
Essentially I’m asking for a favor from friends. Waking up as early as 3:30 a.m.—yes, you heard me right, 3:30 a.m. calls to drive to a location and help film something that isn’t a priority to them. Those are some good friends!
Without a budget, your time is limited. So we do away with reshoots or rescheduling. In order to capture footage of the car, we had to pick a Sunday extremely early where the streets are empty.
My team was the following:
- Two actors
- A camera operator
- A driver
- Me
Yes, that’s all.
Because of the size of my squad, if I had any last-minute dropouts, filming would have been shut down. Luckily that didn’t happen because they were exactly as I had hoped—reliable. I’m incredibly grateful for their help and in order to give my thanks properly, I created an introductory B-Roll which you can see in the video.
 Credit: Sean Alami
The shoot
Now, there are two parts to every project:
Part 1: Planning, scheduling, and bringing your A-game when it comes time to shoot.
Part 2: Obstacles you have zero control over. The weather, for example. Some people call this part luck, be it good or bad. I try to stay positive by calling it good faith.
I was fortunate enough that not many obstacles reared their ugly head during filming. Because if they did, I’ve no doubt it would be game over!
We started at around 5 a.m. in order to get the FPV shots wrapped up. And surprise surprise, it just wouldn't arm. Immediately we were 30 minutes behind schedule. So we made an executive decision to move on to the non-drone shots.
When I’m shooting, I always tend to lock in my favorite shot from the shot list first. In this case, my preferred shot is when the car turns on the intersection.
The plan was pretty straightforward. Drive in another lane slightly in front but next to the BMW. Then drive ahead through the intersection as the BMW turns.
In the edit I letterboxed the picture to make it more cinematic, then I added a color grade with a little bit of light and a sound effect. Voila!
The bumper shot was done on a separate day. I met up with Marlon from the team at his garage. I shot it stationary with a gimbal but dragged it across almost like a pan. I then brought it into post and removed the background. I put it in slow motion and added stock footage to the background with a blurry bumper in front. The footage I used was that of the exterior of a moving train being shot from the interior.
The window shot was a little complex because we were on a zoom lens and the van was manual so there was a lot of stop-start when changing gears. In the end, we decided just to stay in one gear so it ran more smoothly.
The wide shot in the original commercial was one of my favorite shots, and I really wanted to ensure it held true. In scouting the locations I wasn’t able to find the right spot to get the preferred effect when driving through the intersection.
 Credit: Sean Alami
The hardest shot of all was the exterior of the car from behind. We had to get higher in order to create that elevated effect. So I got on top of the van and prayed that the driver kept me safe. Needless to say, I’m here to tell the tale, so he did a fantastic job! (Editor's note: We do not condone unsafe and/or dangerous methods of shooting under any circumstances. Try learning about car mounts instead!) Because of the danger involved, we couldn’t go too fast so I had to speed it up in post.
The front shot was similar, only this time I was sitting in the back of the van. Again, we went slow and sped it up in post. Sound effects played a huge role in making this shot come to life.
Now for the FPV shots. I’ve only been shooting FPV for 18 months, and only in open spaces and contained environments. So this time I had to be wary of the obstacles of flying in a built-up area. Luckily the arm problem disappeared as it was a minor GPS issue. (Editor's note: Make sure you know the FAA regulations before you fly.)
With all the changes of rules and regulations regarding drones for FPV, you now need a second person having the drone in line of sight at all times. Andrej helped with that while communicating with Marlon in the car.
The result I came up with was fairly basic, as I would have liked to have gotten closer to the walls or the car, but we simply didn’t have the time, and as you know certain shots sometimes have to be sacrificed for others.
With the FPV shot on the bridge, I had to take a separate day because I needed more time for the streets to be empty and therefore needed another early morning. Marlon joined me for a risky shot that I’d never done before. It was worthwhile in the end as I was delighted with the results.
 Credit: Sean Alami
In conclusion
Before you go, let’s hone in on the cost of all this. Yes, I say it was $50, but obviously, I had all the gear and managed to source a good team with a van and a pretty slick car. The $50 I split between the two drivers at $25 each for gas money.
If you don’t have the equipment or the favors, you’ll have to buy or rent it. But for the most part, this is all you need. Some decent equipment, some gas money, and a great group of friends willing to help you over the finish line!