Our film It’s Been A While was made for under $1,000 with no production support, no traditional crew, and barebones equipment. It premiered on Short of the Week last Thursday, and I’m here to tell you how we did it.
First, check out the film below. More details after the jump.
If you’re taking the time to read this article, you’ve probably read similar stories that explain obvious indie filmmaking techniques: work with friends, ask for favors, etc. Instead of treading over familiar ground, I’m going to break this down into six components and go into as much technical detail as possible.
1. Create Limitations for Yourself
This may sound obvious, but don’t set out to make a massively intricate film when you don’t have the means to pull it off. Instead, focus on a simple story with a clear dramatic thrust. It's Been A While (referred to from here on as IBA) was written by Ryan Sheppard, who crafted a simple story around the theme of loneliness. He specifically designed the story as a solo character piece in one location, with no scenes lasting longer than two pages. Additionally, the length of the script was capped at five pages so it could be shot in one day.
I’m sure you’re familiar with the saying, “If you want something done right, do it yourself.” That logic also applies to getting it done cheaply. This means you should wear as many hats as possible. I was the director, producer, cinematographer, camera operator, editor, and colorist. The writer held a boom. The lead actress slated her own audio takes. Props and wardrobe were limited to what was already available at the location. Hair and makeup were also done by the actress herself since they fit the style of the character.
This film would’ve easily cost at least five times more with a full crew. By creating limitations and working within a strict logistical framework, we were able to stay focused on the story instead of getting distracted by fancy equipment and the normal hustle-bustle of a large film crew. Your movie doesn’t need to have all the bells and whistles to garner attention. All you need are an impactful script, a compelling lead performance, and a willingness to get your hands dirty.
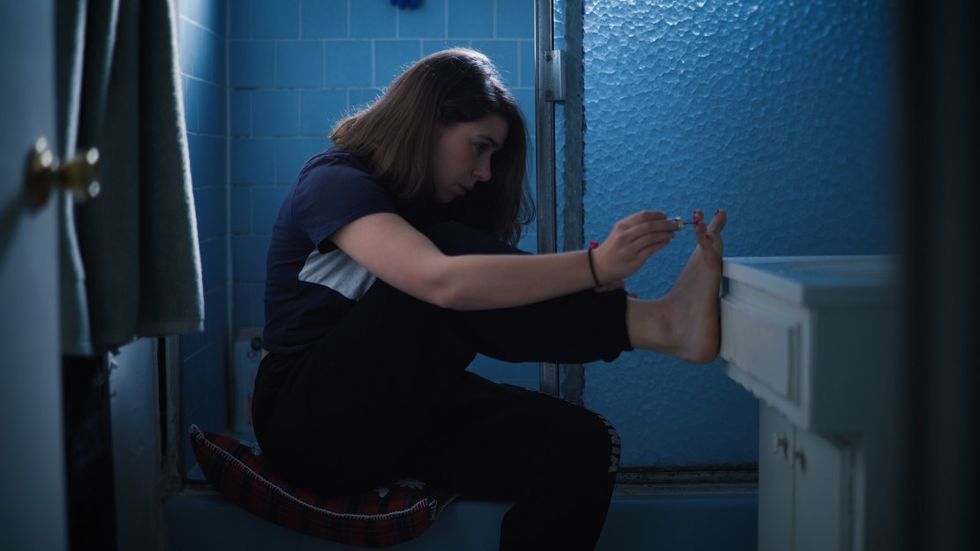 We timed this shot to match the position of the sun outside the apartment. The light was naturally diffused through the bathroom window, which gave Meg a nice backlight on the top of her head. (If we actually had lights, this is probably what we would have done anyway.) For lensing, we used a 50mm Rokinon Cine DS lens and exposed to T1.5 for a shallow depth of field.
2. Design Your Cinematography Around Your Location
First, pick a location that already has good built-in art direction. This is especially important when you don’t have a formal production designer. Many places look nice from an interior design perspective but do not photograph well. Sometimes they have unusual paint on the walls. Other times they have large windows that let in too much sun. The last thing you want is to have a blown-out window in every shot or yellow wallpaper.
If possible, scout the location beforehand and take note of the carpet/wall colors. Pay attention to the windows and how light falls into space. If they happen to have translucent curtains, that’s a plus—it’s a cheap and easy solution for diffusion.
Second, position your actor near windows so you can light them with natural sunlight. During your location scout, take note of the time of day and where the sun hits each room. This can be as simple as using the “compass” app on your phone and seeing what direction certain windows face—eastward facing windows can be used for morning shots and westward for the afternoon. If you want something more advanced, you can download “Sunseeker” from the app store. It provides a precise trajectory of the sun relative to the space you’re in for any day of the year. This will allow you to stage and block your scenes around the natural light within your space. We shot IBA out of order to utilize the best light within the apartment.
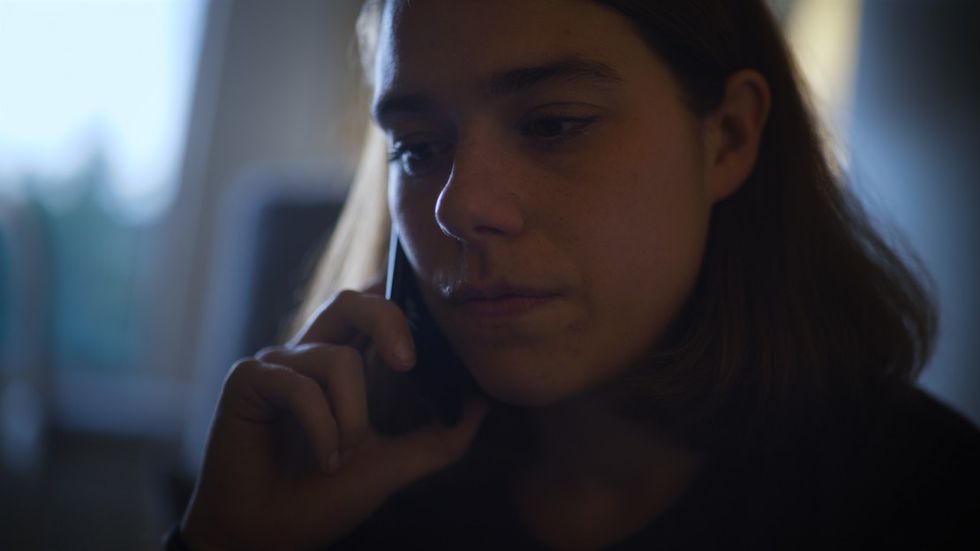 We made sure to film this shot in the afternoon. The position of the sun relative to the apartment created a nice natural sidelight through the window on the left, which gave her face some contrast. We used a normal lamp with a 3200K lightbulb for the right side of her face.
3. Be Strategic About Your Gear
First off, make sure you use fast lenses. This will make your life easier when shooting interiors with only natural light. This is a much better solution than increasing your ISO. (In general, try to keep your ISO as low as possible—we kept it at 200 for the whole shoot in order to reduce noise in the image.)
Also, a side-effect of using fast lenses is the ability to easily produce a shallow depth of field. The bigger your sensor and faster your lenses, the less “flat” your image will appear. A big aspect of cinematography is creating depth, and selective focus helps create that illusion. In my opinion, this is far more important and noticeable to audience perception than resolution.
Disclaimer: pairing fast lenses with a full-frame sensor to create shallow depth of field can often be a crutch for poor lighting or sloppy composition. But in this case, it can add texture to your image and help disguise imperfections in your production design (or lack thereof). However, make sure your images aren’t too shallow. For example, if your actor’s eyes are in focus but their ears aren’t, stop down your lens to something more reasonable. F2.8 is usually the sweet spot for most productions since it splits the difference nicely between a pleasing image and an achievable focus rack.
We shot IBA with a Panasonic S1H and a set of EF-mount Rokinon T1.5 Cine DS Primes. We only had three focal lengths: 24mm, 50mm, and 85mm. The camera is available for rent on sites like Sharegrid, and all three lenses cost less than some individual lenses from other manufacturers.Panasonic also just released the S5, which is half the price of the S1H and maintains most of the video production features. Both cameras are small, durable, and lightweight—making them ideal for close-quarters filming without the need for heavy support.
Also, get a good AC who can pull focus. When working with fast lenses, having a dedicated focus puller is a necessity. If you only hire one “legit” crew person for your film, make sure it’s an AC.
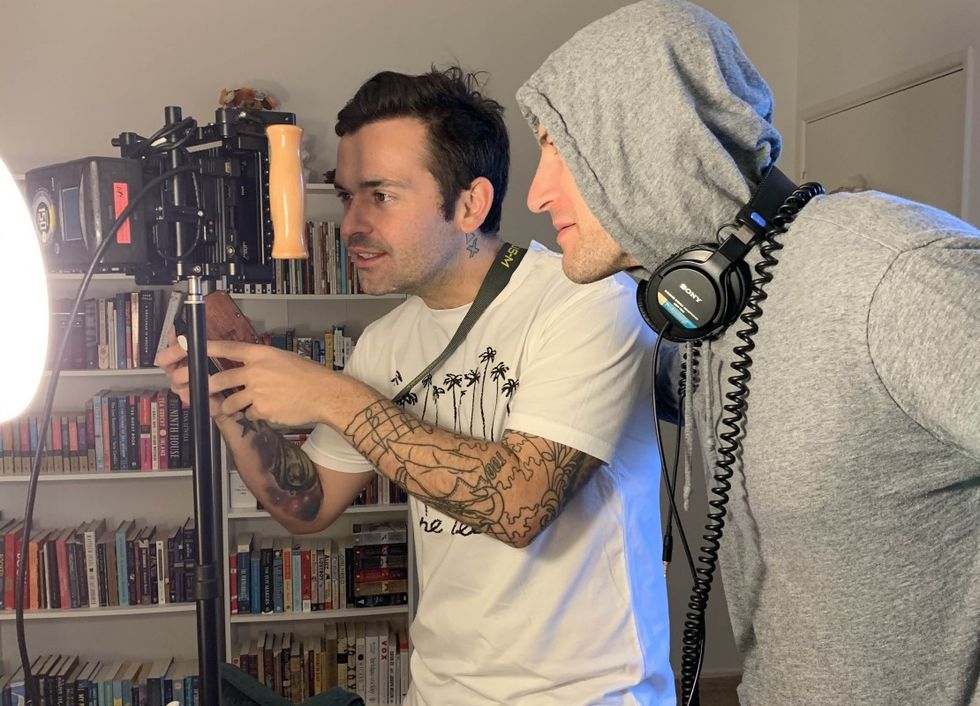 Assistant Camera George Smith finds his focus marks. Since we didn’t have a Teradek, the monitor was connected directly to the camera with a 6-foot HDMI cable. Pro Tip: don’t use cables longer than 10 feet—HDMI can get a bit spotty with longer-length cables. (Equipment Pictured: Tilta Nucleus Follow Focus and Small HD703 UltraBright, placed on a 6-foot Impact Light Stand with 1/4”-20 mount.)
Last but not least, strongly consider using the baked-in image profiles in the camera. I’ve seen a lot of talk online lately about shooting RAW. For a no-budget film, this is totally unnecessary. Not only will it eat up card space, but it takes a lot of expertise to get the most out of that image in post.
For IBA, I used the “Cinelike D2” setting on the S1H. It provided a great image, with plenty of flexibility left over for a color grade on top. It wasn’t 12-bit RAW, but 10-bit 4:2:2 was fine. Unless you’re taking your footage to Company 3 for a super rigorous grade, you can stick with the camera’s image profiles and still get great results. Literally nobody will ever be able to tell the difference between 12-bit 4:4:4 and 10-bit 4:2:2 color space—unless you’re doing a VFX-heavy project.
4. Keep Your Camera Movement Simple and Motivated
Dollies, jibs, and cranes are great—but often unaffordable. A simple tripod can still infuse your visuals with life and energy. For the opening shot of IBA, all we had was a tripod. We were able to keep the shot dynamic by designing the movement around tilts and pans, instead of just keeping it static.
It’s always worth the time to think about your first shot—especially for a short film, where it’s crucial to hook the audience within the first 30 seconds. Ideally, it should introduce the setting and character in an interesting way. You can reveal information visually with simple camera moves, or even a well-timed focus rack. Again, you do not need fancy equipment to do this.
We opted for handheld for the second shot, when she realizes the mistake she just made. It helps break up the visuals and provide a much-needed transition. Referring back to the previous point, you’ll also notice that we positioned the actress near the window for the whole sequence. The natural side-light adds to the authenticity of the scene.
Sometimes, all you have to do is incorporate some simple blocking to make your shot feel more alive. For the bathroom scene, having Meg start on the tub and then move to the toilet created a composition change that also affected the shot size. This blocking was not in the script. Always be on the lookout for ways to incorporate blocking in conjunction with camera movement to help make a scene feel less static.
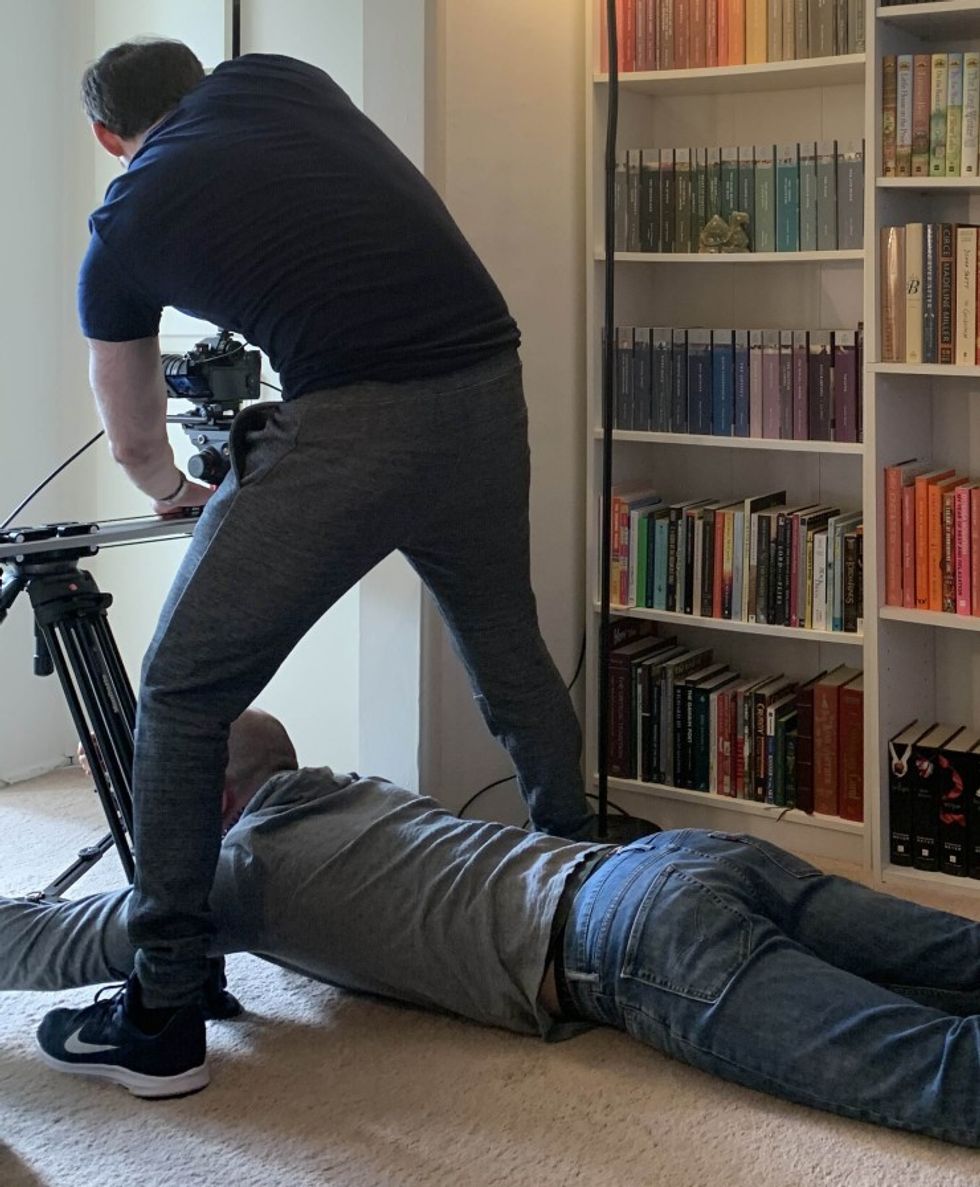 Hilariously, this is how we achieved the best-looking shot in the film. We mounted the camera to a Manfrotto 502AH head on an Edelkrone Slider, which was placed on Manfrotto 546B aluminum legs. I manually operated the slider, with subtle pan and tilt adjustments happening throughout the shot. When the camera reached the far end of the slider, the tripod was unable to handle the full weight without tipping—which resulted in a grown man needing to lay on the floor to hold it in place. Not the best solution, but necessary if you don’t have sandbags.
5. Don't Forget About Audio
This has been covered extensively in every filmmaking article, but it’s worth repeating: audio is extremely important. For every shot, get a boom mic as close to the actor’s mouth as possible. Do whatever you have to do to make this happen. There are plenty of cheap boom pole options.
We used RØDE’s Micro 3-Section Telescopic Boompole with an NTG-4+ mounted on top. The pole was only $50. Always wear headphones and listen closely for bumps, hits, or minor handling noise.
For our shoot, the boom mic was just a backup. The primary audio capture device was the iPhone she used onscreen. I strongly recommend using this method if you have a character speaking on the phone during your scene. The phone’s mic is naturally placed right near the actor’s mouth and will sound better than any boom mic. We used “iTalk,” which is a free app available on the app store. It creates high-quality audio files that can be easily transferred to your computer after shooting.
The key takeaway here is to have as many audio sources as possible. Create redundancies wherever you can with your audio capture. You’ll thank yourself later in post.
6. Be Your Own Publicist
You can effectively market your film with a cheap laptop, a few programs, and an internet connection. Make a poster. Pick out a few screenshots. Always have someone on set shooting BTS pictures with their phone so you can utilize them later. Make an Instagram account for your film and post frequently. Tag everyone. Submit to as many film festivals as your budget will allow.
 Don’t worry if you’re not a professional photographer—the image for this poster was taken on an iPhone and designed in Photoshop in less than an hour. Since it’s not being printed anywhere, we could get away with lower resolution.
Many online platforms will give you a much faster response than traditional festivals. Instead of waiting six months to hear back, submit to places like Short of the Week and NoBudge. They will notify you within days, and even provide feedback if you elect to pay an extra fee.
There are many other things to consider when making a film—definitely more than I can fit in an article like this. But these are the main things that will help you succeed with just a few hundred dollars in your pocket.
For other questions, feel free to contact me on social media, and I’ll be more than happy to answer as many as I can! Thanks for reading, and I hope you enjoyed the film.
You can read Short of the Week’s article on “It’s Been A While” here and you can find me on social media Instagram, Twitter, and Vimeo, or visit my website.
I'd love to hear about your journey in the comments.
Happy shooting.


![Ethos, Pathos, Logos: 20 Effective Ways to Advertise [Infographic]](https://nofilmschool.com/media-library/ethos-pathos-logos-20-effective-ways-to-advertise-infographic.jpg?id=34064614&width=600&height=600&quality=90&coordinates=560%2C0%2C0%2C0)

