People's concept of what a DIT actually does ranges greatly depending on their experience. A DIT, or Digital Imaging Technician, is technically a Union job title in the IATSE Local 600 (Cinematographers Guild)...though many folks out there call themselves DIT regardless.
Considered part of the camera department, not post-production (though very much the bridge between the two), the DIT works closely with the Cinematographer on insuring the image quality and artistic look of the movie throughout the shooting process. It's a job that very much came into being during the digital age and should not be mistaken with what is essentially a "data wrangler", which is usually somebody more from a post-production background who is generally responsible for offloading and backing up your footage. Now, while an official DIT will of course also be handling media management, storage, and backup it is important to understand they play a much bigger artistic role alongside the DP than a mere “data wrangler” ever would.
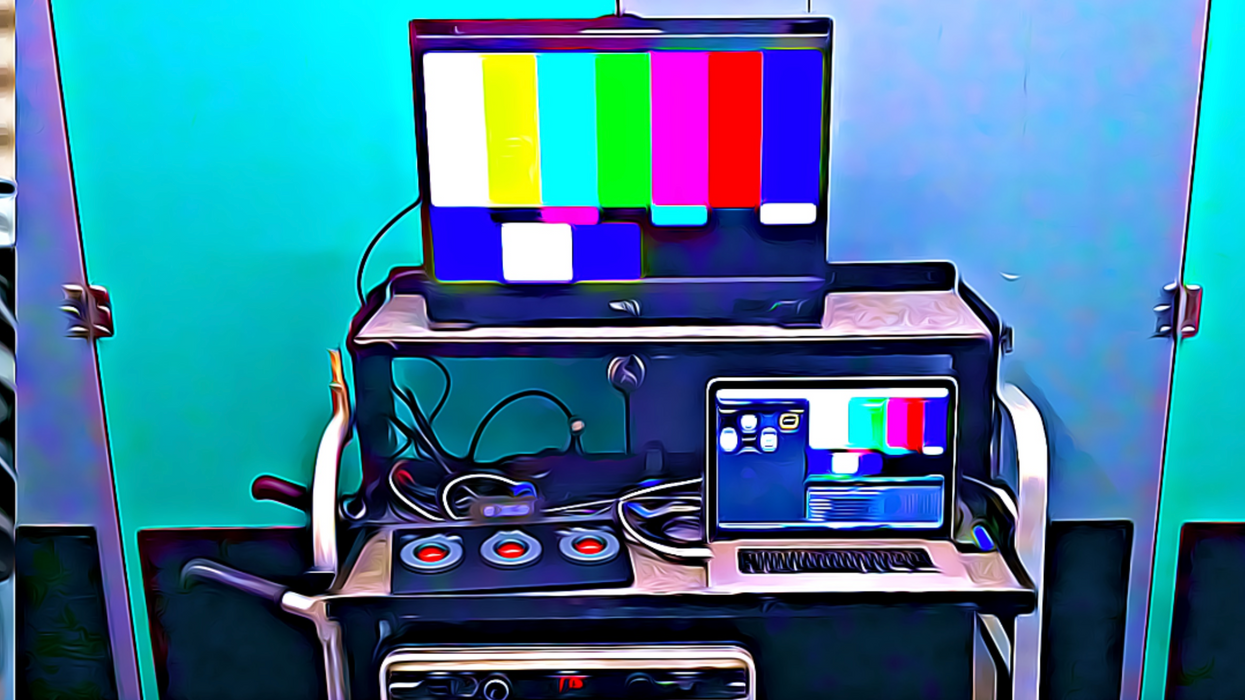
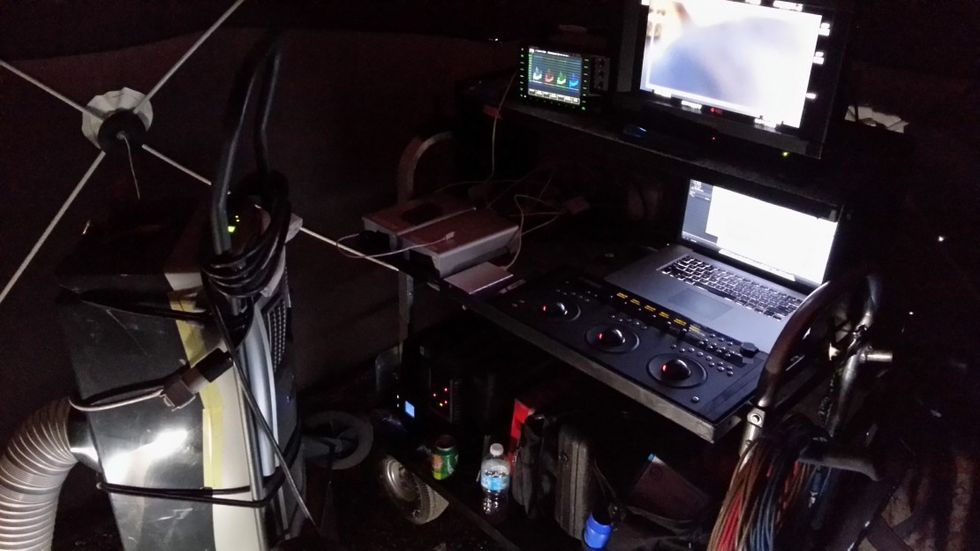
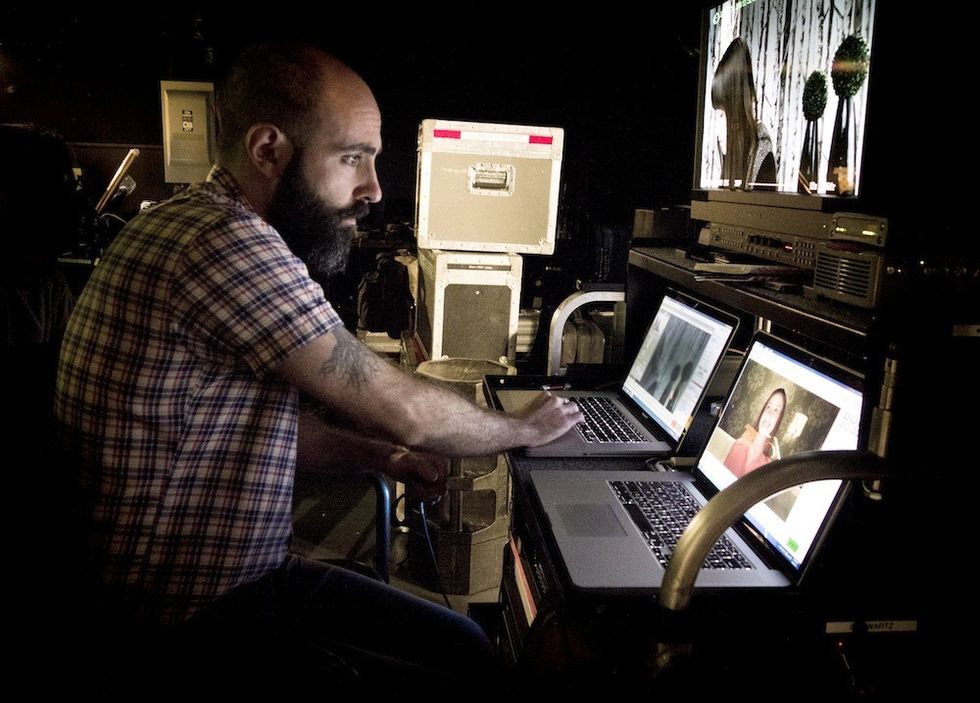
 Thomas Wong's DIT station on No Film School founder Ryan Koo's 'AMATEUR'.
Official job description notwithstanding we will be using DIT as it is perhaps more broadly used in the marketplace: the all-important job of managing the media on your shoot (though we will be dealing with some image QC as well). Also, we're going to focus specifically on lower-budget, indie fare.
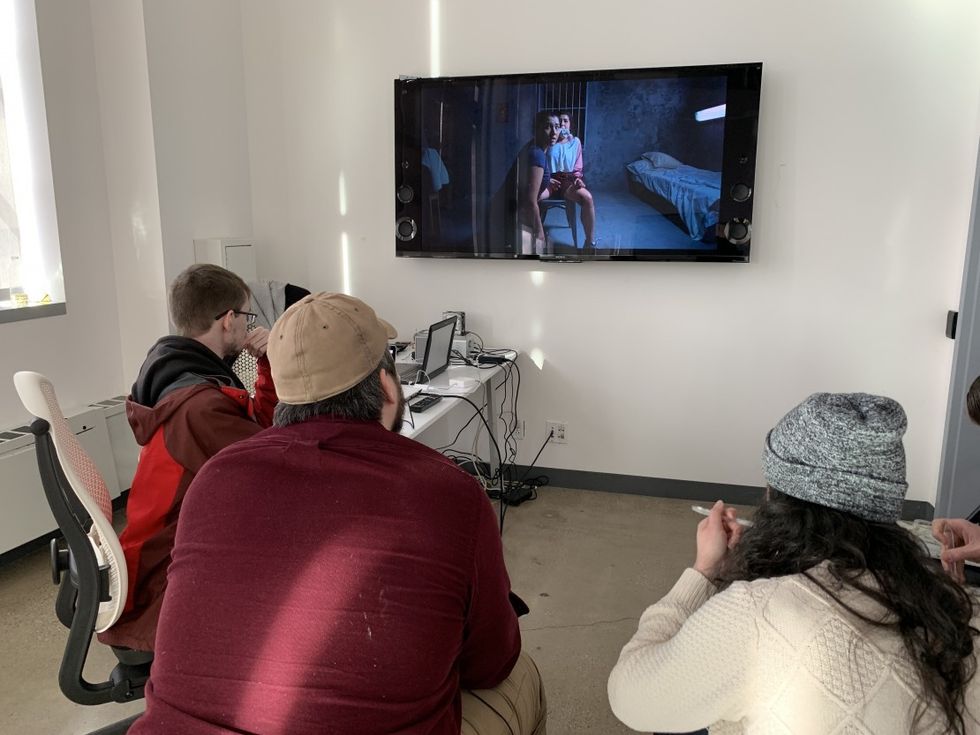
With that in mind, Ariel Carson-Sinelnikoff, a 3rd year Director at the Feirstein Graduate School of Cinema in Brooklyn, was kind enough to let us use CATFIGHT, her thesis film, as a testing ground for this article, so let’s dive into what a DIT setup could look like on a modestly priced short film and cover equipment, workflow, and best practices in the process.
Feel free to check out a video walk-through below or continue on to the article.
Setting Up Your DIT Station
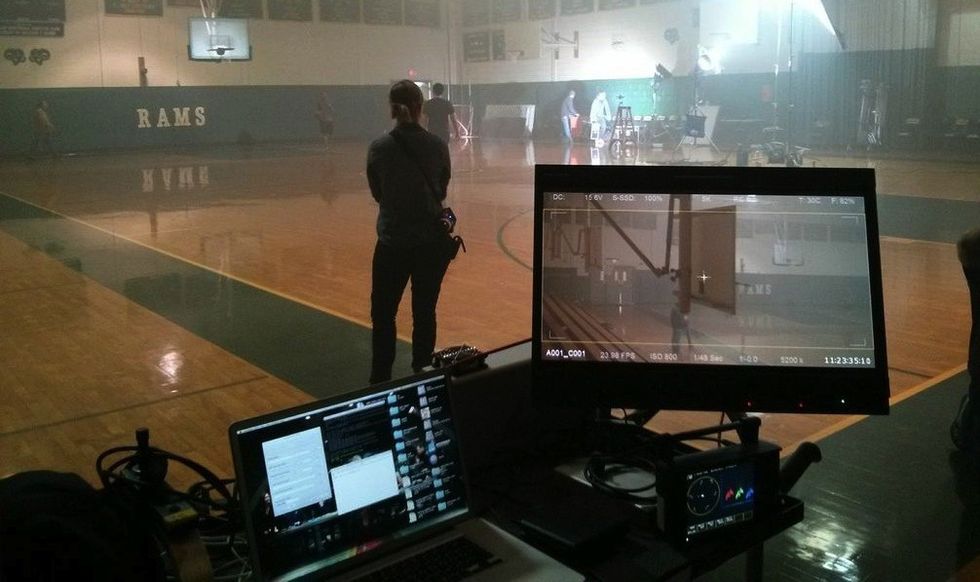
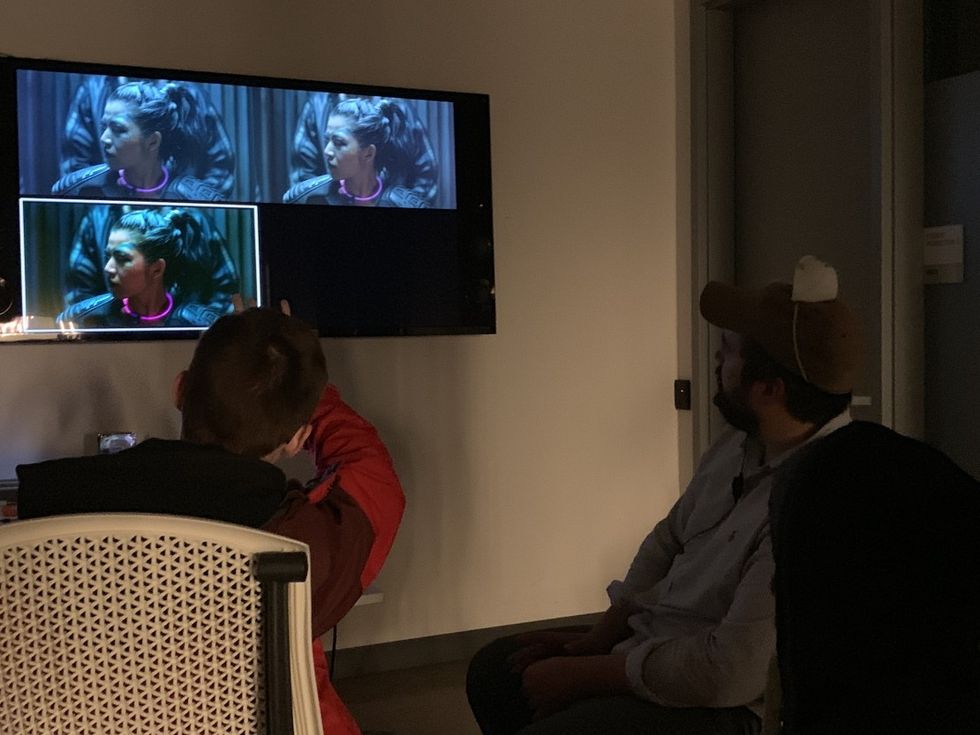
First thing you'll want to do as DIT is to find a suitable staging area. Generally, this is a conversation to be had with the AD and Location Manager. Personally, I like it to be a little out of the way for solitude, security, and a little secrecy. It's nice to have a place where the director, DP or Producer can come over to check out some footage right on the spot, but at the same time, it's nice to be a little secluded from the rest of set in order to have some space to focus. Also, there are some directors who do NOT want their actors seeing themselves on dailies and so being a little hidden away is an easy way to avoid this altogether. If for some reason a director did want to invite an actor to watch a daily or two, now it feels like an extremely special moment as they are invited into this sacred space.
If you have a big, fancy cart that's great (and I'm jealous), but DITs come in all shapes and sizes these days and if you're going to be stationary like we were (5 days all in one place with ample room for staging), a table or two gets the job done just fine. Make sure to bring some extension cords and surge protectors that you know you can trust...and a $20 Outlet Circuit Tester isn't a bad idea to have handy either.
Lastly, you might want to just give a small thought to ambiance. How can you make the space unique to you and warm and inviting to the cast and crew? You may be severely limited for various reasons on this front, especially if you are constantly moving, but the bottom line is people are on set 12-16 hours a day for days on end, so do your best to create a nice environment and energy at your station no matter how big or small your DIT set-up is.
Software
Though there are higher-end programs more dedicated for DITing that your IATSE member will more than likely be utilizing, Blackmagic's DaVinci Resolve (the FREE version at that!) is still more than sufficient to get the job done for 99% of productions. You're welcome to use other programs like Silverstack, Pomfort, Lattice, Hedge etc., but just make sure that whatever you use to offload media from your camera cards utilizes the all-important Checksum-Verify, essentially a process which checks data for errors upon transferring. The most common form is known as MD5 and basically uses a string of numbers and letters to achieve verification, though it's not important to understand the science so much as to understand that it's important that you utilize it.
Google Drive
Once again, while there are more robust, tailor-made workflow solutions for managing the massive amounts of paperwork and communications that can be generated during your production, Google Drive is still a legitimate way to share documents back and forth between team members and create spreadsheets and calendars to keep your project chugging along. And best of all...it's FREE!
Finder
I can not stress enough that dragging and dropping in Finder is NOT a legitimate way to offload media from a camera card as it does not incorporate any Checksum Verify. Use at your own peril. Once you are cloned/verified you can use Finder to create your back-up copies, though I have a better recommendation for this down below.
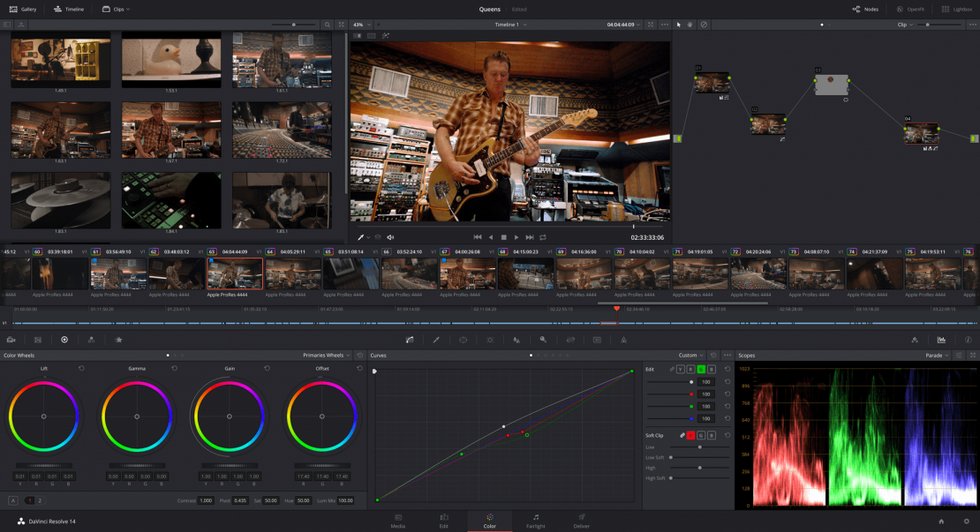 DaVinci Resolve
Equipment
With the advent of massive RAW media formats that can be 4K, 6K and 8K (12K and 16K images are coming), it is first and foremost important to have the right equipment so you can do your job in as timely a fashion as possible. It’s never fun to still be sitting on set at 4 a.m., while everyone else has been back at the hotel for a few hours, because you are waiting on footage to process. Up until relatively recently, this was unavoidable if you were on a laptop and dealing with large resolution RAW footage, but luckily technological advances in computers have made it so that while it is nice to have the most expensive toys on the block, you can certainly get a lot of jobs done with relatively modest equipment.
We went with a two computer setup and I can't stress what a great choice that was. Production shot on a Sony F55, capturing both Sony RAW 4K footage (Sony F55 Raw SQ/23.976/4096x2160) and In-Camera proxies (XAVC Intra/23.976/1920x1080) simultaneously on separate AXS and SxS memory cards. Computer 1 was essentially for our RAW Media Management and Computer 2 was for Color Management, but before we dive into the workflow let's check out the hardware specs for our set-up.
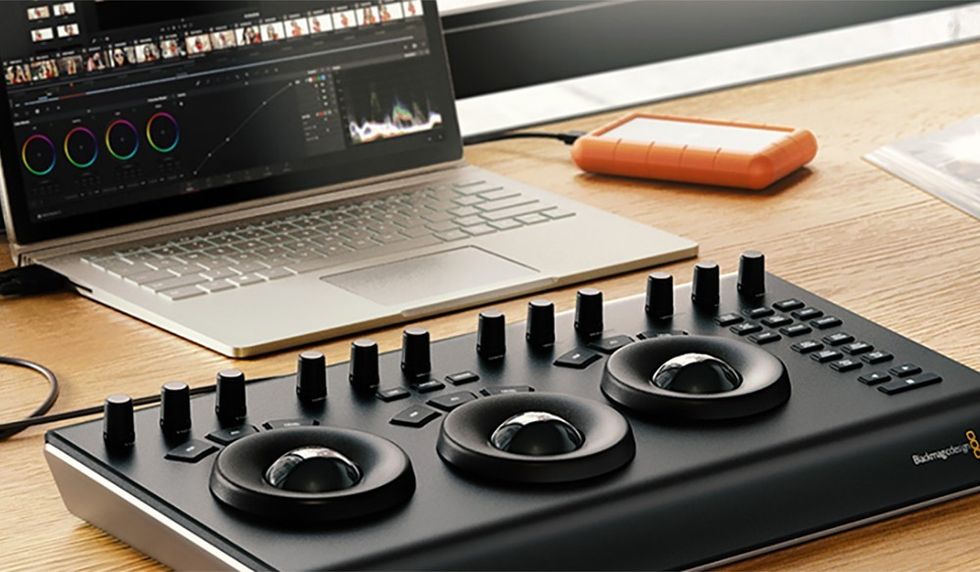 Credit: PremiumBeat
Computer 1 (RAW processing)
2018 MacBook Pro: 15-inch, 2.6 GHz i7 with 16 GB RAM and a Radeon Pro 560X graphics card*.
*It's important to understand that the 13-inch MacBook Pros do NOT come with the 560X and so are markedly different from the 15-inch MBPros. This is where these new, fancy eGPUs come in handy (which we'll get more into in a moment).
Peripheries
- Cal Digit T3: Hub for additional connectivity via Thunderbolt 3. The T3 provides power to your MacBook Pro, affords it five USB 3 ports, a display port, a gigabit ethernet, audio in/out, optical audio out (for 5.1 monitoring), an SD card reader (comes in handy for grabbing audio) and two additional Thunderbolt 3 ports.
- Blackmagic eGPU: We also had in our corner from Blackmagic, the eGPU that they developed with Apple. It gives you four USB 3 ports as well as an HDMI and two Thunderbolt 3 ports in addition to giving your USB-C compatible Mac access to an external Radeon Pro 580 GPU with 8GB of GDDR5 memory. Now in our case, we were already running the 15-inch 2018 MacBook Pro which has the dedicated Radeon Pro 560X on-board and our second MBPro wasn’t USB-C compatible so rather than greatly enhancing the main computer's processing power it simply took over the bulk of the work from the internal GPU when utilized. If we didn't have our Cal Digit T3 we could have easily utilized the eGPU for our connectivity hub as well.
A Quick Note on eGPU’s
There is a slight misconception that these eGPUs will work in tandem with your computer's internal GPU like some kind of a render farm but that is just not the case. In the image below you can clearly see the internal GPU doing all the work in the screenshot on the left while in the screenshot on the right the eGPU is doing the bulk of the work with the internal GPU adding only a small percentage of processing power. Now if we had been using the 13' 2018 MacBook Pro that would have been a different story as the 13-inch models only have the Intel Iris Plus Graphics 640 onboard (and NOT a dedicated GPU) and so the Radeon Pro 580 is a nice bump up in that case. It was fun to play around with regardless and again, had we been lacking the Cal Digit T3 we could have used the Blackmagic eGPU as our connectivity hub too.
Last but not least we had a Sony AXS Card Reader connected to this computer for the camera RAWs that we would put onto a 8TB G-RAID and then back up to two 8TB Seagate Barracuda bare drives via an OWC toaster (Thunderbolt 2) for our back-ups.
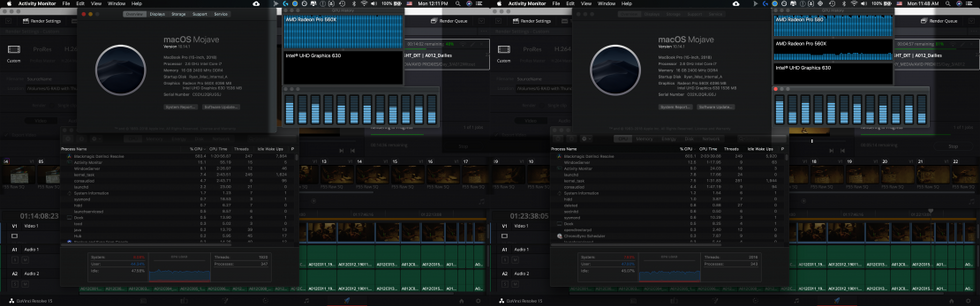 Notice the GPU history both with/without the eGPU utilized
Computer 2 (Proxies/Color):
2015 MacBook Pro: 2.7Ghz dual-core Intel Core i5 processor with 8GB RAM.
Peripheries
- Blackmagic Thunderbolt 2 Intensity Shuttle: Going HDMI out into our monitor. In our case, we were using a 65-inch, 4K Sony XBR which isn’t exactly color calibrated but was sufficient for our on-set work. If we wanted to do honest to goodness calibrated coloring on set we would have had to have brought in an actual calibrated monitor but we just didn't have that type of budget. At the very least you should try and utilize some piece of hardware (like our Blackmagic Shuttle) to get an actual video signal-- rather than just computer graphics-- which is what you get from the HDMI out on a MacBook Pro.
Lastly, Computer 2 had a Sonnet SxS Card Reader (which we needed to track down and download the driver for) with a Lacie Rugged 2TB that we were throwing the proxy dailies stringouts on to give to the director to take home with her each night to review on her laptop.

DIT Workflow
So now that we’re all set up and have discussed specs, hardware and software let’s go step-by-step through the workflow we developed for DIT on the set of CATFIGHT.
We’ll start with the main computer that was tasked with processing and managing the RAW footage first.
Computer 1
- Receive AXS card with RAWs from the camera department.
- Insert camera card into AXS card reader.
- Offload Footage In Resolve via the Clone Tool (automatic checksum verify).
- Open Resolve and navigate to the MEDIA tab on the bottom (it annoyingly default opens to the EDIT tab).
- Click on the Clone Tool on the top to open it and then click Add New Job. Set your source and destination folders by dragging and dropping them from the media browser on the left. The SOURCE will be the camera card itself and the DESTINATION will be wherever you are saving your main RAW media on your hard drive. In our case, a folder on the 8TB G-RAID.
- Click CLONE and wait for the footage to finish copying over to your hard drive.
- Double-check that all the media came over by cross-checking the clips with the camera reports from set. If there are any discrepancies you'll want to let the AD know ASAP and fix the issue before re-formatting the camera card.
- Once the media is copied over, and as long as there were no issues, go ahead and back the media up twice before you do anything else.
- There are various programs and apps to automate your backups more efficiently. I personally recommend Chronosync where you can set up Synchronizer Tasks ahead of time to sync the RAW media folder on your main drive to folders on both your back-up drives with the click of a button.
- If you don’t want to shell out any more cash you can use Finder at this point to make your copies as once the Checksum Verify is created at the initial stage in Resolve it is carried along anytime you copy the media-- even if you simply do it through Finder.
- Once the camera card is fully offloaded and backed up twice go ahead and double-check the files with the camera report one last time before handing the camera card back to the camera department to be reformatted. Once the camera card is reformatted any media on it will be gone FOREVER so it is extremely important to make sure you have properly managed and backed-up each card before giving it back to camera.
Now this might be the end of the line for a lot of shoots but as I mentioned before we were attempting to incorporate some additional elements into our workflow so at this point while waiting for the next media dump I would then offload a few RAW clips to the on-set colorist on COMPUTER 2 via a transfer drive (a Seagate 4TB with a nifty USB 3.1/C adapter) and he would get started on building a more tailored look for the footage based on input from the DP, director and the LUTs that had been applied to the proxies that had been shot in camera.
Meanwhile On Computer 2
- Receive SxS card from camera.
- Insert into card reader, open up Resolve and offload/clone the footage the same as we did the RAW footage above-- except this time your DESTINATION will be the Rugged Lacie 2TB.
- Once your proxies are cloned over, bring them into your media pool in Resolve, select them all and create a Sequence with the dailies from this batch of footage.
- Next head to the delivery page and export all as one clip. These stringouts will go on the Lacie Rugged 2TB drive to be given to the director so she can just hit play and watch an entire stringout of dailies for each camera card rather than having to open up each individual clip one at a time. It’s a good idea to label each shot/take on screen with clip name and timecode overlays in case they have notes on any specific moments this will make it easier to find later.
- Once in-camera proxies are taken care of our on-set colorist then grabs the RAW samples-- from the end of the workflow from Computer 1-- and starts building looks based on proxy LUTs, feedback from DP, director etc.
- Once finished the on-set colorist spits a LUT out and Airdrops it over to Computer 1 where it will be applied to all the corresponding RAW clips-- and its from these that we will create our MXF editing proxies from-- with a more refined look than the in-camera proxies, whose LUTs were created ahead of time.
- Also in the case of the F55 we had tested using the in-camera proxies to edit with directly in Avid (to avoid needing to transcode all over again) but Avid is buggy and wouldn't allow it. I have heard the same issue exists with certain in-camera proxies created on some RED cameras as well.
- It was still worthwhile to record the in-camera proxies though because the MXF editing proxies sometimes took overnight to finish transcoding so by shooting proxies in-camera as well both director and DP could look at dailies sooner than later without having to have the RAW footage in front of them-- or wait for the MXF proxies to be transcoded.
At this point, these MXF Proxies would be handed over to our on-set editor, who was also the lead editor on the project bringing these into Avid and start cutting. Now, since we didn't have an AE (Assistant Editor) on set to sync/organize, any edits created on-set would most likely need to be re-done after that Assistant Editing work took place after wrap. However, it was still worth it to incorporate into the workflow for us because a.) the director was able to see scenes cut together while the sets, costumes, actors, etc. were still available and so could better plan their shot lists each day as well as grab immediate pick-ups and b.) they shot a number of scenes MOS (no sync sound) and so in those cases you could potentially keep the temp edits done on set moving forward as there would be no production sound to sync to them.
Check, Double-Check and Triple Check
All along the way, we were constantly cross-checking with various things in order to make sure no media was lost or corrupt. I've included a sample DIT checklist you can download below but you should essentially be tracking how much media is on the card vs. how much made it over to the hard drive. We had several instances where there was a discrepancy here, hence pointing to the fact that not all the shots made it over. Upon further checking, we discovered a corrupt card that we then took out of the rotation until it could be replaced with a new one. We were also checking shot count on the disk with the shot count from the script supervisor and camera logs from camera department and sound rolls, as well as double-checking the RAW clips on Computer 1 with the In-Camera Proxies on Computer 2 while we were offloading. If a discrepancy was spotted anywhere, we would call the 2nd AD, Robert, and he would get us talking to whoever we needed to as soon as possible to iron out the issue. 99% of the times it's a clerical issue, but that one time it's an actual human error that can be caught by triple-checking something you're going to want to catch it!
End Of The Day
Last but not least, we would lock the main drive up in the production office on set, I would take one of the backup drives home and give the 2nd back up to our rock-star Producer, Kerstin. Making a back-up is only about 30% useful if you are going to store it alongside all the other back-ups as it does protect against hard drive failure at least, but the real fear is fire, flood, theft, act of God, etc. So, split those backups up and always have at least 3 versions of all RAW media at all times or else it isn't really backed up!
My backups always go in my fire-proof/water-proof safe at home until I bring them back to set the following day. At end of shoot, I'll give all 3 drives (main and 2 back-ups) to Production along with any camera, sound, script reports that had been handed over to me during the course of the shoot.
Then shut down your system, pack it on up, don't skimp on proper cord wrapping, and make sure you turn the lights off on the way out.
Final Words
What we've just explored here is just one way to manage media and image integrity on one shoot. It's important to understand that there are so many different cameras, codecs, software and hardware out there that no two gigs will ever look the same for a DIT and hopefully this article has given you a glimpse into some of the different workflow elements you can incorporate into your next DIT gig, no matter how big or small the shoot is.