As Moore's Law continues to make technology more accessible to the masses, it is time to start exploring what it takes to build your own grading suite at home or in your office. Before reading the rest of this post, I recommend that you check out How To Get The Most Out Of CS6, DaVinci, & Your Mac Pro, as this article continues to build on what I've outlined. So let's get started shall we?
First off, I think it is important to acknowledge that this grading suite does not replace a high end professional suite. Having spent time in those suites, nothing replaces the opportunity to work with an experienced and talented colorist - they are worth every penny. And while I would LOVE to be able to work side by side with a colorist to finish every project, the reality is that the budget just doesn't exist for every single project. More and more these days, I find the need to be grading the footage myself, so that I can be sure that the end results are not screwed up by someone in the production office who thinks they know what they are doing. They may grade an image using default presets and call it good enough. My solution will get you 80% of the way there, for about 20% of the cost (minus the years of grading experience).
The Goals:
The first thing to do when designing the layout out of any room is to clearly define the goals you want to accomplish. In the room I have dubbed "The Viewing Room" in my house, my goals were threefold: 1. Have a tightly controlled room that I could grade my work in, 2. Be able to view 10-bit content as I grade, and 3. Be able to watch blu-ray's and content from my computer (web pages, photoshop, etc.) directly on my 50" Plasma.
The Environment:
- Control The Light.
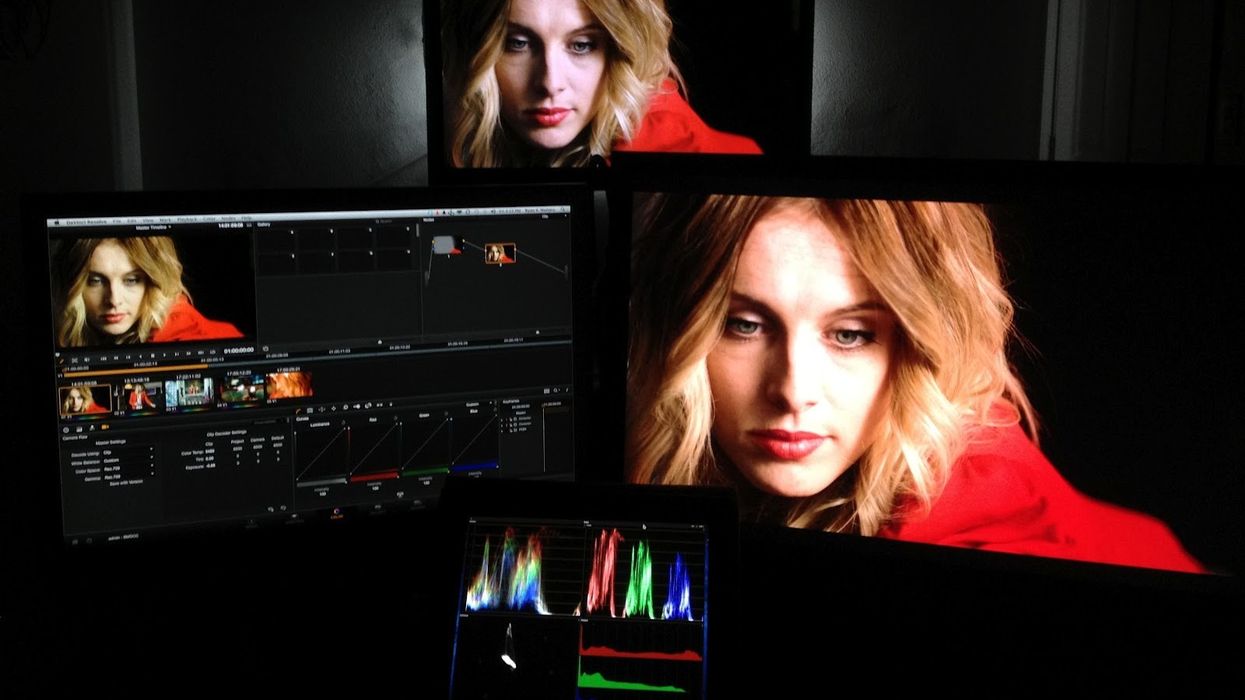
This is the first and most important thing that you need to take care of when setting up your suite. If you have stray light hitting your screens, or the wrong color temperature light lighting the room, it will hamper your ability to properly grade and view your content. To help control the light in my room, I placed the darkest window tinting I could buy from Home Depot on the windows (which are behind me in the picture above). I then hung a black curtain over the window, and on top of that I hung black blackout curtains. When I close the curtains in this room it is pitch black even in the late afternoon when the sun shines directly in the windows. Step one complete. :)
- Make Everything Neutral In Color.
The worst thing you can do in your grading suite is to have colored walls. Our optical system is amazing adaptive- it has been designed so that when we walk from the outside 5600k color temperature light into the 3200k light of most interiors we never notice the color shift- everything retains its proper color. This ability is not so great when it comes time to grade footage in a colored room. If your walls are yellow, for example, your eyes will adjust to the abundance of yellow, and you'll be adding in extra yellow to your graded image to compensate. So unless you want people to look jaundice in appearance, it is best to go completely neutral.
The color of your walls is going to depend on your viewing system- if you are using a projector, then you are going to want to keep your walls black. If you are using a Plasma or an LCD, then you are going to need to use 18% Neutral Gray. Now you may be thinking to yourself, I can just go down to Home Depot (or somewhere similar) and have them mix up some gray paint for me. Unfortunately, this isn't going to work. The problem with Home Depot paint all comes down to quality control. No matter how hard they try they will not be able to get you the correct 18% gray color. Batch to batch the colors can shift, and even if you do get a large enough batch it will have a strong color cast to it. I have seen 18% gray paint made by Home Depot by taking a sample of the real stuff and it failed - it had a blue cast to it. So unless you want your footage to have an extra amount of blue in the grade, just get the real stuff. eCinema Systems is where I bought my paint from.
When it comes time to furnish the room, keep it neutral/desaturated, and keep it simple. I've gone with all black furniture.
- Use The Correct Light & Light Levels.
It is just as important to control the kind of light you bring in to your suite as it is to keep unwanted light out. NEVER under any circumstance have mixed color temperature light while grading. Any fixture that you bring in to the room should conform to the D65 standard. Or, in other words, it should be 6500k in color temperature. And they should have an CRI of 90 or higher. Sylvania offers a line of florescent bulbs perfect for general room ambience. Any ambient light that you place in the room, should not produce glare on the screen, or wash it out, as that defeats the whole purpose of a grading suite. :) The light levels of the client area should be 2 - 10 ft-L as recommended by SMPTE.
If you are using a Plasma or LCD for your client/viewing monitor, it needs to have the appropriate amount of back light. I recommend buying the Ideal-Lume lights from CinemaQuest. They are easy to install behind the screen, and when you buy the optional power strip, you can have the back lights turn on and off with the TV. (This is VERY convenient, as you don't have to fuss with turning the lights on and off separately). To conform to the SMPTE standards for a grading suite, the monitor should be calibrated to 35 ft-L of light output. At this level, the surround light should put out 3.5 ft-L. (10%, or less, of the light output). Another way to approach this is to make sure that the light level is not greater than 10-25% of the brightness of the monitor displaying pure white. (You can use a light meter, like the Sekonic 758 to help you dial in these values).
The SMPTE recommendations for the workspace of the colorist are that it should be lit to 3-4 ft-L, which will be just enough to see your control surface. And remember to keep the light off of the monitors. :)
- Viewing Distance.
It is also important to place the monitor at the correct viewing distance in order to allow yourself the ability to see every nuance in the image as you grade. The SMPTE recommendations for viewing distance is 4-6 times the vertical height of the monitors viewable screen. Sony has updated this recommendation for HD images to 3 times the vertical height. So for your typical 24" monitor you should be 3' away, and for your 50" plasma you should be about 6.25' away.
- Calibration
Calibrating all of your monitors will be one of the most challenging tasks. At least it has been for me ... The first approach I took was using a Spyder Elite system. Unfortunately, I was never able to get all of my monitors to match, which was frustrating and disappointing as I had paid for the higher end model. I have since gone back to calibrating by eye using charts and filters provided in HD Basics. While this is a much more crude method, I have been able to get my screens to match. (Not perfectly, but a lot closer than with the Spyder). I'm still looking into more accurate ways to calibrate my monitors. My research has lead me to the X-rite i1Display Pro. If it works, I'll be sure to post here on my blog about it. :)
The Gear:
50" Panasonic Plasma
Plasma is the only way to go, in my opinion, when it comes to large screens that faithfully reproduce black. And for a consumer product, the Panasonic line has the best color reproduction of them all. So while this does not replace a professional quality screen, I think it is the best bang for the buck currently out there.
24" ASUS ProArt LCD (10-bit)
This is the most affordable 10 bit monitor I have found to date, and it is what I recommend getting if you don't have the coin for the more accurate DreamColor. So if your dollar is stretched thin, get the ASUS, but if you have the money, go with the DreamColor. (I'm currently saving my pennies to get the DreamColor, and I'm using the ASUS).
20" Apple Cinema Display
Down and dirty and cheap - that's how I like my GUI monitors. :) Nothing special here- just something that works.
iPad 3
Reports suggest that the iPad 3's screen is pretty close to being accurately calibrated, which excites me. :) Regardless of if it is 100% true or not, I have found myself using it more and more and an additional screen to throw Vector Scopes, Waveforms, and other miscellaneous windows on to using AirDisplay. I also view my final grade on the iPad before sending it off, as even though it may not be 100% correct, more and more content gets viewed on devices like these, so checking it on the iPad gives me that extra confidence boost.
Mac Pro
Pick the flavor that fits your budget and processing needs. I'm currently running a 2008 model with 2x 2.8 GHz Quad Cores and 12GB of RAM. And with my setup, I'm able to get real time playback of 5k and 4k Red Footage at 1/2 debayer in Premiere- which is more then adequate for my editing needs.
Blackmagic Design Intensity Pro
As of this writing, this card is the only affordable way to get a 10 bit signal out of the Mac. To get this signal, you have to use HDMI, as the DVI spec does not support 10 bit. This card has worked great with DaVinci, Premiere, Final Cut, & Color. Unfortunately, it does not act like a graphics card in that it does not send out a desktop feed. It only sends out a monitor feed when using one of the aforementioned applications.
Sonnet Temp eSATA Card
When I bought this, eSATA III was the fastest thing out there. It is what I have been using to archive my footage with. (More on archiving in a future post). Now that Thunderbolt has come out, as well as 6G eSATA, I'll be exploring my options to replace this card. But to date, it has been the fastest and most reliable card I have used.
Powered HDMI Splitter
This splitter allows me to get my 10 bit signal to both my ProArt display and to my Plasma. While I seriously doubt that my consumer plasma sees the 10-bit signal as 10-bit, at least I can see the output of the Intensity card on the big screen. :)
Tripp Lite DVI Splitter
I tried several of these out, and this one has worked the best for me. Every once in a while when the system starts up, it will default to 720p instead of 1080p, and I haven't figured out why. So I have to restart to fix the problem. But in a years time, this has only happened twice.
DVI to HDMI Cable
Do I really need to explain this? ;)
HDMI Switcher
This controls whether I see my computer screen or the feed from my Intensity Pro card on my plasma. My wife and I watch all of our TV from the internet via the networks sites. (We canceled our TV service over 7 years ago). So it was important to me to be able to view this content on the plasma. :)
Sony Receiver
This is where I have all of my media devices routed through- Mac Mini, AppleTV, Blu-Ray, and my MacPro. It is my central hub for controlling the video and audio path of all of my devices. :)
IR Repeater
Hidden just above the Plasma is this little IR repeater. This repeater allows me to hide everything (AppleTV, Mac Mini, Blu-Ray, etc) in the closet so that the viewing area is clean and clutter free. (And even more importantly, free from blinking lights.)

The Setup:
Here is how I have my system configured and routed. This system has been working for me for the past year with great results. But I'm sure it will continue to evolve as technology changes. (Click to see the original).
The Experience:
No matter how good or affordable the technology is, it is only as good as the people running it. And unfortunately there is no way to shortcut the process of gaining experience - that just takes time. However, I have come across several helpful tools that have really helped me increase my skills in color grading. So while I wouldn't dare to call myself a colorist, I do have a lot more skill and experience now to tackle the projects that can't afford a legitimate colorist. If you want to increase your skill set, I HIGHLY recommend checking out the resources below.
Off To The Races:
Hopefully this has given you good footing to jump off from as you set out to create your own grading suite. This setup should allow you to get the most out of whatever camera system's footage you end up grading. :)
Links:
- Books:
Color Correction Handbook (Print) / Kindle Version
The Art & Technique Of Digital Color Correction (Print Only) - Online Training:
Color Grading Central (Always available, very informative, easy to understand)
FX's Guide PHD (Online downloadable term based classes, highly interactive)
This post originally appeared on Ryan's Blog.
Ryan E. Walters is an award-winning Oregon-based cinematographer. His work has allowed him the opportunity to travel worldwide in the pursuit of telling stories that are visually compelling. His experience includes feature films, documentaries, commercials, and shooting for Comcast, TLC, Oxygen, and the Discovery Channel.
- Stay Within Avid for Color with New Baselight Plugin ›
- Painting Footage: How Viable is Microsoft Surface for Color Grading? ›
- Color Grading 101 ›
- The Ending of 'Blink Twice' Explained | No Film School ›

 'Sunfish (& Other Stories on Green Lake)'CREDIT: JWH Films


