The need to quickly shoot, edit, color, and deliver short pieces of content has increased dramatically over the past five years, and so the ability to finish your edit in the same non-linear editing (NLE) system you started it in is becoming increasingly desirable.
DaVinci Resolve has been the go-to program for color needs for a while, but it may be more of a hassle than it's worth to "roundtrip out" from your editing program to color a 60-second video. While many turned their backs on FCPX upon its initial release, the software has constantly been updated over the years in an attempt to make it the one-and-only choice for both editing and coloring.
The below video tutorial dives into the new and improved color functions/features in FCPX's 10.4 update. Let's take a look and see if X has what it takes to get the color job done.
Color Wheels at Last
When FCPX was initially released, many people were taken aback by the drastic switch to the Magnetic Timeline. This "trackless" way of working with your footage in a timeline (or a "project," as FCPX calls it) was too much of a departure from the norm. Many editors never gave it a fair shake.
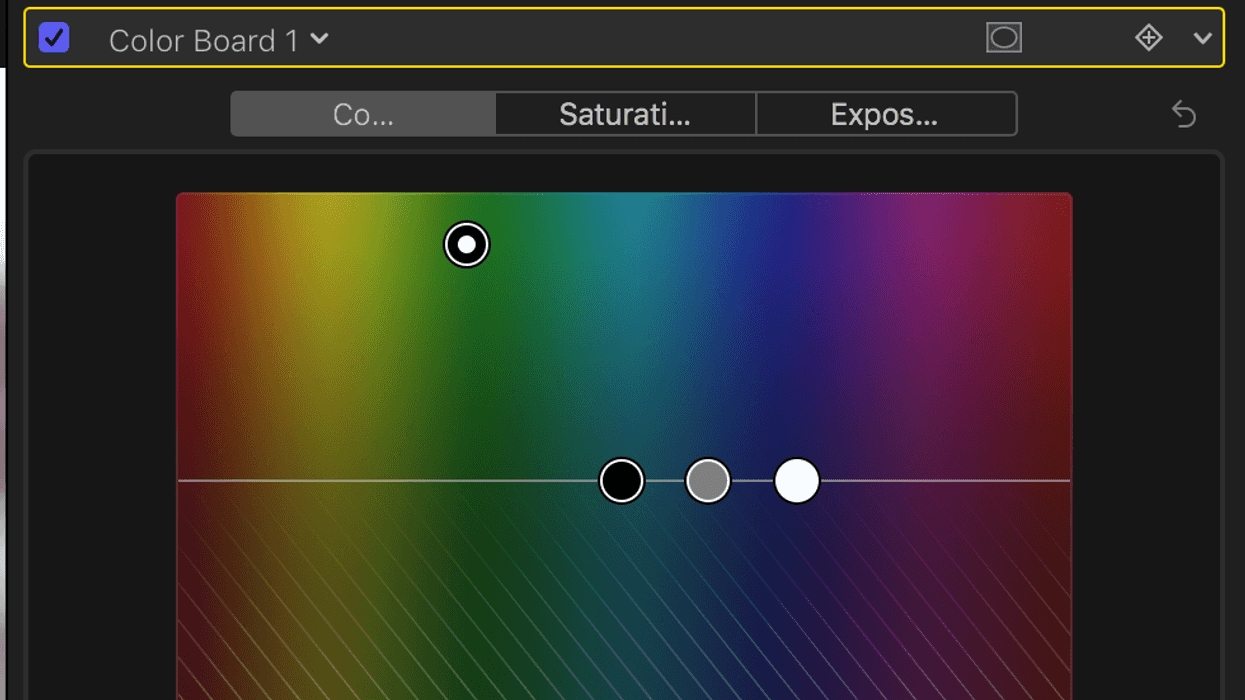
To make matters worse, the initial rollout of FCPX decided to do away with the ubiquitous Color Wheels in exchange for the Color Board (which, if we're being honest, everyone hated). Well, Apple has finally rectified this oversight years later and given us not just Color Wheels but also Color Curves and Hue/Saturation Curves to boot! Anyone familiar with the more standard color tools from Resolve to Lumetri will finally feel right at home in FCPX.
Wheels
Although the design of the wheels are different from what you might be used to, the basic functionality of the wheels is the same as Color Wheels in any other program. You have a draggable circle to push/pull towards or away from your color of choice, with a saturation handle on the left and a brightness handle on the right. Directly below, you have your standard Temperature, Tint, and Hue controls, as well as sliders.
FCPX also has the ability to use a picker/qualifier to identify, isolate, and manipulate specific ranges of color, luma, and saturation.
Below the wheels themselves drop-down access to sliders for the individual RGB values, saturation, and brightness for Master, Shadows, Midtones, and Highlights. And yes, part of me likes that they name them more obviously (as compared to Resolve's Lift, Gamma, Gain, Offset).
Color Curves
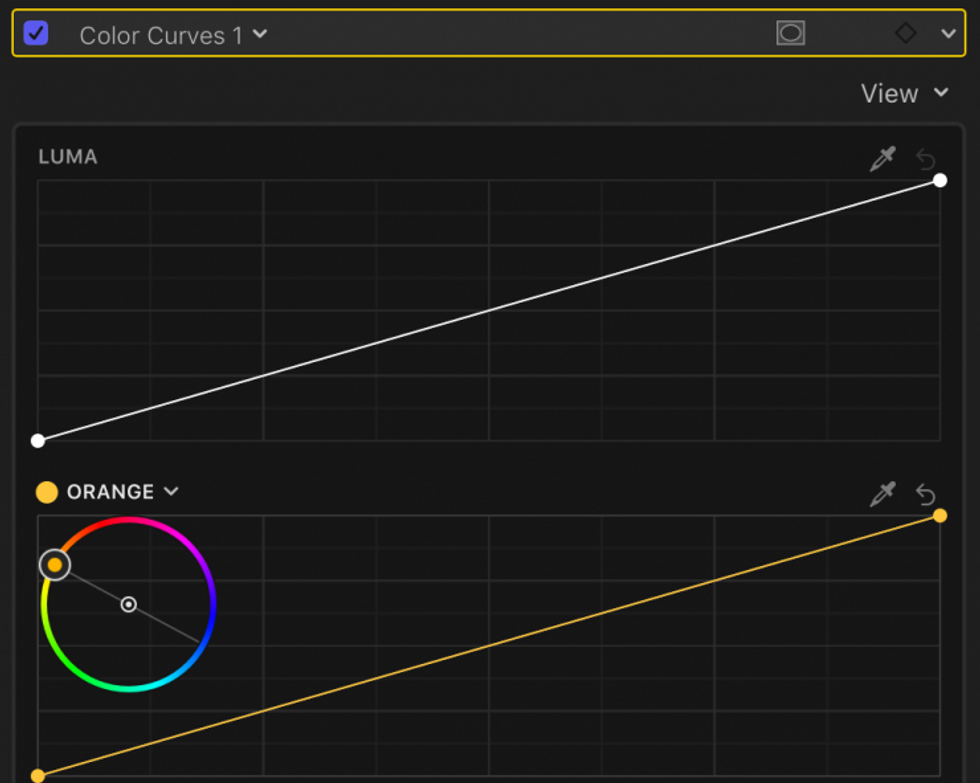
FCPX also has the ability to use a picker/qualifier to identify, isolate, and manipulate specific ranges of color, luma, and saturation in your Color Curves and Hue/Saturation Curves. For anyone who works in Resolve, this is akin to the qualifier in that program or the color picker in Photoshop. While the modifiers on this method of selection are not as robust as it is in Resolve—you don't have options like 'blur radius' or 'in/our ratio,' for instance—it's efficient enough to get basic jobs done that you would have previously had to go to Resolve for.
The curves will automatically change to whichever color you select with the picker/qualifier.
Also of note is that you're not limited to RGB curves in FCPX but rather the whole spectrum of colors including Pink, Magenta, Indigo, Blue, Aqua, Cyan, Sea Foam, Green, Lime, Yellow, Orange, and Red. I may not always understand their naming system, but at least they give you plenty of options. Don't worry trying to figure out which color you are trying to isolate, as the curves will automatically change to whichever color you select with the picker/qualifier.
Color and Shape Masks
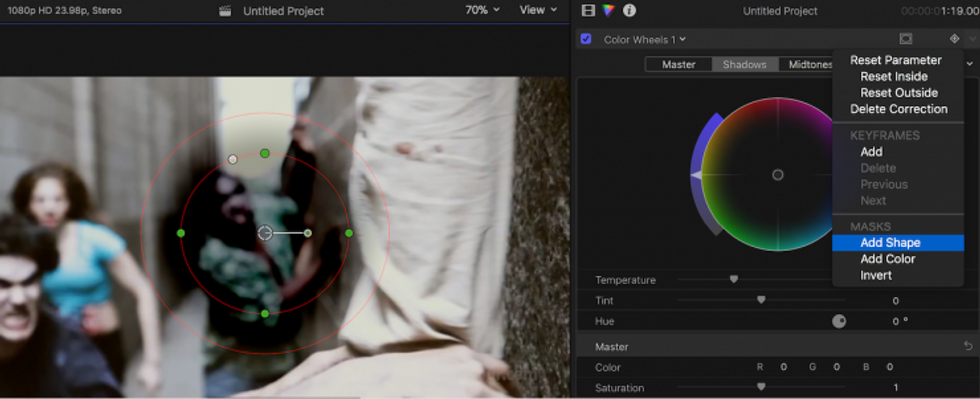
Similar to 'windows' in DaVinci Resolve, FCPX has both color and shape masks that you can combine in various ways to get to your desired selection. The color mask is a quick and easy way to isolate a green screen and do some basic compositing in FCPX.
Once again, you don't have as much manipulative control over these masks as you do in something like Resolve or After Effects, but if the task is simple enough, you don't have to spend the time delivering it to VFX; you can just take care of it right inside X.
FCPX has added a manual white balance function alongside its already existing auto-white balance.
LUTs
In FCPX, you can now add camera LUTs to source clips, custom creative LUTs to your edit, and have the ability to live-preview a look simply by scrolling over the Color Preset in the effects panel with a clip active in the viewer (rather than needing to add the LUT to the clip). It's just a tiny feature but it makes testing out various looks a little easier.
Auto/Manual White Balance
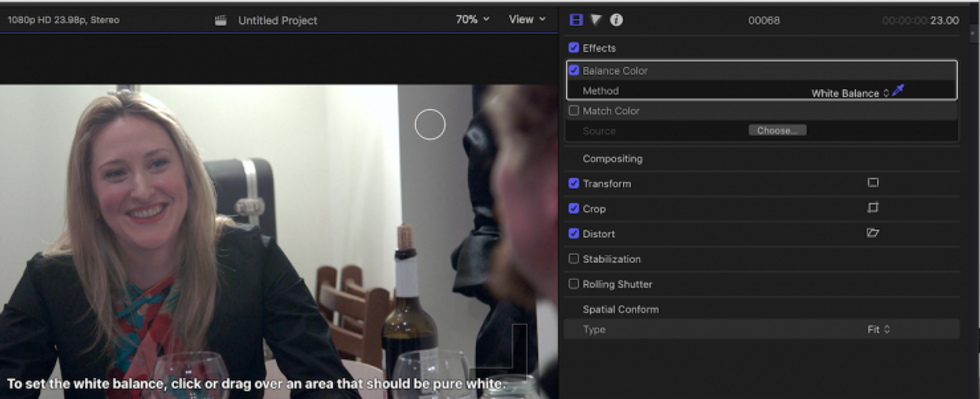
Last but not least, FCPX has added a manual white balance function alongside its already existing auto-white balance (or 'Balance Color,' as its called in FCPX). While you won't want to use an algorithm to color balance your image, it could be at least a good place to start before you begin refining the balance and adding a "look" beyond that.
I've found that it works remarkably well in most situations, and for footage that isn't sacred (ie. a quick social with a fast turn-around shot with an iPhone or GoPro), it may be quicker to use the Color Balance function rather than to do it manually. Don't be a hero unless you need to!
So there you have it, folks. Next time you're on a quick turnaround and need to do a little color work before you deliver, you might want to consider using FCPX.


