This is a guest post by Alexander Fox, founder of CrewOfOne.
Trying to sort out the best way to handle audio on a microbudget DSLR shoot can be a real challenge. Ideally, you’d hire a professional audio operator with a high-end field mixer who would adjust microphone levels on the fly, and record all the audio to a hard drive. Unfortunately, for every one of those shoots I get, I have ten one-man-band shoots. If you’re in a similar situation, you may be interested in the DSLR audio system I’ve developed:
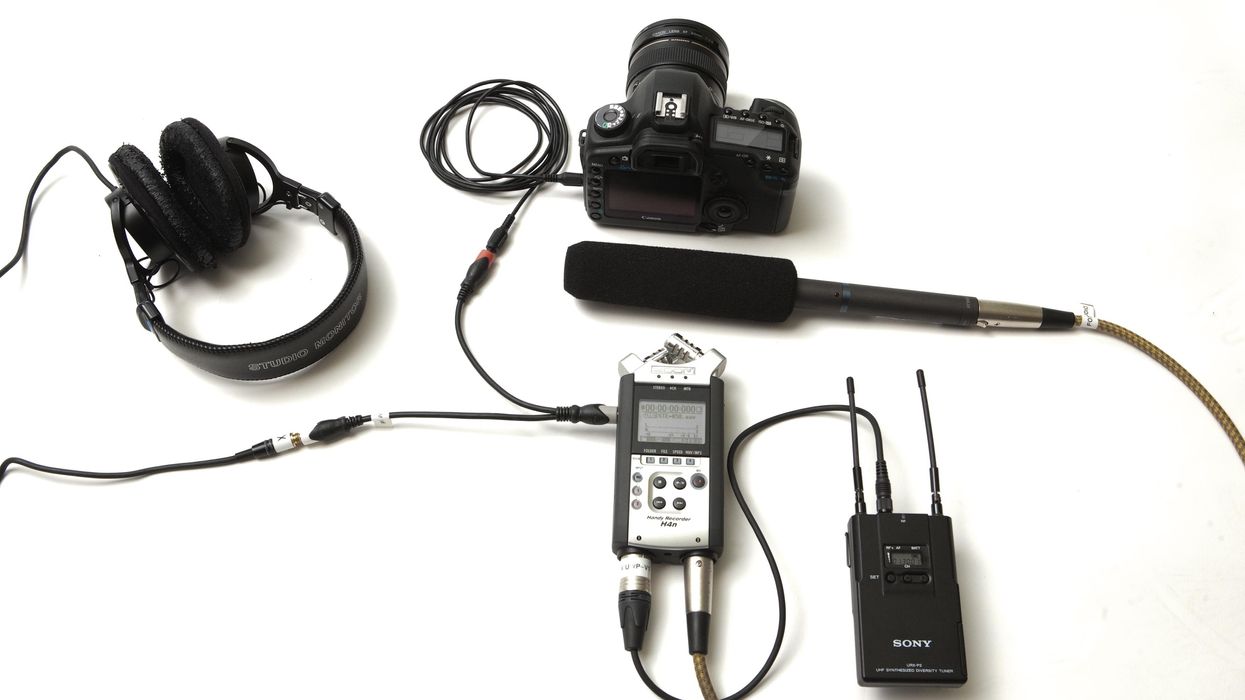
1) I run the audio source (a shotgun mic and/or a wireless mic receiver) directly into a digital audio recorder, and set the record levels in the recorder to give me a decent signal/noise ratio (leave yourself a lot of headroom). Since you’ll be using the same mic and recorder for the whole shoot, do a test before you leave to determine the proper settings. At the beginning of each interview, start the recorder, and don’t stop it until you’ve finished the interview, even if you start and stop the DSLR several times. By the way, I use a Zoom H4N, but there are a lot of audio recorders on the market, so it’s not the only game in town. Just be aware that the Zoom is one of very few that allows for XLR inputs.
2) Use a headphone splitter (“doubler”) to give you two headphone jacks out of the recorder. You can get this at Kmart for three dollars. Be sure you’re getting something that says “share your music player with another listener” or something to that effect. You do NOT want to get something that splits the audio signal into left/right, you just want something that turns one jack into two. Here are a couple examples.
In case the photo above is confusing, here’s a simplified diagram. If you’re using a shotgun mic, just plug it directly into the audio recorder.
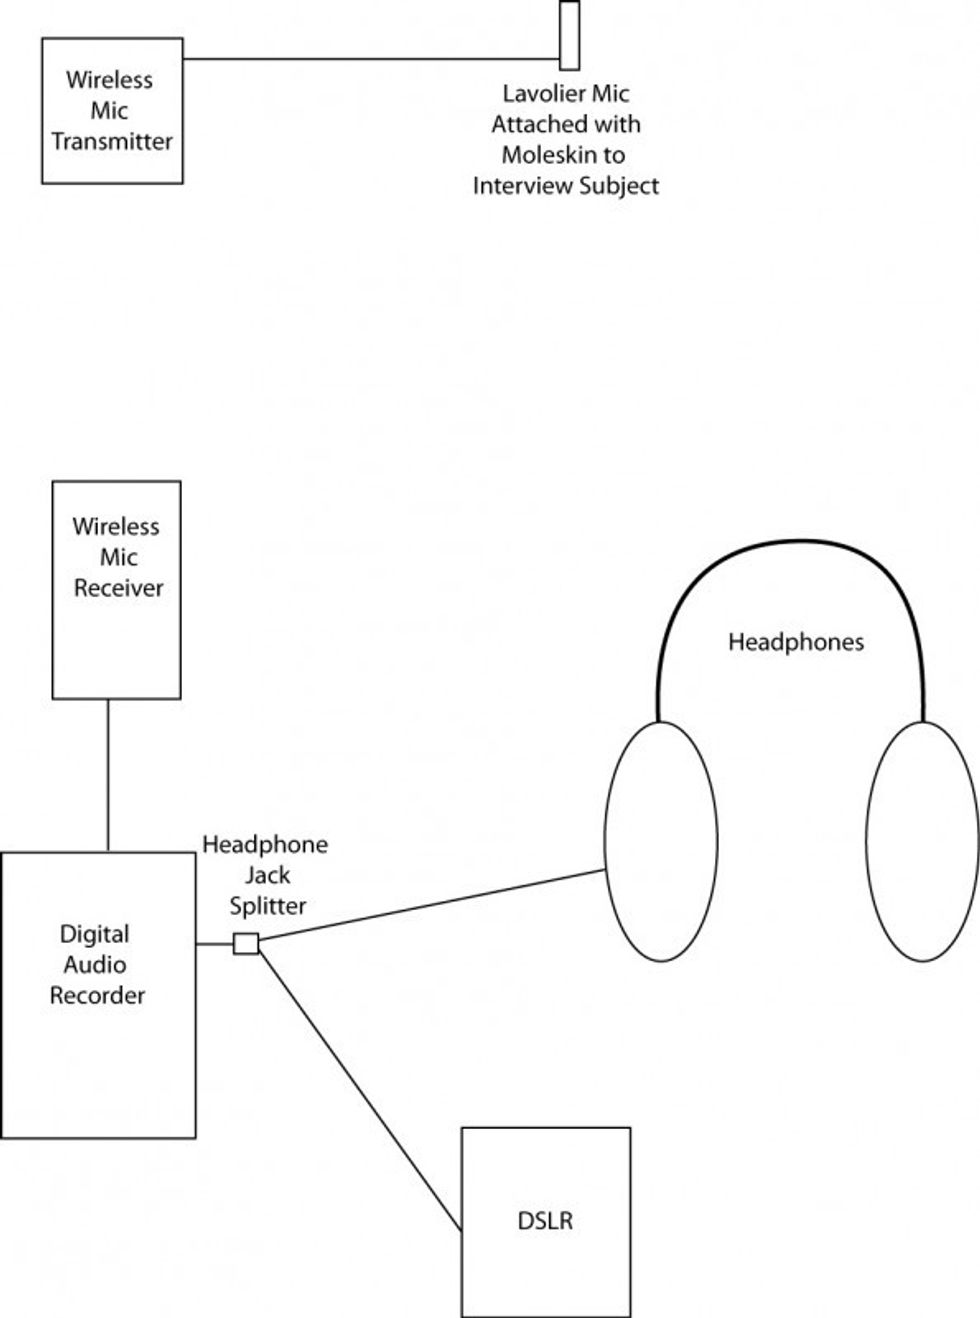
3) Use one of the headphone jacks for your headphones, so that you can monitor the audio.
4) Run a cord from the other headphone jack into your DSLR. Since you need to stay light and move fast, don’t worry about using a Juicedlink or field mixer … This recording will be strictly a backup, in case something happens to the recorder (e.g. a battery dies in the middle of an interview and you lose the file you were recording). Just set the DSLR level manually (when you do your initial level settings test) to a setting that corresponds to the level you’re sending from the recorder. Keep in mind that the headphone volume on the recorder will determine the signal level being sent to the DSLR.
5) When you get ready to edit, use the Pluraleyes plugin to sync up the DSLR footage with the files from your recorder. If you took my advice and let the recorder roll for each interview, you’ll wind up with easy-to-edit sequences based on each audio file. Because the audio going to the DSLR was the same as the audio on the recorder, Pluraleyes should be able to sync up the files with 100% accuracy.
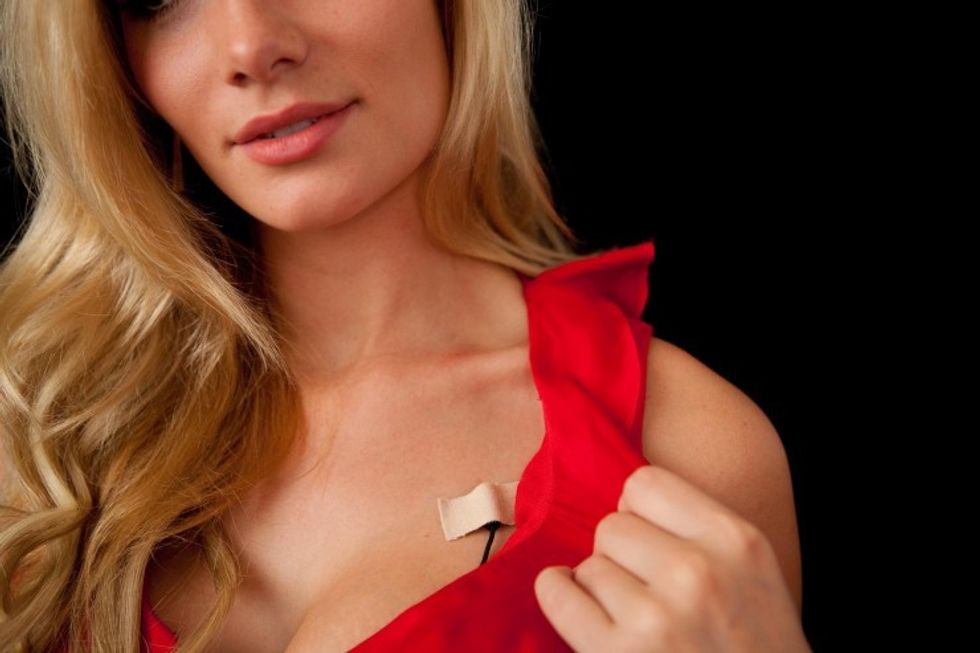
Oh, one more tip … Instead of messing with lav clips, which will undoubtedly get lost, use “moleskin” (available in the foot-care section of any pharmacy) to stick the lav onto the chest of inside the clothing of each interview subject:
By the way, if I may be allowed a shameless plug, this information (some of which is also contained in the audio chapter of The DSLR Cinematography Guide on this site) -– along with much, much more – is covered in greater detail in my eBook, “Make Movies Without Money,” available right here.
 Alexander Fox graduated from the Savannah College of Art and Design in 1999. He is a commercial director and cinematographer, and the founder of CrewOfOne (where this post originally appeared). He tweets at @CrewOfOne.


