25 Tips & Tricks to Master Your After Effects Workflow
With these 25 tips, tricks, and shortcuts, you'll be navigating Adobe After Effects like a pro.
The world of motion graphics can be a bit daunting if you’re just getting started. The shortcuts listed below are geared to help you become more comfortable working in the wonderful world of Adobe After Effects. These tips and tricks focus on a wide range of topics—learn how to more efficiently navigate the workspace, work with keyframes, customize the interface, and properly handle layers. Let’s get started.
1. IBON
If you’re working with a layer that is shorter than the timeline, this combination of shortcuts will quickly crop the length of the timeline to perfectly fit your layer. Simply select the layer and then press I, B, O, and N, in that order. The I shortcut key takes you to the In point of the layer, B sets the beginning point of the composition, O takes you to the Out point of the layer, and N sets the ending of the composition.
2. Maximize panel (`)
With all of the panels and tools available, the After Effects interface can quickly become quite busy. Use the grave accent key to quickly bring a panel to full screen. After Effects will maximize whatever panel your mouse is currently positioned over.
3. Zoom in/out on composition (, .)
For years, I would use the Cmd/Ctrl with +/- to zoom in and out of the composition panel, but you can quickly use comma and period to do the same thing.
4. Zoom to single-frame units (;)
Sometimes when working on complex projects, you need to view single frames in the timeline. Press the semicolon key to quickly zoom all the way into single-frame units. Press again to zoom back out.
5. Scroll to current time in timeline (D)
If you ever find yourself navigating through the timeline and you suddenly notice that you can’t see the playhead anymore, never fear. Press the D key to immediately jump back and center the playhead in your timeline.
6. Center in view
Trying to align a layer when you don’t know the alignment tools can be quite frustrating. If you want to center a layer in the composition panel, grab the layer and select Layer > Transform > Center in View.
7. Pan behind (Y)
If you don’t want to center the anchor point in your layer’s content, you can manually move it via the Pan Behind tool.
8. Snap anchor point (Cmd/Ctrl)
When moving the anchor point with the Pan Behind tool, you can enable snapping by holding the Command or Control key. The anchor point will snap to the X and Y axes, as well as the edge of the layer.
9. Center anchor point in layer
When you center a layer in view, the layer will center via its anchor point. If the anchor point isn’t where you want it, you can quickly center it in your layer by going to Layer > Transform > Center Anchor Point in Layer Content.
10. Duplicate a clip (Cmd/Ctrl+D)
You’ll often find yourself duplicating clips in the timeline, so it’s helpful to use the Cmd/Ctrl+D shortcut.
11. Parent a layer
When you want a layer to copy the actions of another layer, you can parent one to the other. Use the tools under the parent column of the timeline to connect layers via a pick whip or a drop-down menu.
12. Split a clip (Shift+Cmd/Ctrl+D)
If you want to split a clip instead of duplicating it, simply hold the shift key as you press Cmd/Ctrl+D.
13. Open effect controls (F3)
Working in After Effects means working with a lot of effects. You can launch the Effect Controls panel for a layer just by pressing the F3 key when the layer is selected.
14. Show properties with keyframes (U)
To view all of a layer’s properties that have keyframes, press the U key. If you don’t have any layer selected, After Effects will show you the properties with keyframes of all layers.
15. Change keyframe interpolation (F9 or Cmd/Ctrl+click)
Quickly change the interpolation of a selected keyframe by pressing the F9 key. Or you can hold the Cmd key and click the keyframe to cycle between various interpolation modes.
16. Toggle between switches and modes columns (F4)
The Toggle Switches/Modes button is located at the bottom of the timeline panel. It allows you to view different tools when working with layers in the timeline panel. Use the F4 shortcut key to quickly toggle between the two views.
17. Customize timeline columns
You can customize your timeline by specifying which columns you want to display in the timeline. To do this, right or Ctrl+click anywhere on the column header and then check what you want to be displayed in the Columns drop-down menu.
18. Set markers (Shift+0-9)
With the timeline selected, you can quickly add numbered markers at the playhead by holding shift and pressing any numeric key desired.
19. Apply animation presets
If you don’t have time to create even the simplest of animations, you can utilize animation presets. Select the layer and go to Animation > Browse Presets. This action will launch Adobe Bridge, where you can preview a number of different presets. To apply one, simply double-click.
20. Precompose layers (Cmd/Ctrl+Shift+C)
If you’re working in a timeline and you want to nest two or more layers in their own timeline, grab the layers and select Layer > Precompose or use keyboard shortcut Cmd/Ctrl+Shift+C.
21. View a flowchart
Working with a lot of precomps can quickly lead to confusion. To get a bird’s eye view of your project, press the Tab key to view a mini flowchart. To view a full flowchart, select the Composition Flowchart button at the bottom of the composition panel.
22. Create a null object
Null objects are especially handy when used in conjunction with parenting. If you don’t want to add keyframes to a layer, simply create and add keyframes to a null object, and then parent the corresponding layers to the object. To create a null object go to Layer > New > Null Object.
23. Take and show snapshots (Shift + F5-F8)
When working with multiple compositions that you need to compare, use snapshots. You can take a snapshot by holding shift and pressing any of the F5-F8 keys. To view any of these snapshots later simply press the corresponding F key.
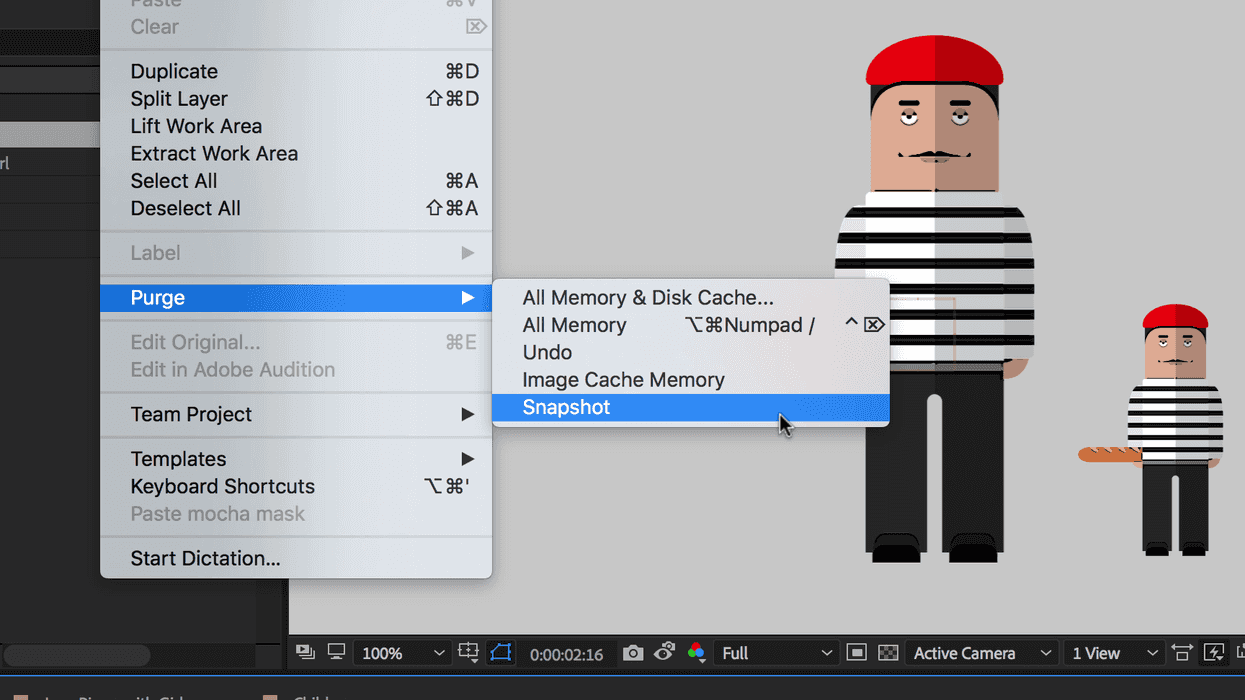
24. Purge memory
If you’re ever having problems with After Effects such as crashing and stalling, give this tip a try. Go to Edit > Purge and select if you want to purge everything or something specific.
25. Keyboard shortcut map
Adobe’s latest release of After Effects now includes a Keyboard Shortcut map, a wonderful new way to visually reference keyboard shortcuts. To open it up go to Edit > Keyboard Shortcuts.
What are your favorite After Effects tips and tricks? Share them with us in the comment section!