Working in After Effects' 3D workspace requires some knowledge. Light and shadow aside, the default 3D camera tool comes with extensive controls. If you want to simply add a quick depth of field look to your project, get ready to set aside some time to fiddle with camera attributes.
That's why the fellas over at Plugin Everything recently created HandyCam, an AE plugin that simplifies the process of working with cameras. Let's take a closer look at how it works.
Select a Target
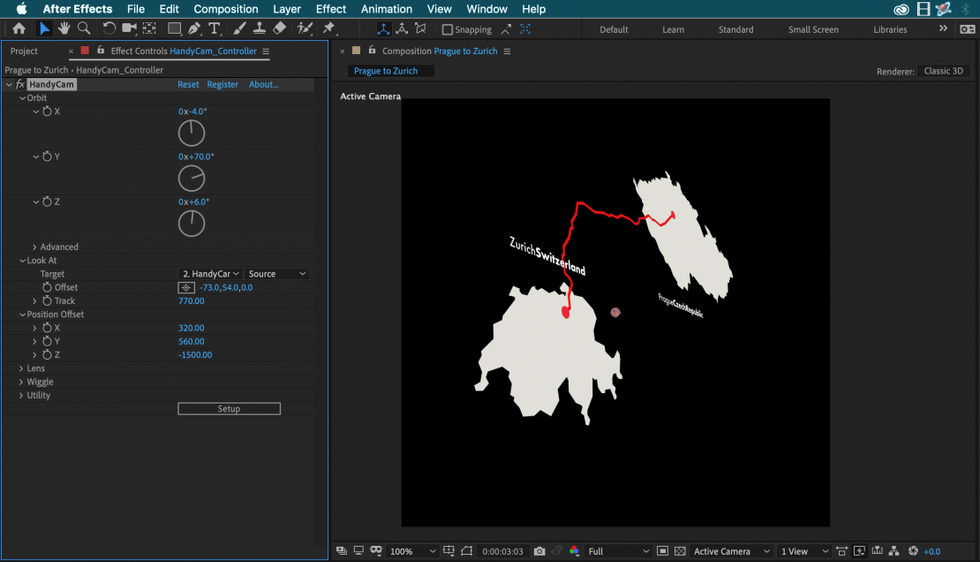
The "Look At" section allows me to specify where the camera is facing. I can target any layer via the Target dropdown menu. When selecting another layer, it’s important to understand that the camera will point at the layer’s anchor point. This means that I might need to reposition the anchor point to the center via Layer > Transform > Center Anchor Point in Layer Content.
I’ll fine-tune the target in frame via the Offset controls.
Track allows me to move the camera inward and outward in relation to the direction it is facing. The target nor the camera will orbit or turn while the track is performed, giving me tighter control over what’s in-frame and how it looks in-frame.

Position the Camera
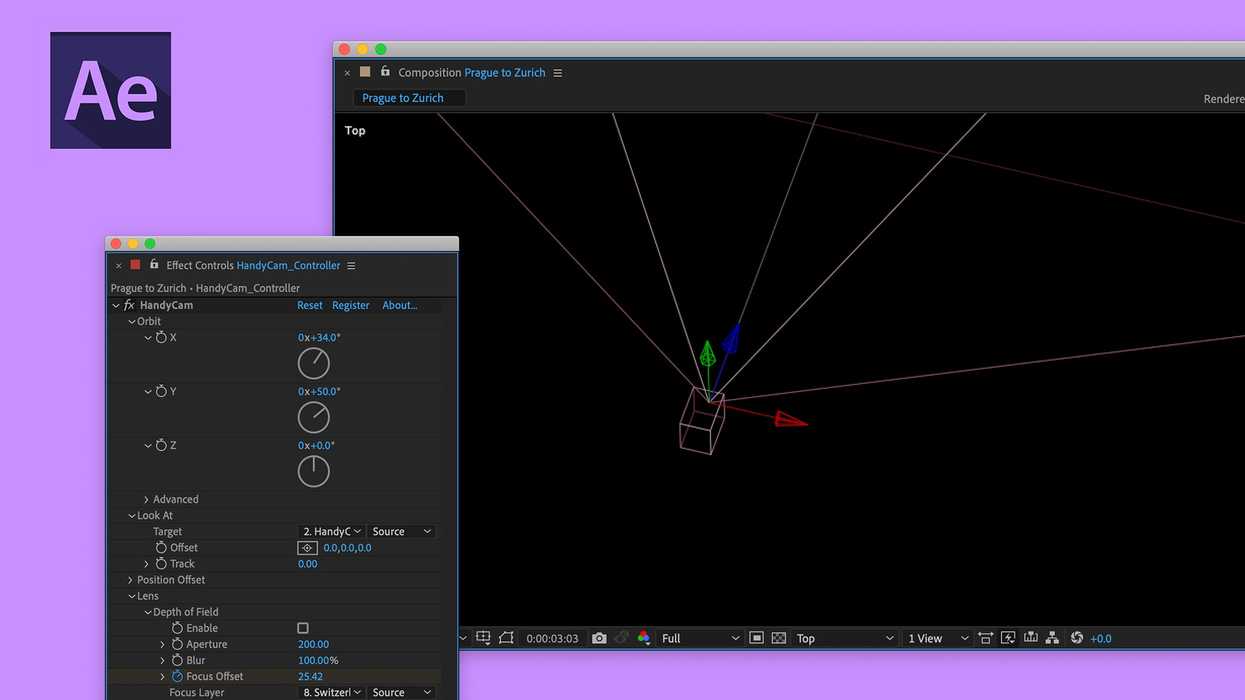
With the target selected, I’ll now position the camera. The first and most obvious tools to position the camera are the three orbit controls at the top. They do exactly what you think—they orbit around the corresponding axes.
The Position Offset attribute sets the camera position in relation to the null controller layer. It is applied before the orbit properties. This can be very confusing at first, but after a few minutes of playing with the different properties, the tool will feel more intuitive. There is a lot of math that went into making this work, so just know that it’s built this way to give the end-user more control over the camera.
Add Depth of Field
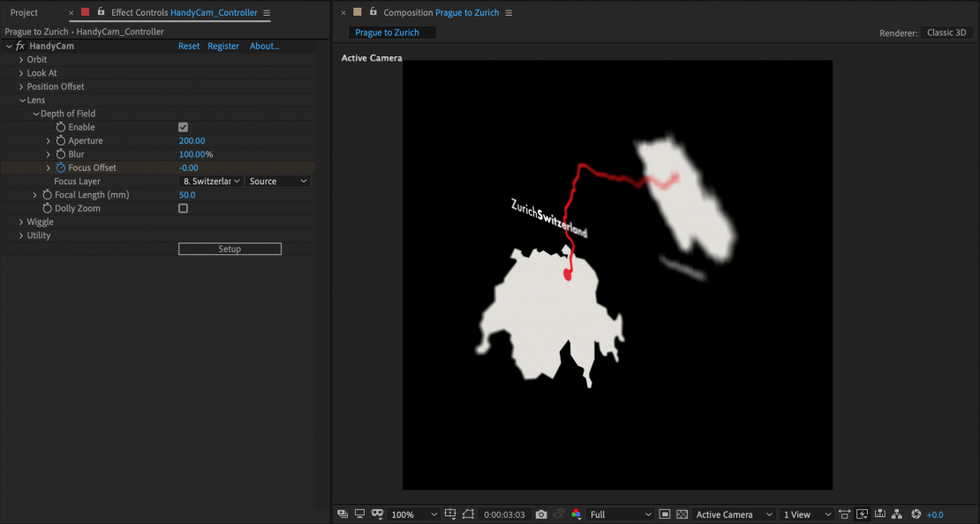
One of the most exciting features of HandyCam is the ability to quickly add depth of field. I’ve spent a lot of time in the past trying to achieve a nice depth of field for an animation, only to give up halfway through the process. This was almost always due to the difficulty in trying to control the myriad properties associated with cameras and focus.
HandyCam simplifies this process by only including a handful of controls. In the Lens dropdown menu, I’ll enable depth of field via a simple checkbox. It’s easy to instantly snap a layer into focus via the Focus Layer drop-down menu. I can fine-tune the look of the depth of field via Aperture, Blur, and Focal Length settings. To create an animated rack focus, I’ll add a few keyframes to the Focus Offset attribute.
Pick up the HandyCam plugin for $39.95 at aescripts.com.
Disclosure: Boone Loves Video is a participant in affiliate advertising programs designed to provide means for individuals to earn advertising fees by reviewing and linking to products.