In this tutorial, I’m going to show you how to create a custom Google Map animation. First, I’ll add markers and a route to a map inside of Google My Maps. I'll export my map as a KMZ file, and then bring it over to Google Earth Studio where I'll animate the markers and route.
Here's what I’ll be using in this tutorial—
- Google My Maps
- Google Earth Studio
- Adobe Premiere Pro (optional)
What you’ll need
- A Google account
- Google Chrome
- Video editing software that can import image sequences
Step 1 - Create a Custom Map
For the first step, I’ll go to Google My Maps. This page lets me create and customize my own Google Map. For the first step, I’ll add markers. I’ll put each marker on a separate layer, which will give me more versatility when I go to animate the map inside of Google Earth Studio. Next, I'll customize the color and icon style of each marker, and then add a walking route traveling between the four marker points.


Step 2 - Export the Map
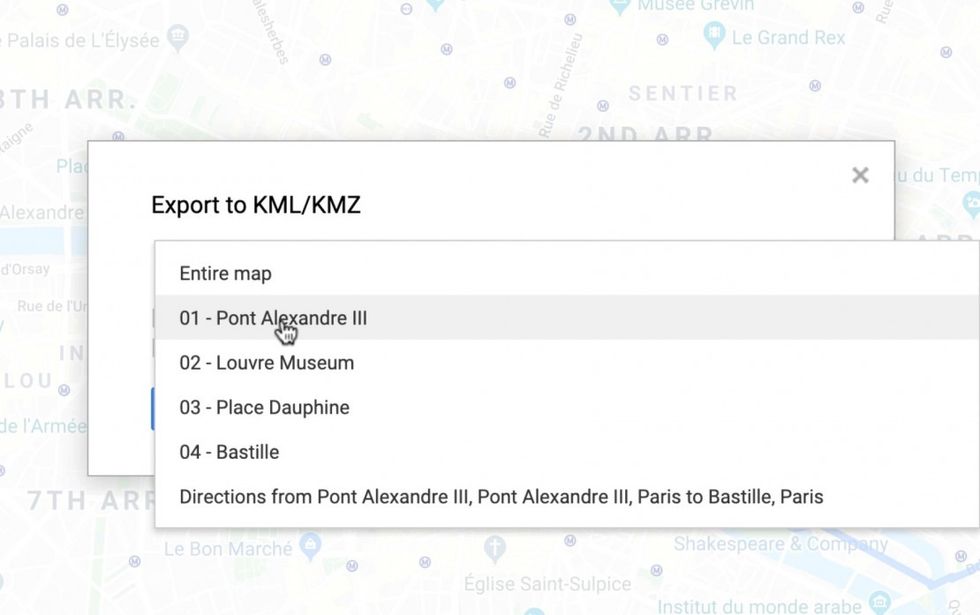
With my custom map created, I’m now ready to export it. For this, I’ll select the button at the top of the menu, just to the right of the name of my map and select Export to KML/KMZ.
The KML format was developed for use with Google Earth.
When the export dialog box pops up, I’ll export each individual layer separately. This will allow me to animate each asset individually once inside Google Earth Studio.
Step 3 - Set Up Google Earth Studio
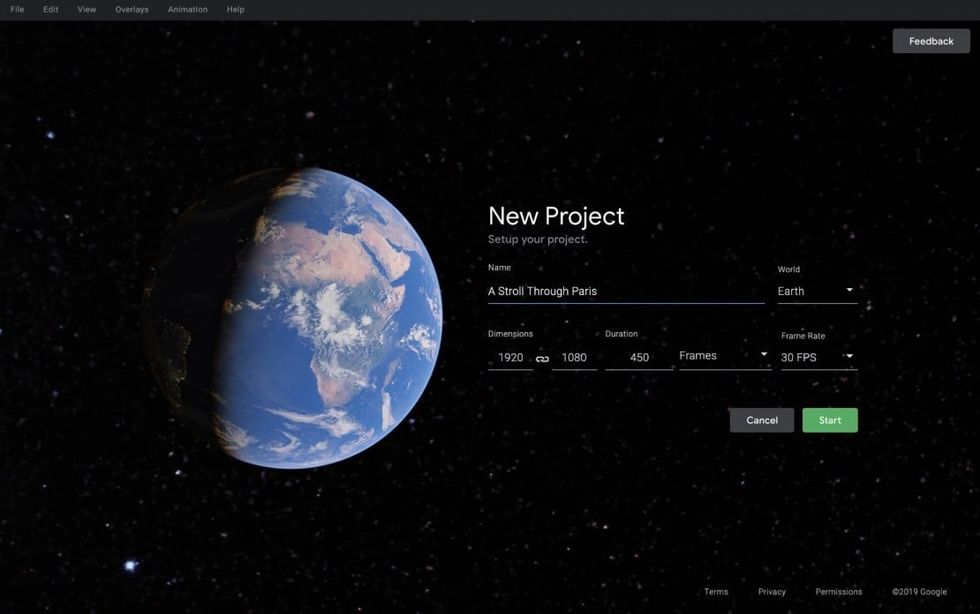
Next, I’ll jump over to Google Earth Studio. At the time I’m writing this, GES is still in a preview mode. This means you’ll need to apply to get access, which should take a few days at the most.
If you’re new to the world of animation, you may need to spend some time getting comfortable with the Google Earth Studio interface. I recommend using the Quick Start options when setting up a new project.
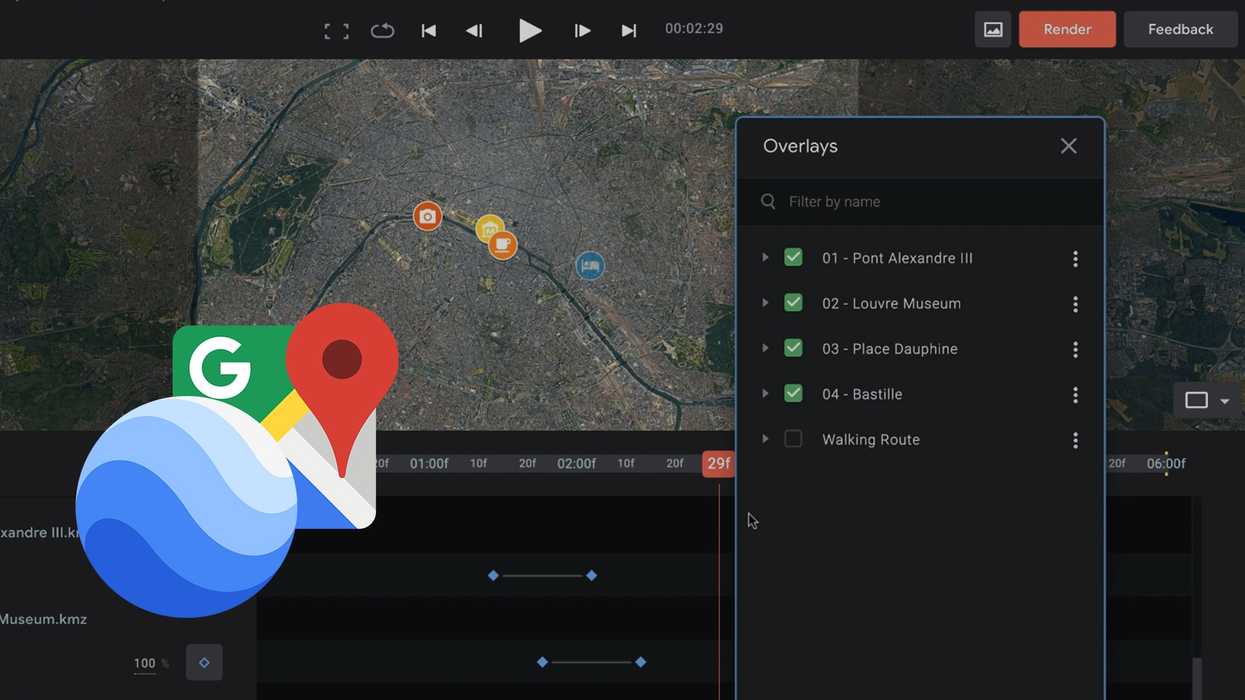
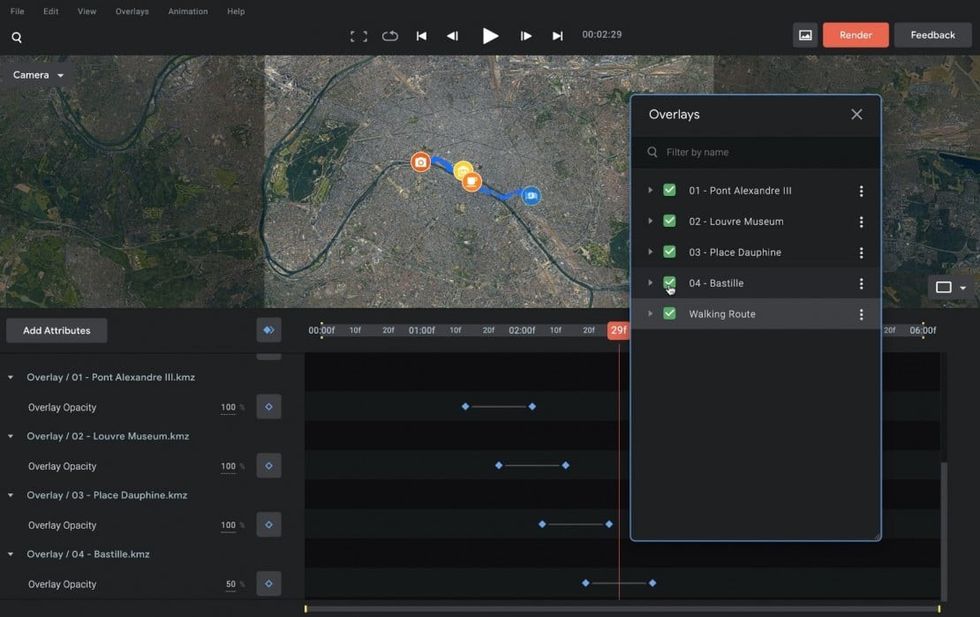
Since I’m not using the Quick Start option, I’ll simply type the word Paris into the keyword search bar at the top left of the interface. To import my custom maps I’ll go to Overlays > Import KML > Upload from Computer. Once uploaded, an Overlays menu will show up, with all of my maps exports available. I can hide them via checkboxes.
Step 4 - Animate
To activate the opacity keyframes I’ll select the button next to each location in the Overlays panel and click on Keyframe Opacity option. Each location will show up as an Opacity attribute on the timeline. I’ll animate each marker in from 0 to 100, and then slightly stagger each. As a final touch, I’ll animate the Longitude and Pan of the camera, to have it slowly move from left to right as the markers appear. Now I'll hit the render button to export for the final animation.
The animation exports as an image sequence, so you'll need a program to turn that into a video file, such as Adobe Premiere Pro, Photoshop, After Effects, etc. Google Earth Studio actually exports files specifically for use in Adobe After Effects. For more on this topic, check out my other tutorial here.