The lift/gamma/gain controls of color grading have been more or less standard for 40 years now, so much so that one large online colorist group is even named after them. However, it's easy to forget they aren't the only model for manipulating color. They aren't even the first common format in film.
Before the control balls and knobs we know so well, the Hazeltine color timing machine had three "Price Is Right" style wheels that controlled red/cyan, green/magenta, and yellow/blue.
Interfaces evolve, and we're seeing more experimentation in color interface all the time. While the "color board" from Final Cut X didn't quite take off (though some love it, they eventually started to offer traditional color wheels) as well, there is a very fresh take worth looking at in Photon from Color.io.
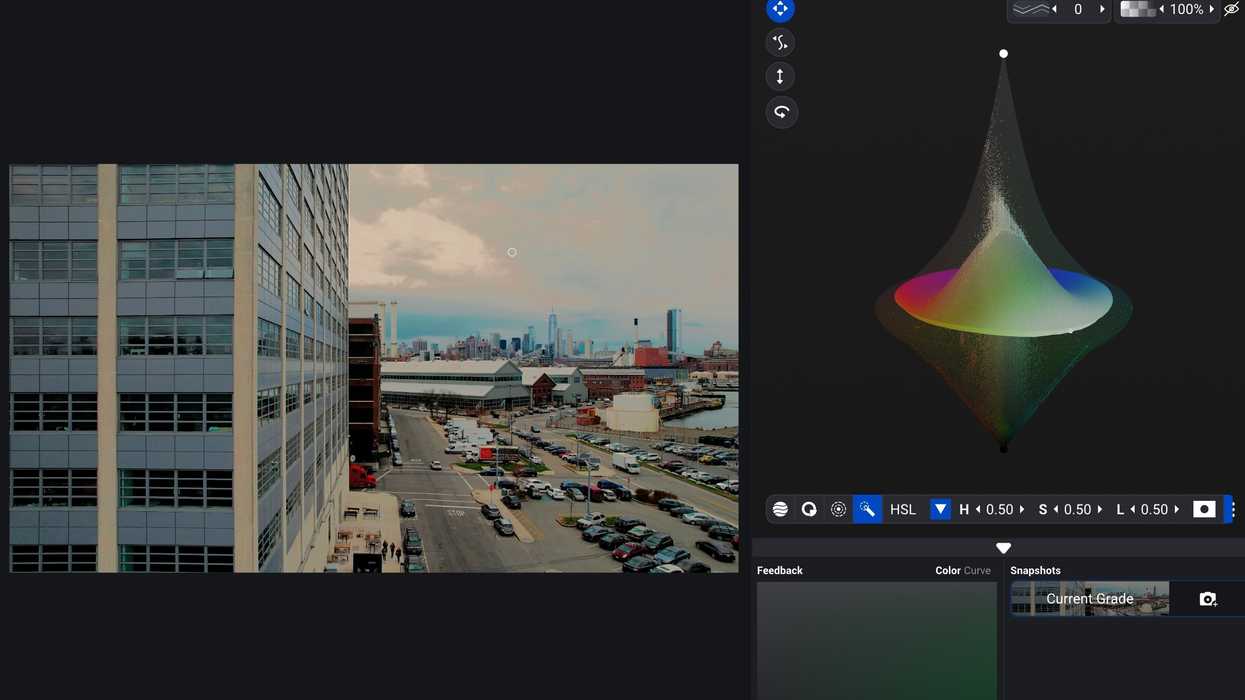
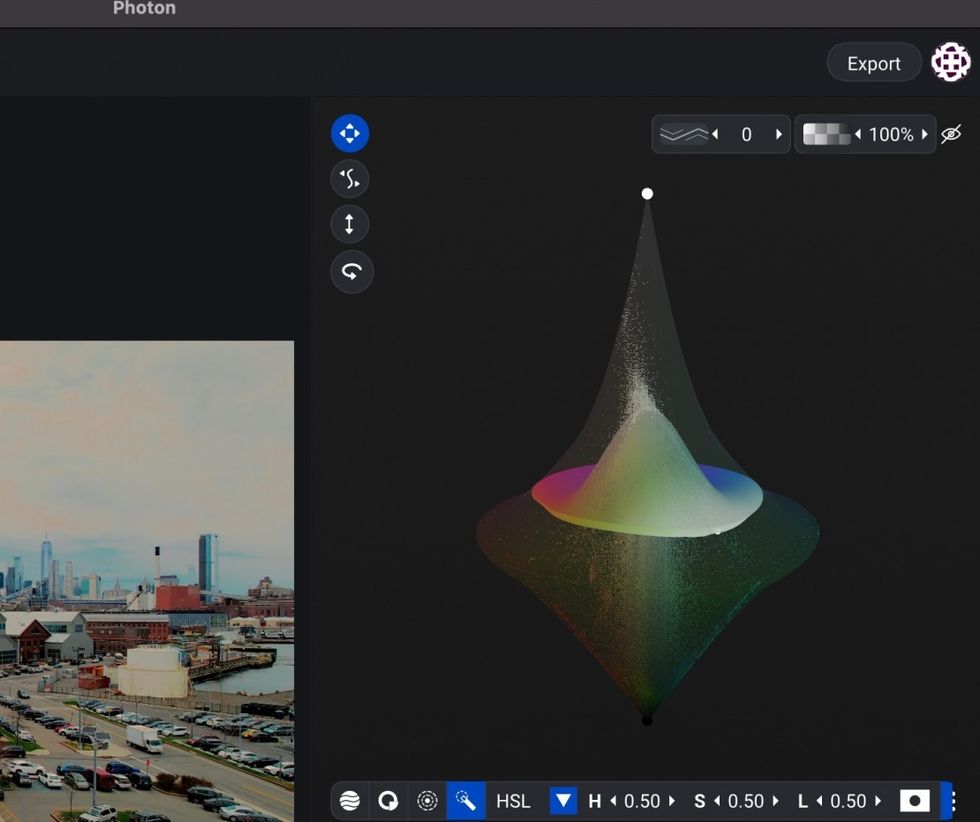
If you bring up an image in Photon, instead of lift/gamma/gain circles or contrast/exposure sliders or anything else you might be familiar with, you get a 3D shape that represents the color of the image. By clicking either on the shape, or on the image itself, you can push and pull around with your mouse to manipulate the image. The vertical axis is the brightness of your image, and color "blobs" out in a color wheel in all directions.
You just click right on the shape and push or pull around, and the image shifts in conjunction with your input. It does all this with spatial color smoothing, which helps prevent banding errors as you push the image around.
Photon is also designed as a tool for creating and editing your existing LUTs.
While we frequently talk about a tool like Lattice for manipulating LUTs, that wonderful tool is mostly focused on combining LUTs and changing formats. If you have a LUT that is doing almost what you want, but not quite, you can edit it with Photon.
You can bring in external LUTs, edit them with the 3D tool, and then export them as fresh LUTs.

One thing that comes up frequently when teaching beginning students color grading is, "Why can't I just click on the vectorscope and drag it around?" It's refreshing to see someone build a tool that does basically that.
You get a digital readout that is something like a 3D combination of a waveform monitor and a vectorscope, and you can just push the values around to be where you want them to be. It really doesn't take much time to get used to the interface, even if you have decades behind you working with the traditional lift/gamma/gain controls, and it does allow for speedy image tweaks.
It might be nice if we could get a scale like the vectorscope scale added to the 3D model so we can see if our color chart is landing where it should, but that is something that would be easy to add in the future.
The standalone app works with still images only, but that's still of use to filmmakers when creating LUTs for on-set image manipulation. You can dial in precisely the look you want quite quickly, then export that LUT for use in an in-camera or in-monitor situation with ease. There is a plugin for Resolve, and it's been updated to work with Apple Silicone.
Photon is available on Color.io as standalone software for macOS and Windows and optionally plugs directly into DaVinci Resolve via OFX. You can find out more over on the Color.io website.
Updated: May 17: Color.io has updated Photon so the Resolve plugin works with M1.