Zombies have been around since the dawn of time. There is something so cool and menacing about zombies that draw many filmmakers toward them to tell a horror story about the faults of humanity. The slow-moving creatures are perfect on their own, but the threat becomes overwhelming when there is a horde of them.
No matter the reason behind your choice to use zombies in your project, a horde of zombies can make the audience feel trapped with the characters. While a lot of us don’t have the budget to create practical hordes of the living dead, the world of Adobe After Effects and a few editing programs allow us to create a horde for free. So let’s break down how you can create a horde of zombies.
The low-budget options
There are a few ways to create a horde of zombies on a lower budget.
A simple way to create this effect is by locking off your camera and having a small group of friends or actors move through a shot in multiple takes. After you have the footage needed, mask each group from each shot in Adobe After Effects and stitch them together to make one large group.
You can make the shot more complicated by using a lot of rotoscoping and tighter groups. This entire effect can be done in any editing software no matter how large or small the zombie takeover, and can be used to create any type of crowd in any location. This is an easy and simple way to capture a crowd of zombies creeping down a street, but remember to have your friends or actors change their clothes before each shot.
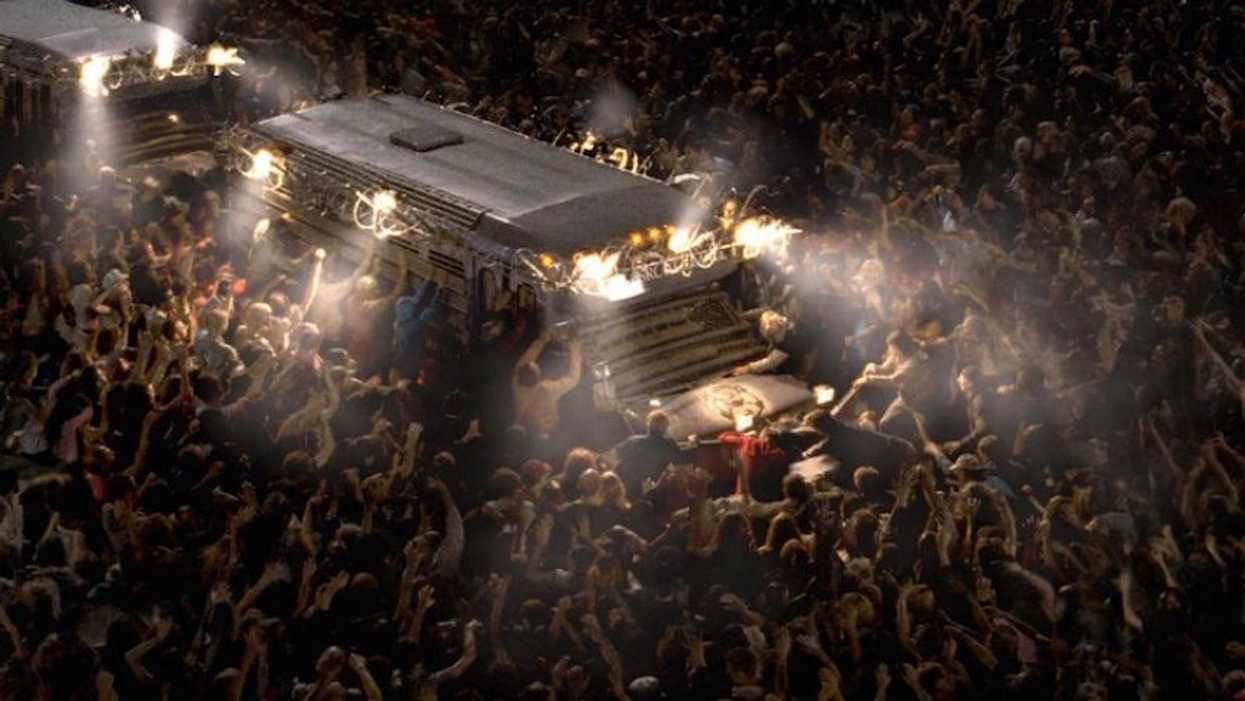
If you want a more impressive shot like the horde of zombies from Zack Snyder’s Army of the Dead, then we’ve got you covered.
 'Army of the Dead'Credit: Netflix
A horde fit for Snyder
First, you need to find some stock footage of a fairly empty space. If the stock footage has some moving pieces in it like cars, then you can go ahead and cut those objects out because you don’t want them to show underneath the zombies, breaking the illusion. You can remove the moving objects using the Content Aware Fill tool.
Create a mask around the object, then keyframe it to move with the object throughout the shot. Then, set the mask to subtract.
There are different fill methods you could use, but we recommend keeping the fill method on the object. The work area for the range relates to which part of the timeline it will create the fill in the plate. If the moving object is only in a specific part of the frame, then you can move the end slider over so that the Content Aware only fills in that section. Once you’ve got everything done, click the generate fill layer button which will automatically generate a layer of fill in each frame.
Play through the shot, and edit as needed if there are any issues with lighting or tracking.
For objects that have no reference point behind them, mask the object and use the create reference frame which will open up Photoshop. Once there, you can paint out the stagnant objects manually. This doesn’t have to be a perfect paint job because the area will eventually be covered in zombies. After you have saved and closed out of Photoshop, click the generate fill layer, and the program should map out the photoshop image into the space.
 'Train to Busan'Credit: Next Entertainment World
It is time to render this shot out as a new clip once you’ve got everything cleaned up. Drop the clip into a new composition, and 3D track your scene by right-clicking and choosing the track and stabilization option, then track the camera. Find a point that looks fixed for the longest amount of time in the shot, then right-click on the point and choose to create camera and null.
Now it is time to create the zombie horde.
Instead of using real people as we did in the first horde option, we recommend checking out Mixamo which is free for Adobe users. Mixamo offers a lot of different character designs with a range of movements to make any crowd of people look as realistic as a group of computer-generated characters can. Once you’ve selected a character, you can choose their animation. You want your zombies to be in a simple standing position for your zombie horde.
Download the FBX of the character once you’re satisfied, and repeat this process with a few more character designs to add variety to the crowd.
After you have all your characters for the horde, open up Blender, a free software, and import the FBX characters in.
You will have to alter the timeline length for each character to match the last animation frame, then export as an OBJ and check that animation box. It is best to create a folder for each character because there will be individual files for each frame of the shot. Download the textures of each of the zombies by going to the UV editing tab to exporting them into a file. This process is tedious, but the work will be worth it.
 One of the many zombie characters on MixamoCredit: Mixamo
It is finally time for characters to be ready to be shot back on Adobe After Effects.
Open a new solid, apply Element 3D, and open scene setup. Go to files and click on import, then 3D sequence which will allow you to transport your characters to the scene. If you can’t see anything after you’ve clicked the first file, click the box that says normalize size and change the alignment bottom.
Your character won’t have any textures yet, so let’s add them by clicking the character’s folder which will reveal the materials used to make the model. The different materials will have different textures, so apply the textures in the corresponding areas until your model is complete. Repeat this method with each character until they are all complete.
Form a tight group with your zombie character by moving and rotating them around. Then, create a new group folder and set the number on the right side of the folder to two, and create a plane. This plane will be on the ground in the final scene. Back in Adobe After Effects, this Element scene will automatically be in our 3D camera-tracked scene.
Under the world transformed, you can change the rotation of the tight group of zombies in your scene. Right now, your zombies may be a little too close to the camera, so let’s change that by altering their world position and rotating by eye. You can change the ground plane size and align it with the street by clicking group two, then clicking particle look.
Your tiny group of zombies isn’t very intimidating, so let’s finally create a horde. Go into group one, particle replicator, change the replicator’s shape to the plane, and increase the particle count. After increasing the shapes scale and X and Z values, go to scatter properties to move the group of zombies into different directions. The noise scatter option does a similar thing, but with sound. You can also use a random seed generator to move the zombies into random locations in the scene.
At this point, you can play around with the different values and shapes of the zombie horde to fit the scene you’re wanting to create. Be a little curious and see what would happen if you messed with all of the values. You might find the exact look you were searching for by accident.
For the ground, scale-up ground 2, and use a shadow matte material inside Element. Then, enable ambient occlusion to add some ground contact shadows in render settings, but be careful to not make the shadows too harsh. Go into Element to duplicate the zombie group, then change it to number three to add more zombies into the open spaces of the scene like side streets.
Back in After Effects, copy group one, then paste it into group three. This will copy over all of the settings that you previously established for your zombie horde, and just turn horizontally to cover the open space. If you have multiple spaces that need filling, then repeat this process but with a new file each time.
 'World War Z'Credit: Paramount Pictures
There could be buildings that need to be brought back into the foreground, so duplicate the footage and create a new solid that is set to 3D. Find the rotation and placement of the buildings that need to be brought to the foreground, then scale up and rotoscope to match. Set this footage to alpha matte, and keyframe the mask and rotation to tweak throughout the timeline if it changes. You can do this for any area that needs to be in front of the zombies.
You will have to color match by eye, and you can add any effect in Element like fog in the distance or spotlights to light any zombies that are positioned under billboards or light poles. The number of zombies in your horde depends on you. The amount can easily be changed by adjusting the particle amount.
Conclusion
Now, you should have an amazing zombie horde to terrorize whatever landscape you decided to have them in. While this entire process may take some time, the result can look as if it were made with a higher budget. As I mentioned earlier, this is a process that you can use to create any type of crowd, from zombies to fans at a football game. The possibilities are endless with the magic of Adobe After Effects and a little extra time on your hands.
Do you have any tips that we might have missed when it comes to creating a crowd of zombies? Let us know what they are in the comments below!
Source: Film Riot