Let's say you face one of the following challenges.
- You're looking for slow-mo footage you’ve shot back in 2018. Not any particular clip but rather all clips with a frame rate above 60 fps.
- The director or producer is looking from behind your back at the screen and asks you to offload the footage and show them what it would look like with a specific LUT applied and they want you to play it back in a specific frame rate.
- You need to find a specific clip of a
with a high-quality rating.
How quickly will you be able to accomplish these tasks? What if it’s RED footage and you can't just preview in the Browser or a simple player?
The tool we’ll talk about is Kyno from Lesspain Software and it's an answer and solution to the tasks above, to name a few. It’s the All-In-One Media Management App used by professionals as media storage browser, file organizer, universal player, logging tool, converter, and more. I’d say that it’s an App for anything you may need to do before you start editing on the timeline.
So, this is the first out of 3 articles where I’ll go in details about Kyno. It’s impossible to show all of its features in 3 short videos so I’ll use the “best of” approach and I'll show you Kyno applications that make this program so unique. In the second video, which I’ll upload in a few weeks, we’ll talk about powerful converting features and in the third one about subclips, markers and integrations between Kyno and applications like Premiere Pro, Final Cut Pro X, Frame.io, etc.
Without further ado, let's do it!
1. Metadata
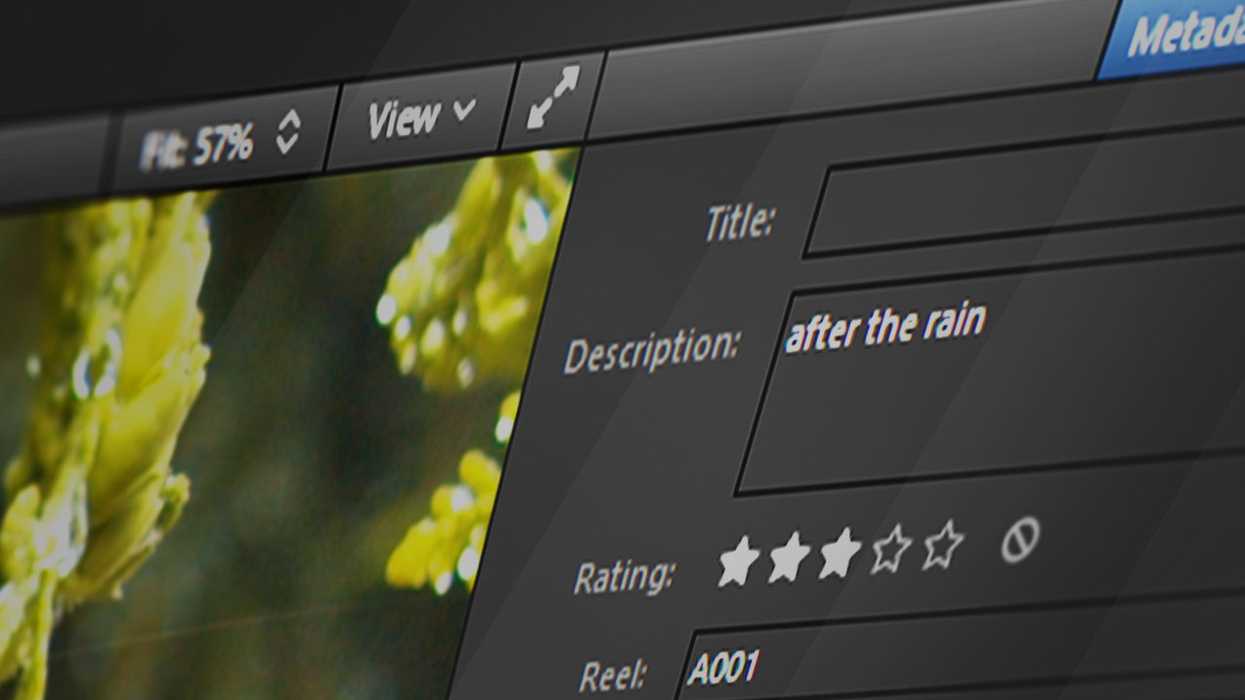
We can apply and edit metadata in Kyno and what I love about it is that it’s not a messy list of metadata I don't need or use. Instead, we have the most important information for filmmakers. Like the title, description, reel, scene, angle, etc.
We can batch edit any field for any number of clips which is also very useful. We can export, import, and merge metadata information and exchange it with people working on another copy of the footage. This is super useful for collaboration and I can't imagine working without it in a professional environment.
2. Tags and Rating
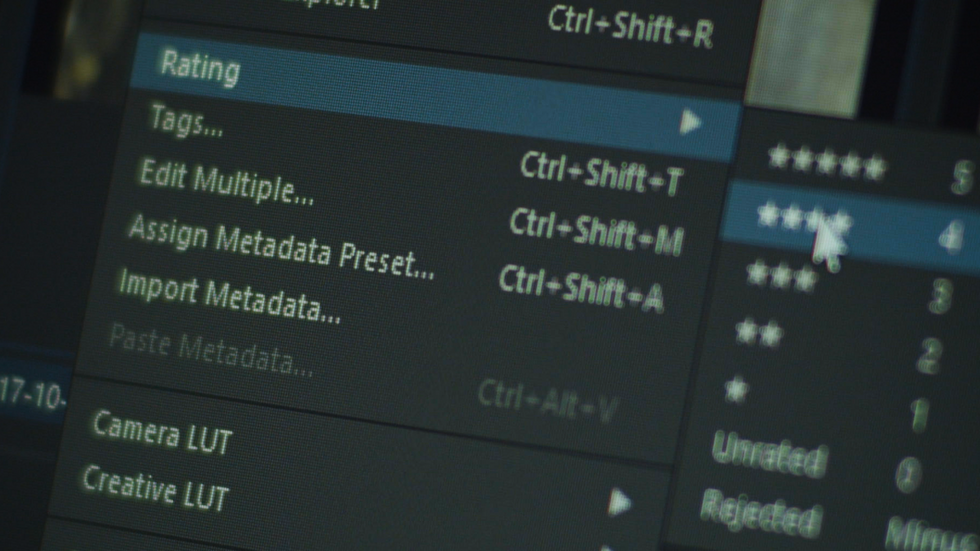
We can rate clips, which I love doing in Lightroom and always wanted that feature in a software build with filmmakers in mind. So as with pictures, I’ll go through the clips keeping my hand on the numeric keyboard and rating them.
Also, as in Lightroom, we can tag clips which help us organize and describe assets so we can easily search for them in the future.
3. Drilldown
Drilldown is like a signature mark for Kyno. It will display all clips within the selected location drilling down to every subfolder that it can find. And it can find all the subfolders in the world!
You can even select any disk and activate the drilldown. We do it with this icon over here or with a keyboard shortcut Ctrl + Shift + D. Imagine how useful it is in case you forgot which subfolder a needed clip is in.
4. Workspace
We can build our own Workspace with folders that we want to access quickly and easily.
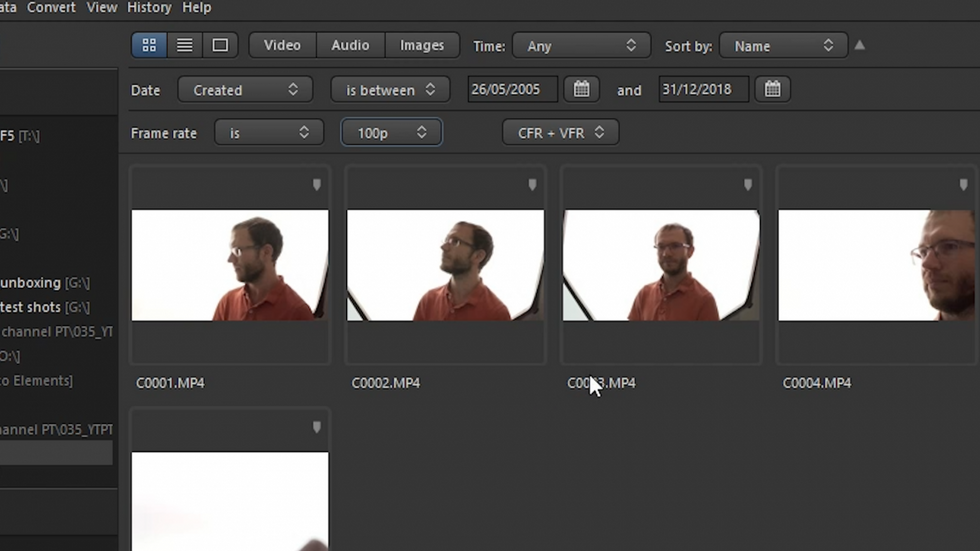
5. Advanced Filtering and Searching Options
Tags, rating, metadata, all of them allow us to filter and search for specific clips. So let’s go back to finding slow-mo footage from the previous year. Specifically, I’ll look for footage shot at 100 fps. I select a high-level folder or disc where I know that clip is buried in and I choose to filter by the frame rate. Specify the query and after a moment I’ve got the results.
We can look for a specific text in a title, description, or even marker and subclip annotations. All of that to say, if you spend some time logging your footage, you can find anything you need in seconds. We’ll come back to subclips and markers in Kyno in the third article later this summer.
Filtering possibilities are only limited by our imagination and abilities to specify the query. And this is what content creators and filmmakers need!
Also, in the next version, we’ll be able to also search for any VFR (Variable Frame Rate) clips which are often pretty troublesome. So once we can find them we can convert them to a constant frame rate before importing in your NLE. At least that’s the practice I recommend.
6. Professional Player
Kyno can be used as a professional video player. It supports most of the professional formats including RED files in Kyno Premium.
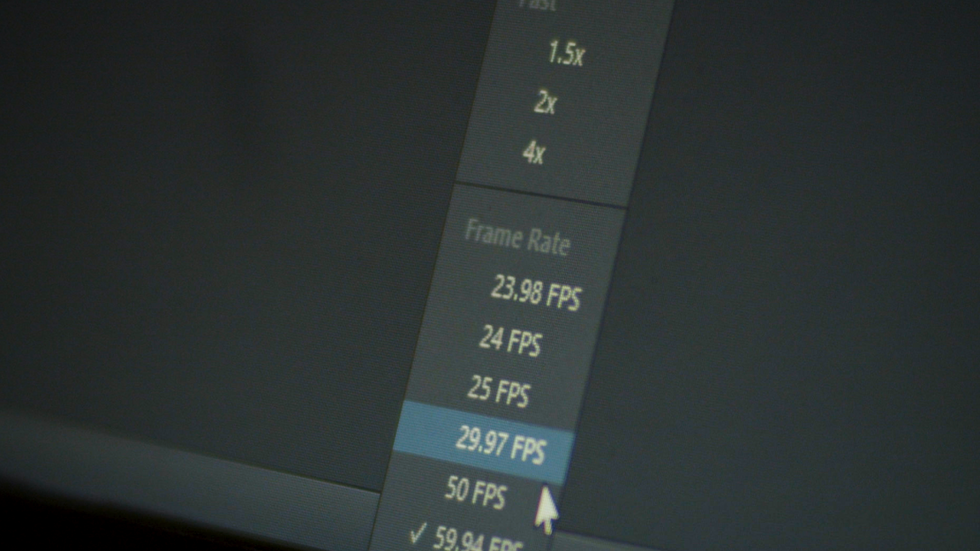
My favorite feature of the player is the ability to choose the speed setting. It's like footage interpretation on the go. We can slow the clip down or speed it up to a specific frame rate.
For example, if I have a 100 fps clip and I want to see how it will look like when played back in 24 fps, I can do it easily.
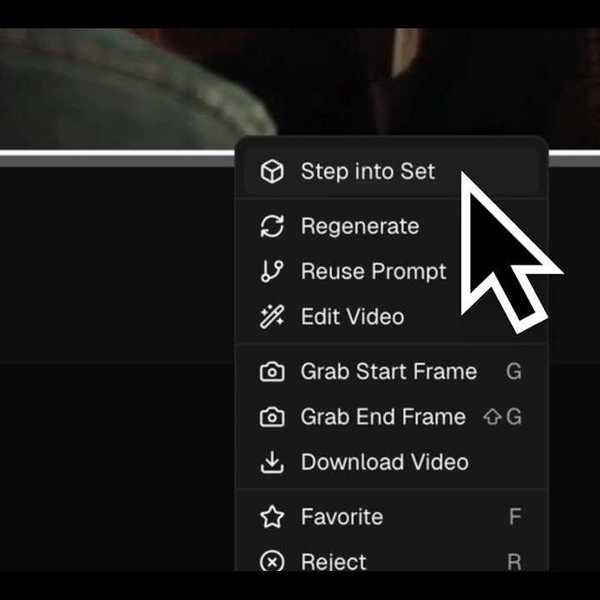
Some additional features of this player include adding In and Out points, enabling zebra for overexposed areas, Widescreen overlay and playback loop. We can also Rotate and Flip a clip in a view and we can apply LUTs within a player.
There’s no need to import clips into your NLE to perform such operation. What is more, you don’t actually need to enter the player to apply a LUT. You can do it in any view and it will affect a thumbnail as well. We can actually apply two LUTs to the same clip because we have a Camera LUT and a Creative LUT at our disposal. And obviously, we can add our own LUT folders as well as use the ones we already use in DaVinci Resolve.
7. Content Preview
When we are in a detailed view for a clip we can open the Content tab. Kyno generates a preview of 36 frames throughout the duration of the clip so we can have a pretty good idea what the clip is about. I love using this feature for long clips!
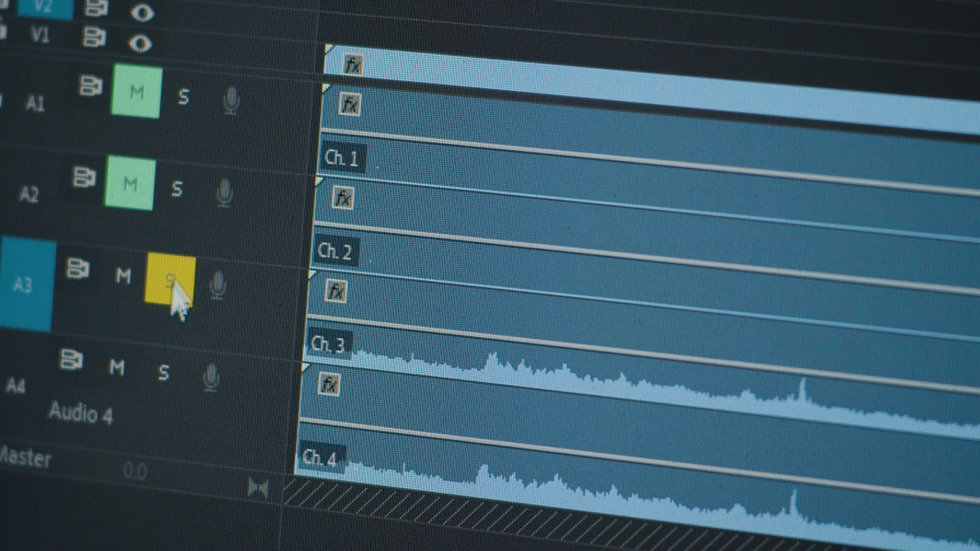
8. Audio Channel Selection
Have you ever had this problem: you want to interpret the footage to get rid of unwanted audio channels, so in order to do that, you have to drop the clip on the timeline first just to preview them? Now you can do it before even importing clips to your NLE. If you have a multi-channel audio clip you can choose which channel to listen to within Kyno player.
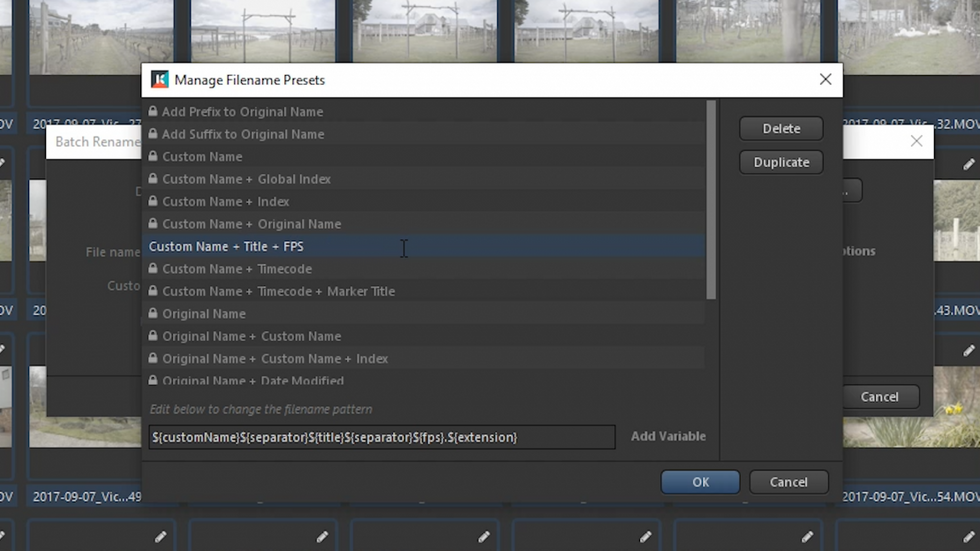
9. Powerful Renaming Features
Kyno has infinite possibilities when it comes to renaming. Not only we can create our own naming conventions but we can also use metadata from Kyno to generate them. We can also run Batch Renaming when pasting any clips to a folder by choosing Paste and Rename feature.
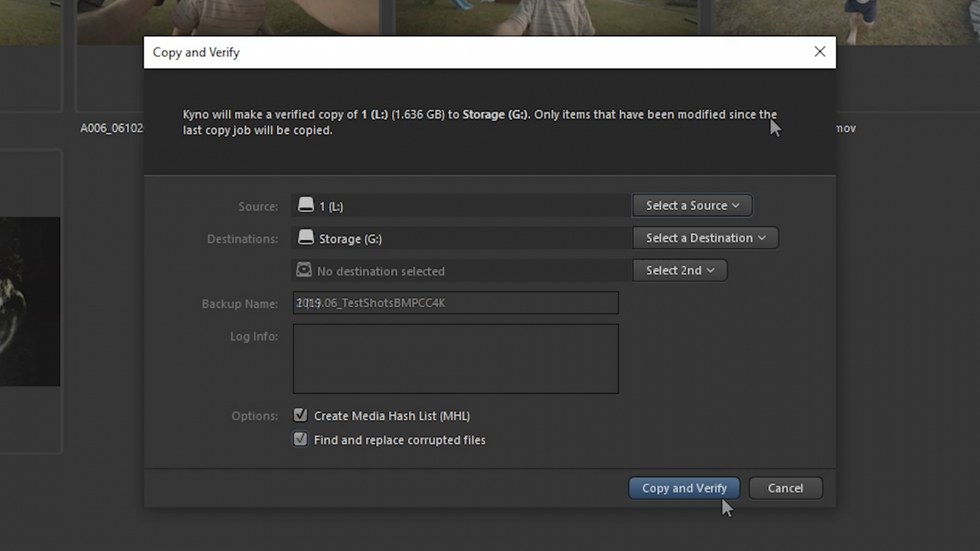
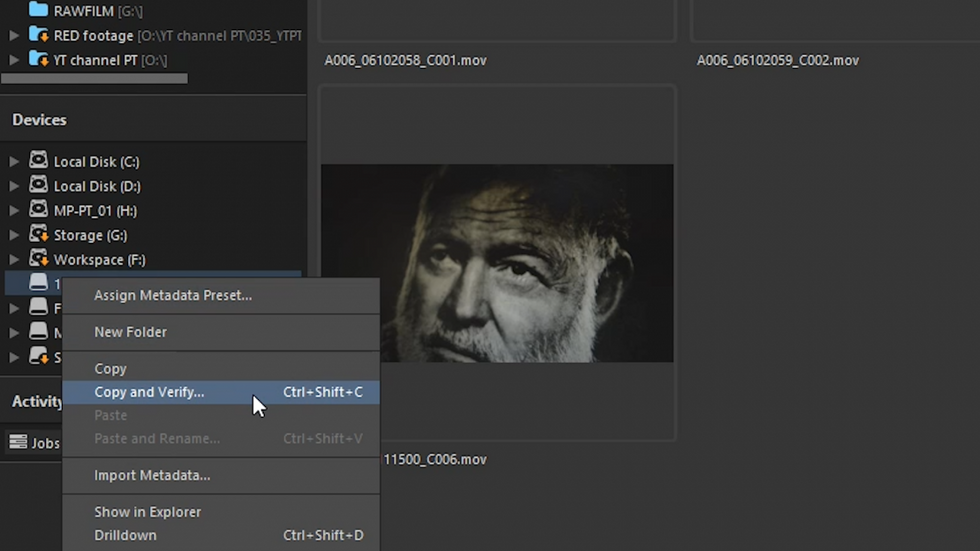
10. Offloading
Kyno also has an offloading feature which basically means that Kyno will Verify Camera Media while copying to a new location. All files will be copied and verified with the source. There are programs for offloading like Red Giant’s Shooter Offload or Hedge but they cost almost as much as Kyno and don't offer much more than that (at least that's my impression). With Kyno we get offloading as a part of a package.
In a Standard license, you can run the verified copy to only one location but in Kyno Premium you can choose up to 4 destinations at the same time.
11. RAW R3D Files Support
Usually, RED footage is hard to play back smoothly but Kyno seems to deal with RAW R3D files exceptionally well. We can change the resolution of the playback and use the rest of the player’s features. It even reads the sidecar for R3d files, so if you change settings like ISO, WB, etc. in REDCINE-X Pro it will be indicated in Kyno as well!
It’s possible because Kyno uses indexing instead of databases like, for example, Lightroom.
Why is it important? If you’ve ever used Lightroom you know that you need to import files into it. Also if you lose connection to the database, you’re in serious trouble. Bear in mind though, that RED support is just available in Kyno Premium.
12. Metadata Logging Presets
We can create Metadata logging presets for appending information to clips. Obviously, we can batch assigning these metadata presets and there’s even a very cool feature that allows you to pre-assign metadata preset to SD card before the shoot. So after the shooting day, you offload the footage from the card and you have tags and other metadata already in place.
13. Reports
If you’re a cameraman or a producer working for numerous clients, you’ll love reports. To generate a report, select a footage folder you’re interested in and choose to Create Report. In a blink of an eye, you have all data about assets at your hand.
Information like total media duration in the folder, the average duration of a clip, number of markers and subclips, video codecs and formats, the total and average size of clips, and more.
14. Correct Camera Timecode
If you’ve ever dealt with an offset in one of the cameras recording time data, you’ll love the fact that Kyno lets you batch correct incorrect camera time information. Simply select the clips in question, right-click and choose Correct Recording Time.
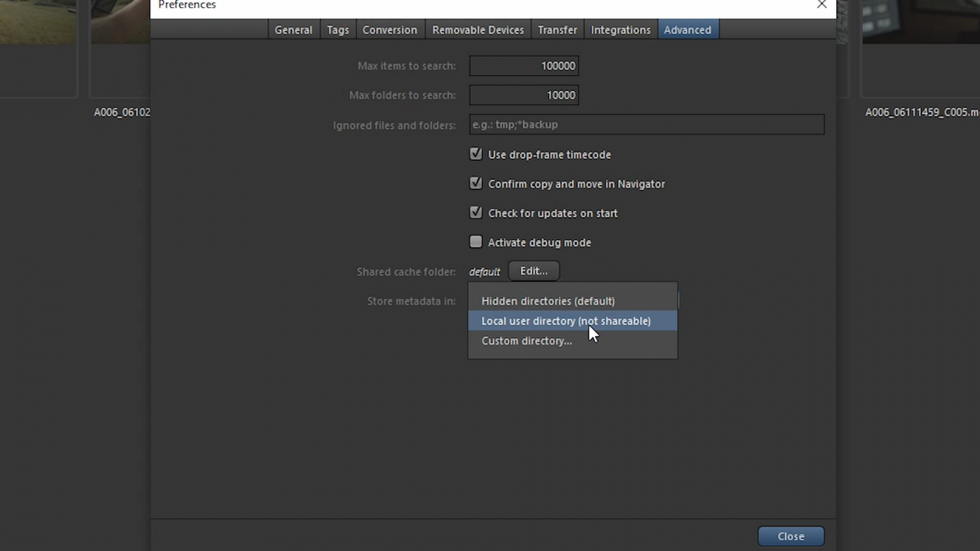
15. Shared Cache
As mentioned earlier, Kyno works great on shared storage solutions because it lets you define the location for metadata as well as Shared Cache folder. So really, there’s nothing holding you back from creating an ultimate video assets database for your studio.
Two more things worth mentioning in this part of the series.
- A keyboard shortcut for a fullscreen player is the same as in DaVinci Resolve, that is Ctrl + F (Command + F on Mac).
- Unfortunately, we don't have any kind of keyboard mapper in Kyno. I love how in DaVinci Resolve or in Premiere Pro we can set our own shortcuts and modify existing ones. Would be really nice to have such a possibility in Kyno as well.
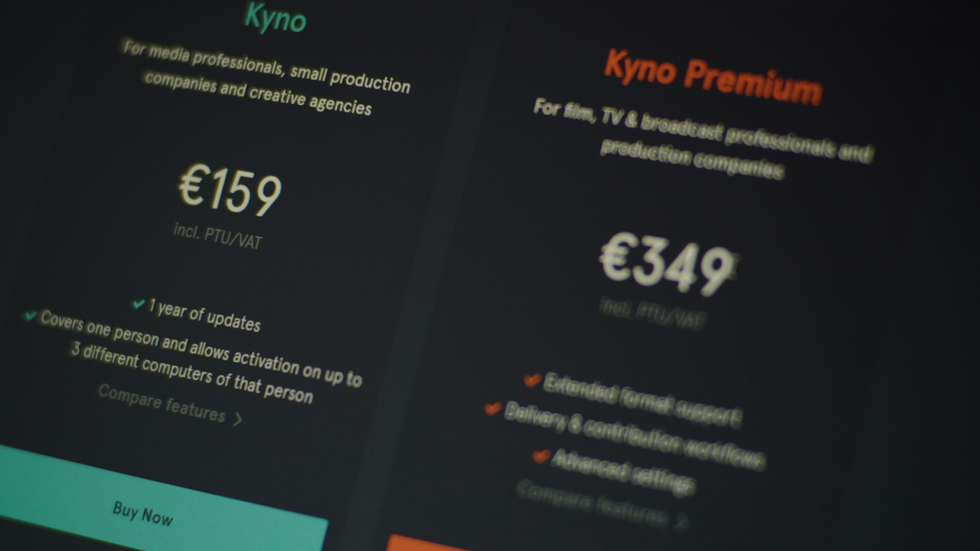
Now that you know the basic features of Kyno for video assets management, you can download a free 30-day trial. Test it for a few days before you decide if that’s the right tool for you. And if it is, use the coupon code CTTP20 at checkout for 20% off any license. FYI, this coupon code is only valid until July 2, 2019.
Also, this is a one-time payment like in the old days, not another subscription, and you get one year of free updates. You may have it on 3 different computers, which is awesome as well.
Once you play with Kyno for a while let us know how useful it's for you. Any new habits like applying tags to footage that you want to implement in your workflow? Let us know what you think down in the comments.