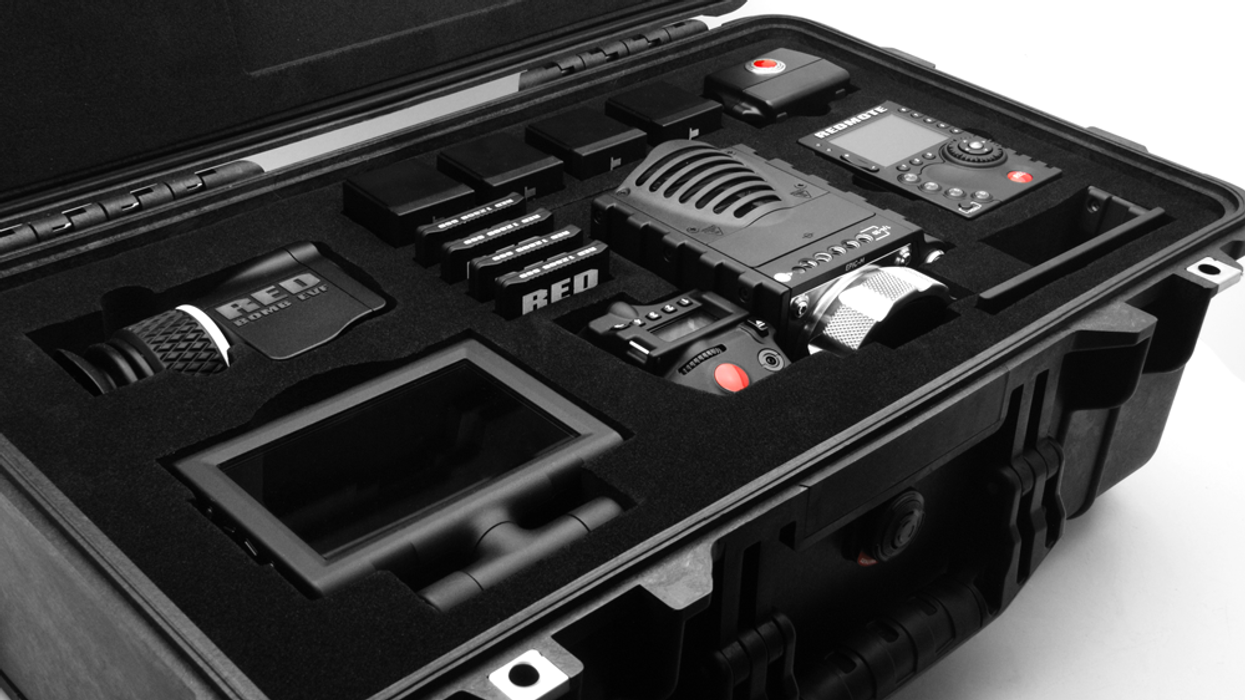
How to Build a Custom RED SCARLET/EPIC Flight Case for 75% Less Than the RED Version

RED makes an excellent custom laser-cut EPIC case for $600 (pictured). However, the same wheeled case -- a Pelican 1510, which is the maximum allowable size for carrying onto an airplane -- is just $150. It's certainly nice to have a custom foam insert in your case for maximum camera/accessory security, but if you don't feel like spending $450 on a foam insert, here's how to create your own -- using RED's own custom-cut materials, which come with the original camera and accessory packaging. It may go without saying, but this post will only be of interest to folks who have a RED DSMC or are thinking of buying one.
First of all, if you're spending the kind of money that a RED camera costs, $450 of savings might not seem like a lot. If you're renting out your equipment frequently, you might want to just go for the $600 official RED version, which is guaranteed to be the most snug-fitting version of this case and will take a beating. However, this DIY approach is a viable option not only for those looking to save money, but also for owner/operators who might not use exclusively RED accessories. RED's case is made for the RED 5" LCD, the BOMB EVF, the REDMOTE batteries, etc. What if you use your own batteries (article about powering options coming soon)? What if you don't use RED's EVF? You're going to want another option. Here's what I did.

My Side Handle just arrived (finally), but I didn't have it when I was making this case, so you'll see that I'm not being the most efficient with the case space -- but you can always cut out more strategically-placed inserts. Here's what the case looks like when you're done:


So if you happened to have bought a RED camera and you happen to still have your original packaging (this is becoming a very niche post), the following photos steps and photos should illustrate what I did. With the money you save, you could buy one of those new iPads -- there are nifty slating apps and they make great screenplay readers too (although I still find I like printing out drafts and going over them with pen and paper).
Instructions
First, take out the foam insert from your SCARLET/EPIC box. You'll have to do some cutting/tearing; if you want to keep your original box intact, this case solution is not for you:
Then what you're going to do is tear out all of the pick-n-pluck foam from half of the Pelican case so that the RED box foam fits in. Note that I later decided to switch the insert to the other side of the case, because the wheels interfered with placing batteries on the right side:
If you're using your own screen, you can fit it in how you choose. If you got RED's 5" touch monitor, go to the original packaging and remove the foam:
It has an extra pocket on the side that we'll need to remove:
Cut it off like this:
Now fit the LCD monitor foam to the top of a section of pick-n-pluck:
You'll fit it into the case with the border of the pick-n-pluck surrounding it (you will use this border all around, in fact:
Now you can see why I switched sides -- the wheels of the case are on the left, and interfere with any object you want to go all the way to the bottom:
Here's how the LCD monitor foam from RED fits in perfectly:
As you can see, I'm using the gap above the LCD monitor for battery storage. These 160 W/h bricks last about 3 hours each -- that's 12 hours of RED power right there (which would take 24 REDVOLTs and would cost a heck of a lot more). Again, I'll have a roundup of powering options here on the site soon:
The wheels of the case protrude into the interior, but the RED-supplied foam from the SCARLET/EPIC box has plenty of extra padding on it. Therefore all we need to do is cut out two corners from the foam, where they would align with the wheel protrusions. Note that I do NOT recommend doing what I did, which is use a serrated knife: it leaves a lot more flecks of foam lying around which is not optimal for sensitive electronics. A regular, non-serrated knife cuts the foam fine and gives you a smoother cut not only for these wheel wells, but also for anywhere else you want to cut holes for gear:
One wheel chunk removed:
And there it is, the RED-supplied custom-fit foam fit into the Pelican 1510:

I hope this was helpful for any other RED shooters who might be in search of a hard case for transportation on airplanes (again, this is the maximum allowable carry-on size). What bags and cases have others found useful for RED cameras and gear?


