Tutorial: Automatically Match Shots with Adobe Premiere Pro's New Color Match Feature
Speed up your color work in three easy steps with this new feature.

Adobe released the latest updates to Creative Cloud 2018 today, and Premiere Pro is full of new features. One of the main tools is the new Color Match option in the Lumetri Color panel. Editors using Premiere Pro can now quickly compare and match colors between shots with the simple click of a button. Color Match essentially captures light and color information from a reference clip and applies them as editable color adjustments to a target clip.
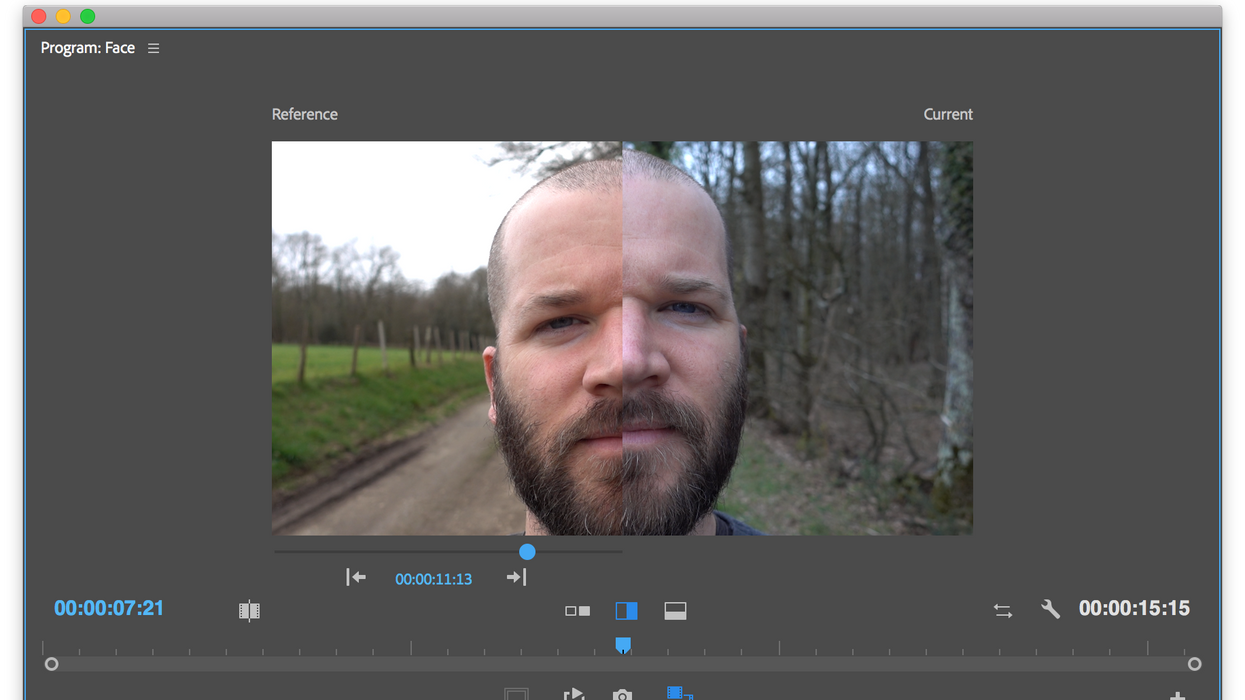
Let’s take a quick step-by-step look at how to use this new feature. For this test, I am using two separate clips of the same subject matter, one captured at 4500K and another at 5600k. Let’s see if we can get a match.
Step 1: Switch to Comparison View
The new Comparison View display allows you to select and view a reference clip directly in the Program Monitor. To activate the new layout, open up the Lumetri Panel and go to the Color Wheels & Match section. All of the new features are located here, including a Comparison View button. You can also quickly switch to this new view via a shortcut button at the bottom of the Program Monitor.
Step 2: Select a reference and a target clip
Select the reference position via a slider bar, timecode, or by jumping between edit points with arrows. Select the target location by simply positioning the playhead over the desired clip. Once you have both the reference and target locations set, you can adjust the comparison view to the desired display. Choose either a side-by-side or a vertical/horizontal split display. In split mode, you can drag the location of the split to view a specific area of the screen.
Step 3: Apply the match
The Apply Match button is located in the Lumetri Color panel, just beneath Comparison View. The Face Detection option intelligently adjusts the color match for skin tones when applying the color information to the target image. Once you select Apply Match, you’ll notice the changes of the target clip reflected in the Lumetri Color panel Color Wheels. Use the wheels and the Lumetri Scopes to check the match and further refine the grade. You can even save the adjustment as a Look file.


 'Aliens'CREDIT: 20th Century Fox
 'Promising Young Woman'CREDIT: FilmNation


