Final Cut Pro X has been churning out some great, pro-focused updates in the last year or so. With the addition of some killer color tools, HDR, and now ProRes RAW support, FCPX is shaping up to be a real contender in the world of NLEs. However, it’s not always about the new fancy codec support or the robust new finishing tools and motion graphics. Sometimes editing is about the everyday, mundane tasks you end up doing with most of your time. Organizing your media, doing temp mixes of audio, animating photos, utilizing effects to create different styles and just plain watching the footage.
With all this in mind, I wanted to take a look at some of the more day-to-day tasks an editor may be called upon to do on any given project and explore 10 ways in which FCPX sets itself apart from the other NLEs on the market in order to achieve some of these things. Check out the video tutorial below, skim through the article for the highlights, and see if you can spot the one feature that is available in other NLEs.
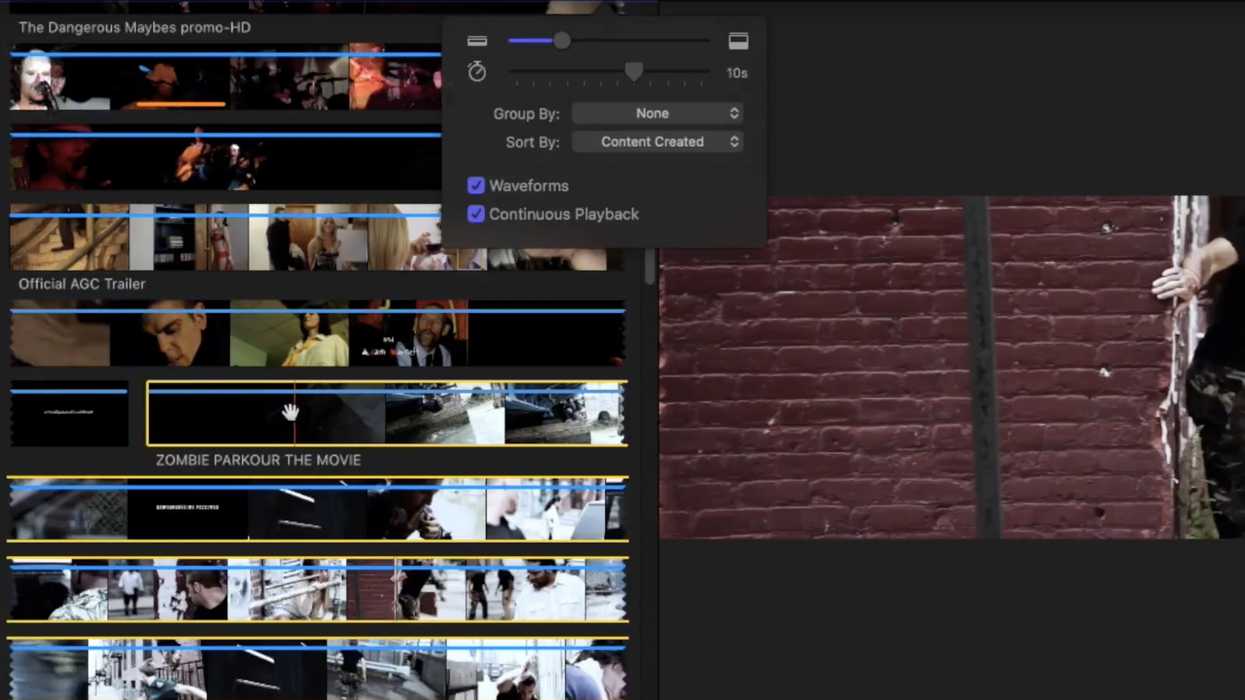
1. View clips as filmstrips in the event browser
Whereas most NLEs give you the option to view your clips as either a list or a thumbnail, Final Cut's view options give you the ability to see the entirety of your clips all at once as a filmstrip, without having to open them up individually and scrub through them in the source monitor. This is incredibly helpful for hunting down specific moments of b-roll in those long, exploratory clips so prevalent in documentary shooting or finding start/stops for multiple takes on a shoot where the camera was left running.

2. Power of Skimming
With the Skimming function turned on (keyboard shortcut: S) your cursor is essentially a mobile playhead that can skim footage in the browser, the timeline—or even skim over pre-sets in the effects browser to preview them (more on that later). Also if you head up to VIEW —> BROWSER and select SKIMMER PREVIEW, when you hover over a clip in the Browser you'll now get a little pop up revealing its keywords. This is useful when you want to keep your clips in filmstrip view and don't have access to the triangle drop-down to reveal your keywords for a particular clip. Also if you know the precise timecode in a clip you are looking for this is a quick and easy way to skim through and find that too.
3. The Range Tool
Final Cut Pro's nifty Range tool is essentially a quick way to create four keyframes simultaneously in order to lower or raise the volume of a portion of a clip. Simply hit R for range tool, lasso the portion of the audio you'd like to lower or raise and voilà! Instant keyframes. You can also use the Range tool to lasso various Video Effect parameters in the Video Animation Editor in the same way. You can check out a quick video tutorial on the Animation Editor in FCPX right here.
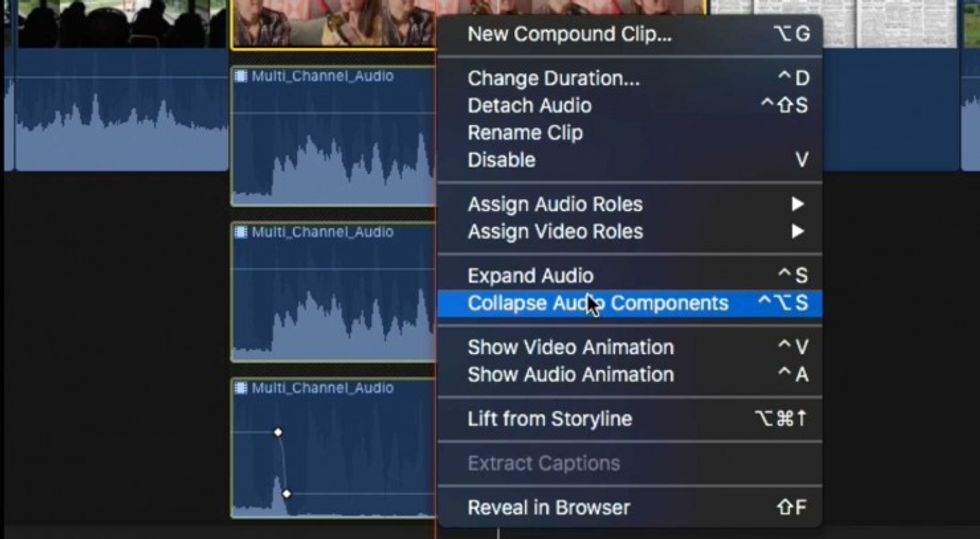
4. Collapsing/expanding audio components
FCPX organizes audio channels embedded in the same video clip into what is known as a Component, essentially multiple audio channels wrapped up together into one container of sorts. This is a great way to get to your rough cut without having to worry about all the different ISOs, or isolated audio tracks, that were recorded on set. In Avid, for instance, assistant editors often set up this quasi-complicated workflow where you can double match-frame back to your original sequence with all the audio tracks when you are ready to send your audio out to Pro Tools. Final Cut Pro's ability to group these channels into a single component that can be expanded to edit and collapsed again to simplify editing is one of its best seemingly invisible features.
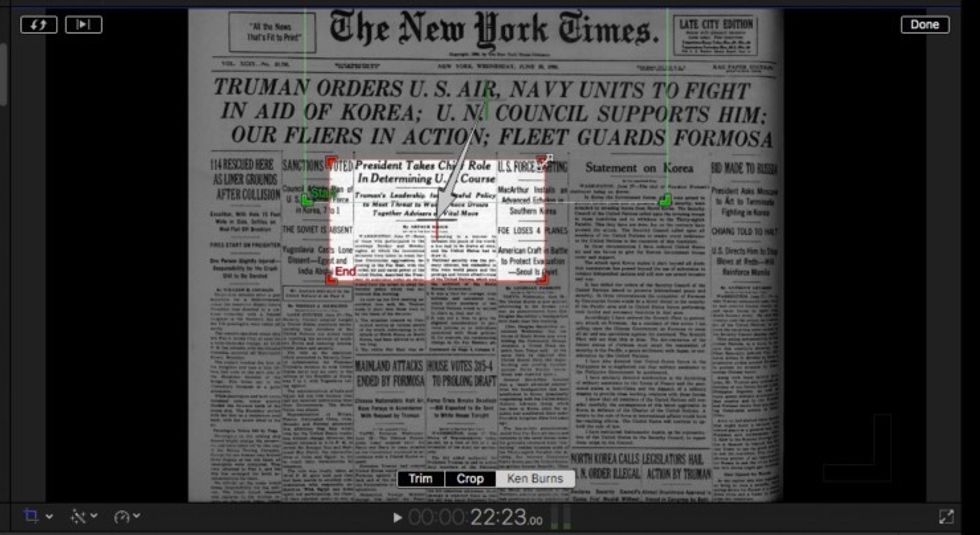
5. The Ken Burns effect
For anyone dealing with documentaries—and with its organizational tools, FCPX is made for documentaries—having access to an 'image pan and zoom' pre-set ala Ken Burns is a great little feature to help editors add initial, temp animation to their photos without having to waste too much time on it. The majority of these moves are going to be refined and changed later anyways but using the Ken Burns effect built into FCPX gets you up and running quickly and is sufficient enough to show a cut to a producer or director in order to give them a rough idea.
6. Previewing effects with the Skim tool
Don’t you wish you didn't have to apply an effect to a clip in the timeline in order to see what it looks or sounds like on it? Well in FCPX that's exactly what you get with the versatile Skim tool.
All you have to do is hover over the effect in the effect browser with your skimmer and it will automatically be previewed on the clip selected in the timeline. If it's an audio effect you can start to skim over the effect icon and then hit the spacebar to play the preview in real time. And what's even cooler is that, if you hold down the option key and skim back and forth over a video effect in the browser, it will show you a preview of the clip with various percentages of the effect applied to it.
7. Hold
The next four little tricks are sweet and quick and are all great examples of FCPX's ability to provide you with these tiny little gems of editing functionality. Final Cut's Hold feature allows you to let an audio effect continue to ring out even if you've run out of media. In normal situations, the audio stops playing once it reaches the physical end of the clip, even if an echo or reverb effect has been applied. But with the Hold function applied, the effect now rings out beyond the limits of the clip itself. Super useful for dramatic reverbs at the end of trailers or montages.
8. Flow Dissolve
For anyone working with interviews, the Flow Dissolve is a quick and easy way to avoid having to find yet another shot of b-roll in order to hide a cut you made in order to edit out all the "uh's, um's" and dead space in a subject's interview. Just drop it on like you would another dissolve and wait for it to render out its job.
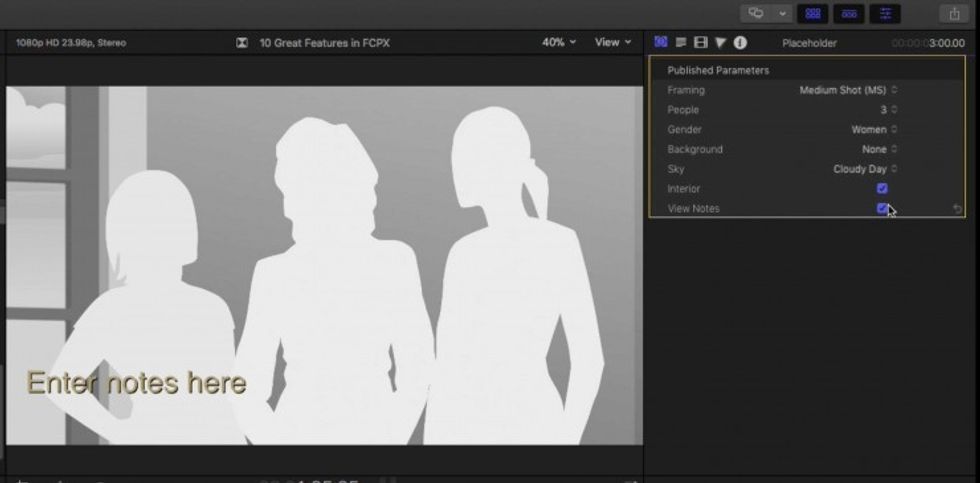
9. Placeholder Generator Clip
This is fairly simple but for some reason it makes me smile that you can actually insert what is called a Placeholder Clip that you can populate with a visual representation of your missing shot. Or at least, sort of. All you do is go to Edit —> Generator —> Placeholder and put it where your missing shot is. Up in the inspector, you can change the settings of what the missing shot is and even add notes to it. Simple but useful.
10. Find and replace text in titles
Last but not least, this is another great feature. Let's say you've gone through and done all the lower thirds for a feature-length documentary only to find out that you were given the wrong spelling for Steven (it’s supposed to be Stephen). Rather than go through and change absolutely every instance of that person's name one by one you can simply go to Edit —> Find and Replace Title Text, type in the text you want changed, what you want it changed to, and click Apply. Boom. Every instance of that misspelled name is now fixed.
While none of these features are earth-shattering in and of themselves, it’s good to know FCPX helps you out a little here and a little there by providing you with thoughtful, innovative features that help you better organize and edit your footage.