A year ago, I published my first video tutorial about using labels in Premiere Pro. Since then, I've decided to share my editing techniques with others and it's been hard to believe that it's been a year since that first video.
To celebrate this anniversary, I asked a few companies to contribute to the giveaway for my audience. The result is a prize giveaway.
In the following video, I talk about more details about the giveaway and I give five editing tips and tricks that I think will be very valuable to most video editors. If you've been using some of them already, let us know in the comments.
I’ll show them on Premiere Pro because that’s the editing tool of my choice, but I think you can apply these tips (to some extent) to all editing platforms out there. Without further ado, let’s do it!
1. Close Gaps and Selecting Label Group
Very often, I use labels to mark clips that have the same theme. When I’m done, I want to put them next to each other on the timeline. After I select all instances of a given label (using select label group feature), I cut and ripple paste the clips. The problem is that this method creates gaps. To avoid it, just go to the Sequence menu and there you'll find the Close Gap command. I also assigned a keyboard shortcut to it. The ultimate level would be to use the external controller like Palette Gear to run all of these keyboard shortcuts together.
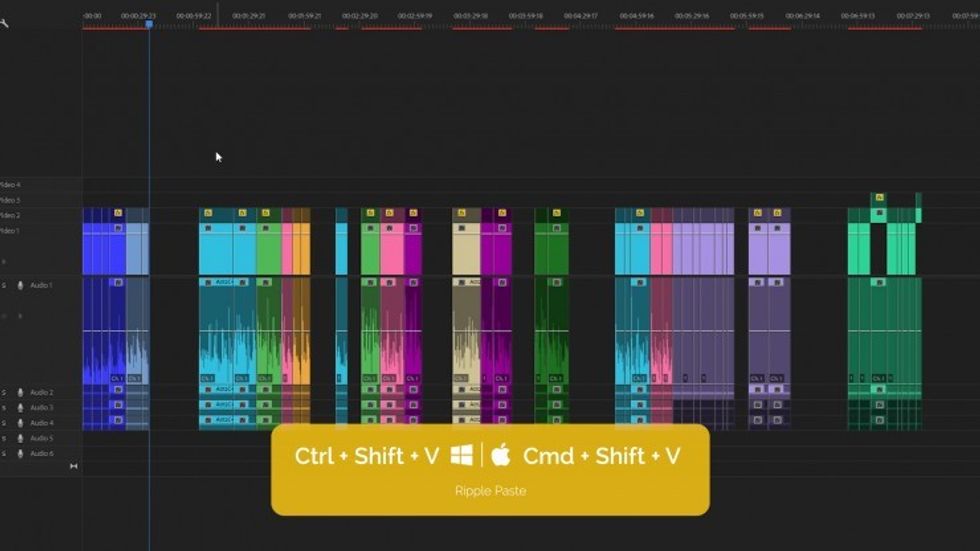
So we could use a macro mode (check out my Palette Gear article) to run the following shortcuts:
- Shift + 1 (my custom shortcut - there's no shortcut by default) for selecting a given label group,
- Crtl + X (Cmd + X) to cut the clips,
- Ctrl + Shift + V (Cmd + Shift + V) to ripple paste the clips,
- and Shift + X (my custom shortcut ) to close the gap for our selection.
This way, the whole process happens in the blink of an eye. Palette Gear Expert Kit is the first item in the giveaway.
2. Creating Submix for all Sound Effects Tracks
If you use sound effects in your edits, you probably distribute them on multiple tracks. Wouldn't it be nice to add audio effects to multiple tracks at once? It is possible, thanks to submixes.
Right-click the audio header and there's an option to add an audio submix track. By default, all tracks are fed to the master track which is used to export. We can send given tracks to the submix first and then the submix to the master track in Audio Track Mixer. Doing so, we can add up to five effects to the submix that will affect all of our sound effects at once.
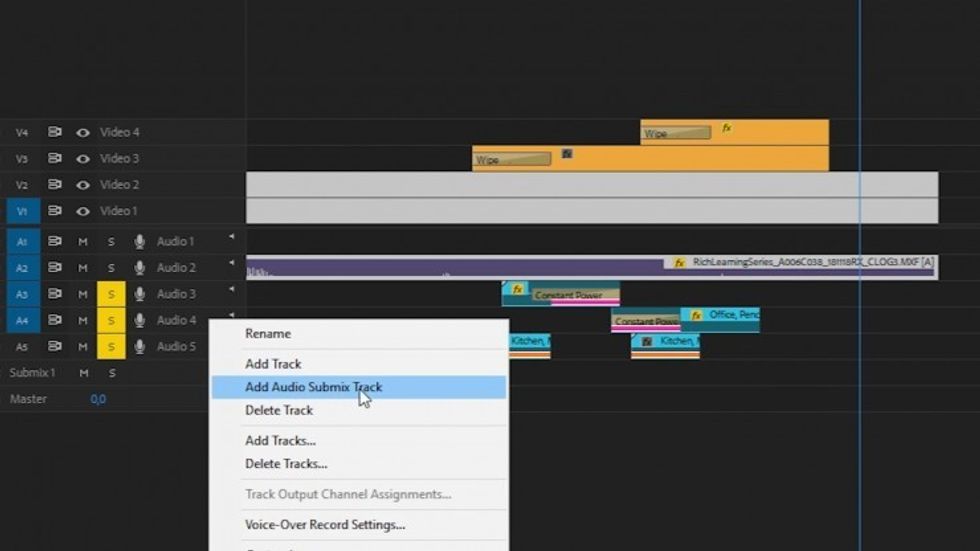
The second item in the prize bundle is a yearly premium membership of Soundly, which is all-in-one sound effects platform.
3. Pin to clip in Premiere Pro
In the Effect Control panel, you can move the playhead across the whole timeline. This makes precise keyframing very difficult. Not many people know that we can change the way the timeline is displayed.
Just open Effect Control panel options and choose Pin to Clip at the bottom. Now the timeline is restricted only to our selected clip.
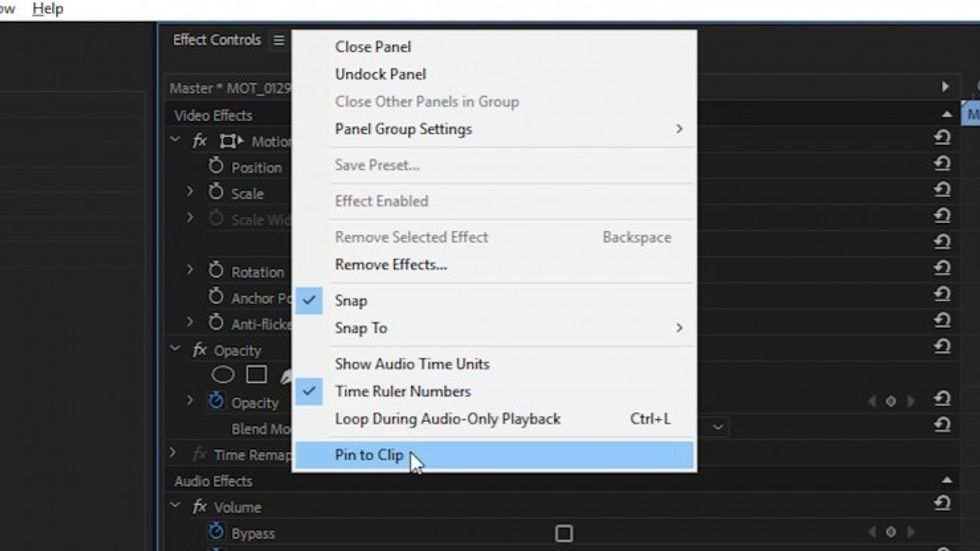
Once you click Pin to Clip in the panel options, it will be your new default setting and it really makes a difference when keyframing.
The third item in our prize bucket is a yearly subscription for entire Adobe Creative Cloud (it’s $600 in value alone).
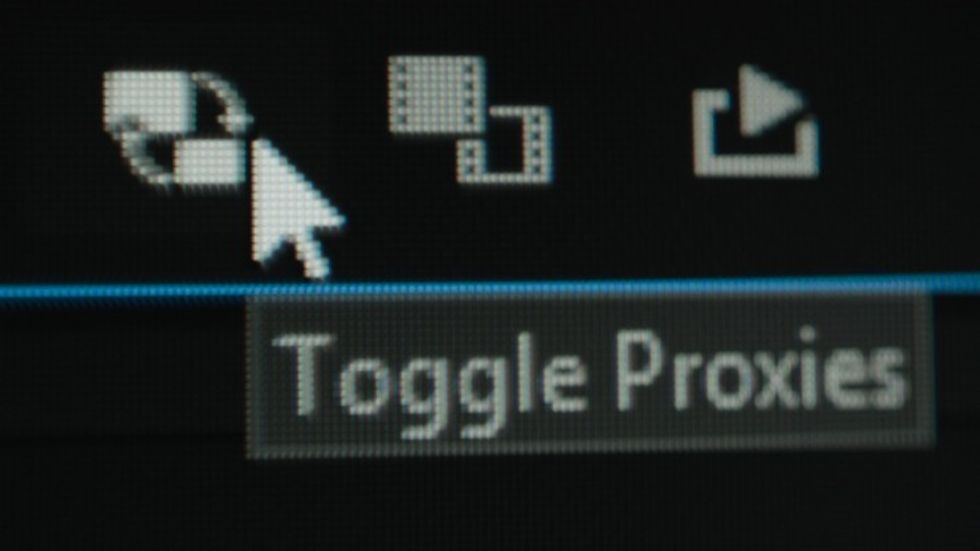
4. Proxies with an overlay
The next tip can be applied to any editing platform and it has to do with proxy workflow. It’s not always clear if you're looking at the proxy file or at the full resolution file in a given moment. For example, I’m not always sure if the blue toggle proxies button in Premiere means that I have proxy footage or full-res footage active.
But if we add a watermark or timecode to the proxies, it will be visible with just a glance. This can be accomplished in any proxy workflow, in Premiere or any other professional editing software. I’ll use Kyno for that purpose because it’s the next item in our prize list and in Kyno it's really easy to add timecode as an overlay when transcoding files to proxies.
To create watermarked proxies in Kyno, you select clips, right click and choose the codec you want to use. Then, for the video, choose Settings and Overlays and you have an option to Render Timecode Overlay. It's super cool and super easy.
5. Reversed Music Transition
So the trick is about creating a transition from one scene to another. Sometimes sound design can really sell the effect. Here are the steps:
- Find a song with nice fade/reverb at the end.
- Take that last portion of the song and reverse the speed for it.
- Place it just before the second scene kicks in.
- Combine it with a hit sound effect.
Usually, it works really well and you can use this trick in a lot of situations to create a nice flow in between shots (although try not to overuse it and make it subtle).
The last product in the prize bundle is a Premium SoundStripe subscription.
Bonus: Macro Shots without Macro Lens
Sometimes in my videos, I like to use macro shots. The thing is, I don't have a macro lens. I use a little trick you can do with any lens you have that will let you get very close to the subject. Just put the lens next to the mount with its front reversed and you’ll have super small focus distance. Here's one little icon from Premiere Pro. We can easily see subpixels in this shot.

With the bonus tip also comes a bonus item in the prize bundle, and it's one of the editing T-shirts I designed. The winner can choose the t-shirt he/she wants.
What are some of your favorite editing tricks that not many people know about? Let us know in the comments and be sure to enter the giveaway!