This post was written by Elliot and Zander Weaver.
Actually, yes. Quite simply, if you use the information below, your movies will immediately look more, well… movie-like. It’s a simple yet incredibly effective technique that will change the way you place your lights forever.
So, what exactly are we alluding to? And why should you listen to us? Both valid questions, and for answers, read on.
We’re Elliot and Zander Weaver, producer/writer/directors, and we’ve been filmmaking since the ages of 5 and 3—which means between us we have 57 years of experience when it comes to telling stories with cameras. We started our professional careers at 18 as camera department freelancers working on everything from BBCscripted dramas to Bentleyand Smirnoffcommercials. In our early 20s, we founded our own production company which financed, produced, and licensed factual entertainment to international networks like Discoveryand PBSand streamers like Netflix. And our debut feature film Cosmos, which we shot and lit ourselves, enjoyed a theatrical run across the U.S. and now streams worldwide.
So when it comes to lighting, we’ve learned from the pros we’ve worked beside and our own experience to hone our skills in making images look cinematic. And in our opinion, lighting is more important than composition and lens choice, and perhaps the most cinematic lighting style to know of all is reverse key.
Before we deep dive, let's look at two examples of our work which both rely heavily on Reverse Key lighting to create a polished, cinematic look.
The first is the trailer for our $7K feature Cosmos:
And this is our no-budget 6K Pro short Over the Moon:
What is reverse key light?
But first things first, let’s just make sure we’re all on the same page.
For those of you who are unaware, the "key light" is the main light that falls on the subject, hence the name. It’s the light that allows you to see a character’s face or the surface details of an object. It can be soft and flattering, hard and sculpting, it can be underexposed or overexposed, but its job is to shed light on the focus of the frame. Let’s look at some examples from the movies below.
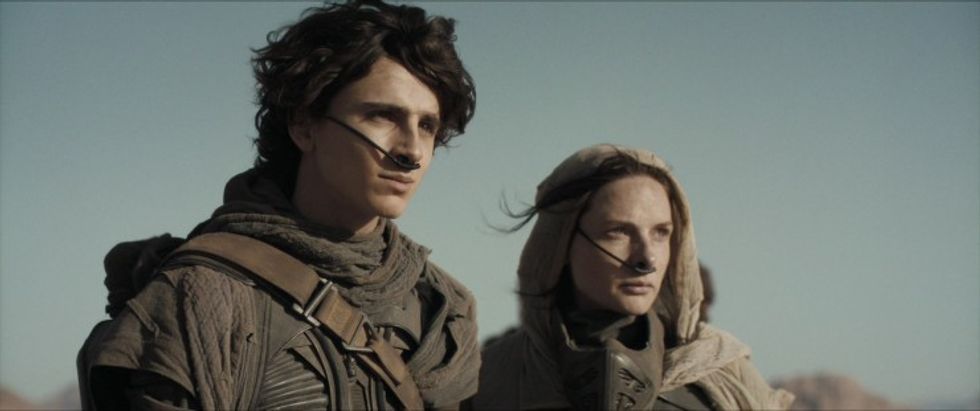 'Dune'Credit: Warner Bros.
 'Tenet'Credit: Warner Bros.
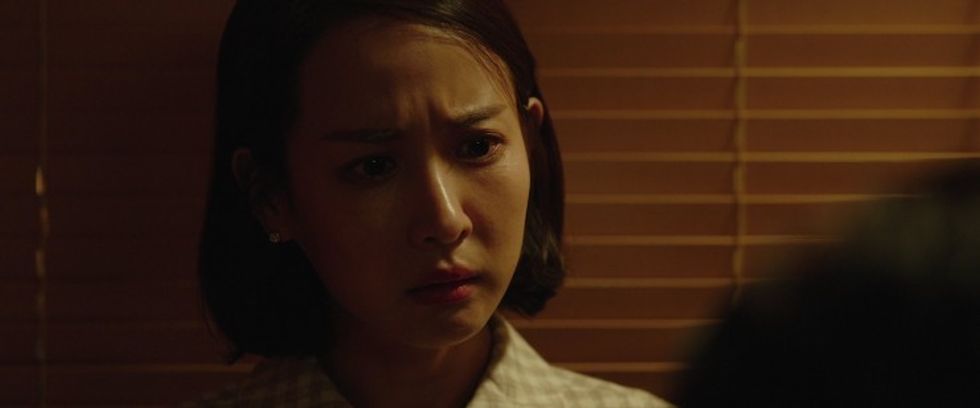 'Parasite'Credit: CJ Entertainment
This is “reverse key lighting”—if you already know about reverse keying you know you see it everywhere. If you’ve never heard of reverse key, prepare to never look at another movie in the same way again.
Reverse key is the technique of placing the key light at an acute angle to the subject, rather than simply letting it fall squarely onto it. A simplified explanation is to avoid setting your key light up “camera side,” i.e. don’t use the key to light the side of the actor’s face closest to camera. Always aim to light the plane of the face that is furthest from camera.
This does a number of things that make a face look more interesting photographically. For people with masculine features, it accentuates those harder elements of the face, creating interesting shadows and a “chiseled” structure.
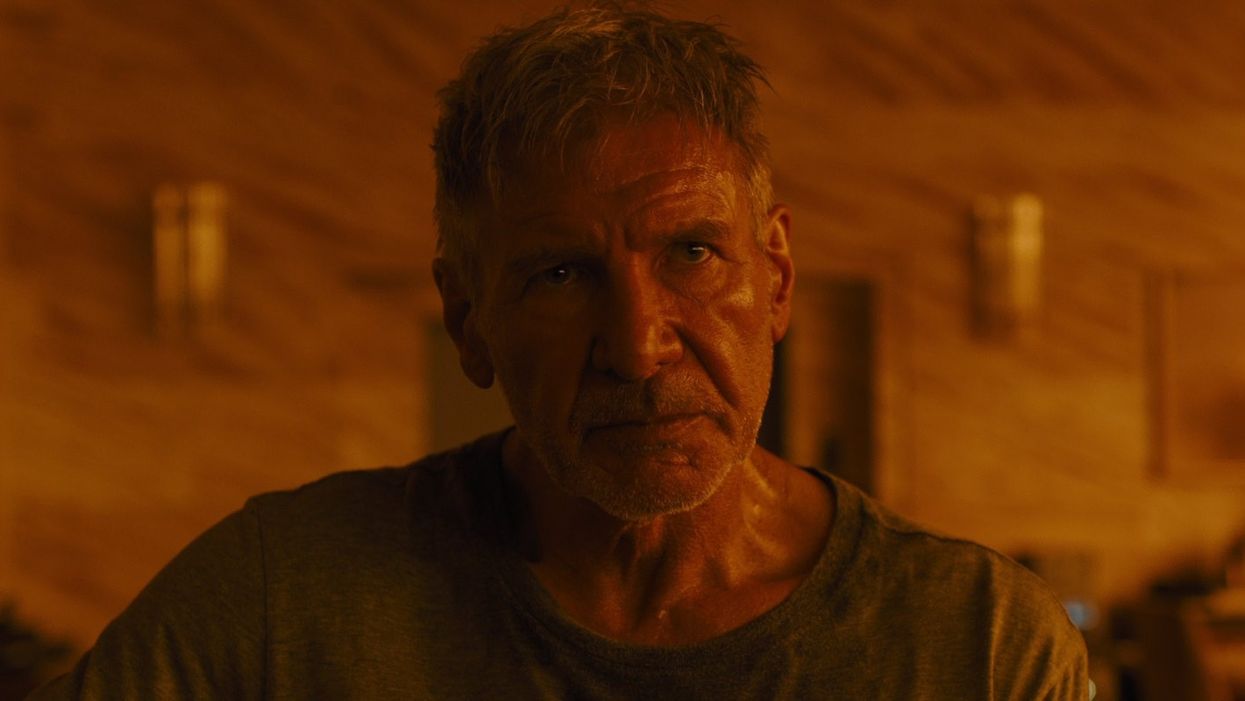
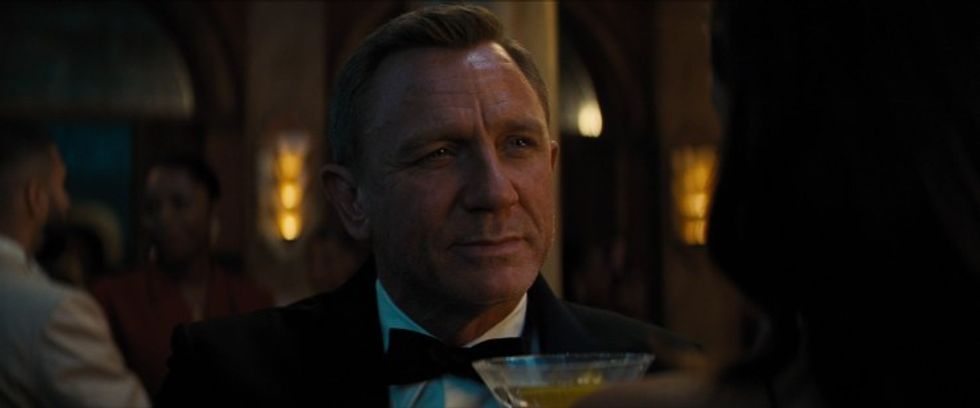 'No Time to Die'Credit: Universal Pictures
For both, it also has a narrowing effect, reducing the width of the face.
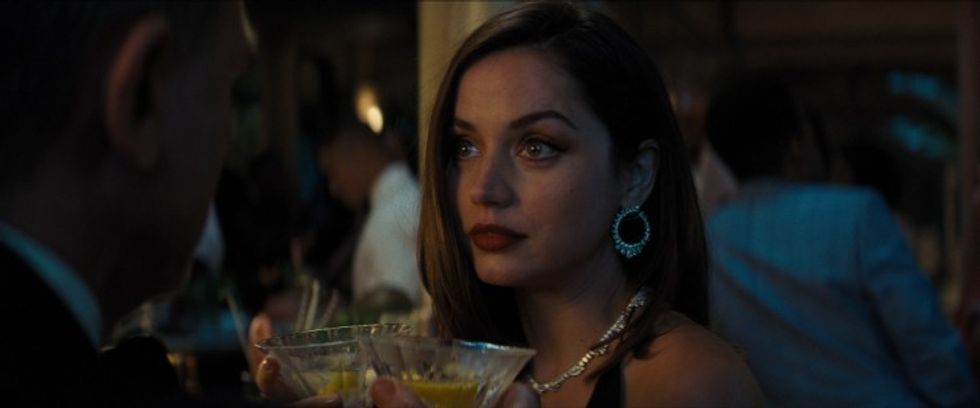 'No Time to Die'Credit: Universal Pictures
Fancy filling it in a little? Go ahead. Why not bring in a couple of backlights/rimlights/kickers opposite the key? Check it out.
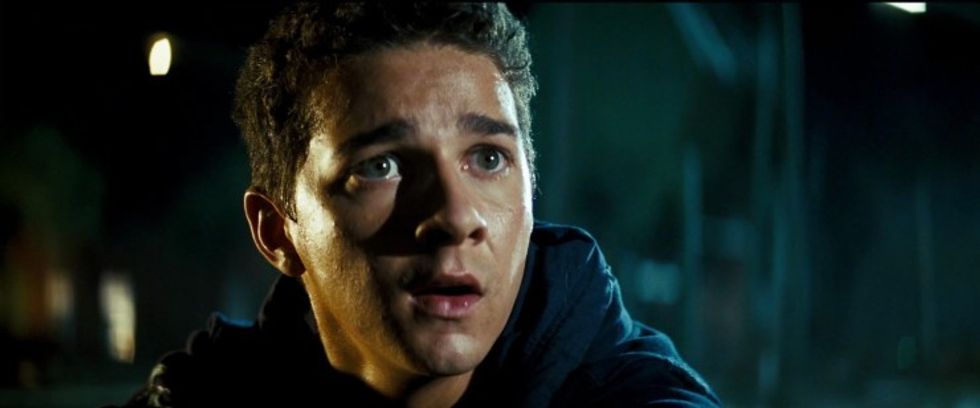 'Transformers'Credit: Paramount
Imagine shining a torch onto a soccer ball, then imagine lifting that torch to eye height. The effect you’ll get is flat lighting, you’ll see barely any shadow falling on your subject, because all shadows will fall away in line with the light source… in this case, you.
 Is it a sphere... or just a flat circle?
Now apply that same technique to your filming and replace the torch with your key and think of yourself as the camera. Always find the most interesting shadows.
 This is definitely spherical
A real-world example
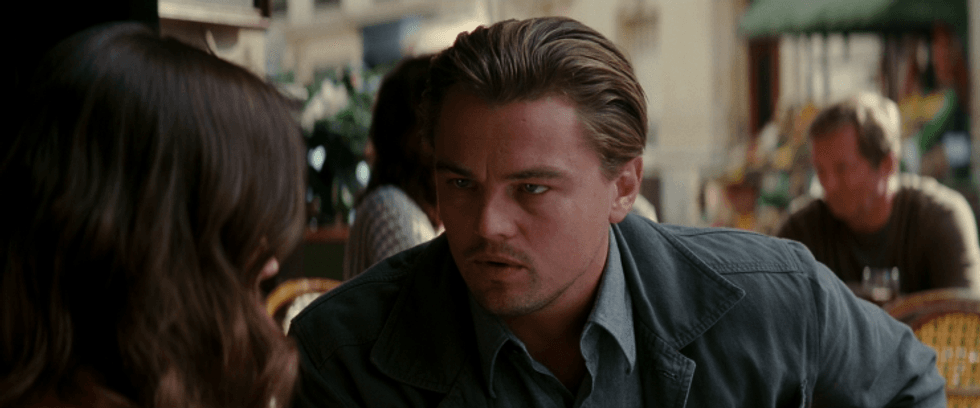
Below are two screenshots from Inception that help demonstrate what we’re talking about. The first shows some reverse key lighting—look at the shadows, the depth, the interest.
 'Inception'Credit: Warner Bros.
 'Inception'Credit: Warner Bros.
Does it fit the scene? How will it tell more of a story? In this example, we can see Mr. Pfister has done just that—he’s chosen to match the direction of the lighting to be believable with the world of the scene—and he won an Oscar for it, so good call, WP.
So there are always exceptions to the reverse key rule in every film, but if you’re looking for a starting point to improve your lighting, reverse key is a great technique that creates a highly photogenic and cinematic effect used by generation after generation of cinematographers and directors.
Remember: cameras and lenses can only get you so far, what matters most is what these devices capture… and that is light. Mastering focal lens, framing, and blocking is important but in the end, cinematography is, as John Alton famously said, painting with light (the word photography derives from the Greek photos- "light" and -graphos "drawing") so conducting light at different angles and intensities really is the art of cinematography.
Unless we have an in-shot motivated reason not to, we always use reverse key. Watch your favorite movie, TV show, music video, and pay attention to how the subject is lit… we’ll bet you 9 times out of 10 it’s reverse keyed.
Move your lights a little differently and see how it impacts the aesthetic of your work. We hope you enjoyed this quick tip. Thanks for reading, and good luck out there.
In 2019, producer-director-duo Elliot and Zander Weaver’s no-budget feature COSMOS, shot entirely on the original 2013 BMPCC in 1080p ProRes LT, released in U.S. theaters. Last year, impressed by their “no-budget” Pocket cinematography, Blackmagic Design sent the brothers their newly released 6K Pro to shoot a new short film. Today Elliot & Zander share their cinematography tips that will make your footage look like a movie.


