Got a Few Bucks? Then You Can Make Your Own DIY Prism Lens Filter
Love those prism filters from Prism Lens FX but don't love the price? Then learn how to make your own.
It was bound to happen, you guys. I think we all saw it coming, actually.
About two months ago, Prism Lens FX came out with some sweet lens filters that have little shards of magic attached to them, and yeah, they can produce some really incredible lens effects.
The one downside is that you have to spend $75 to get them. Not too big of a financial burden for most, I assume, but we love DIY filmmaking here, so of course we're going to share with you a super cheap, DIY alternative.
Check out this quick tutorial from The Phlog Photography to learn how to essentially bedazzle a cheap UV filter.
There's really nothing to this build, gang.
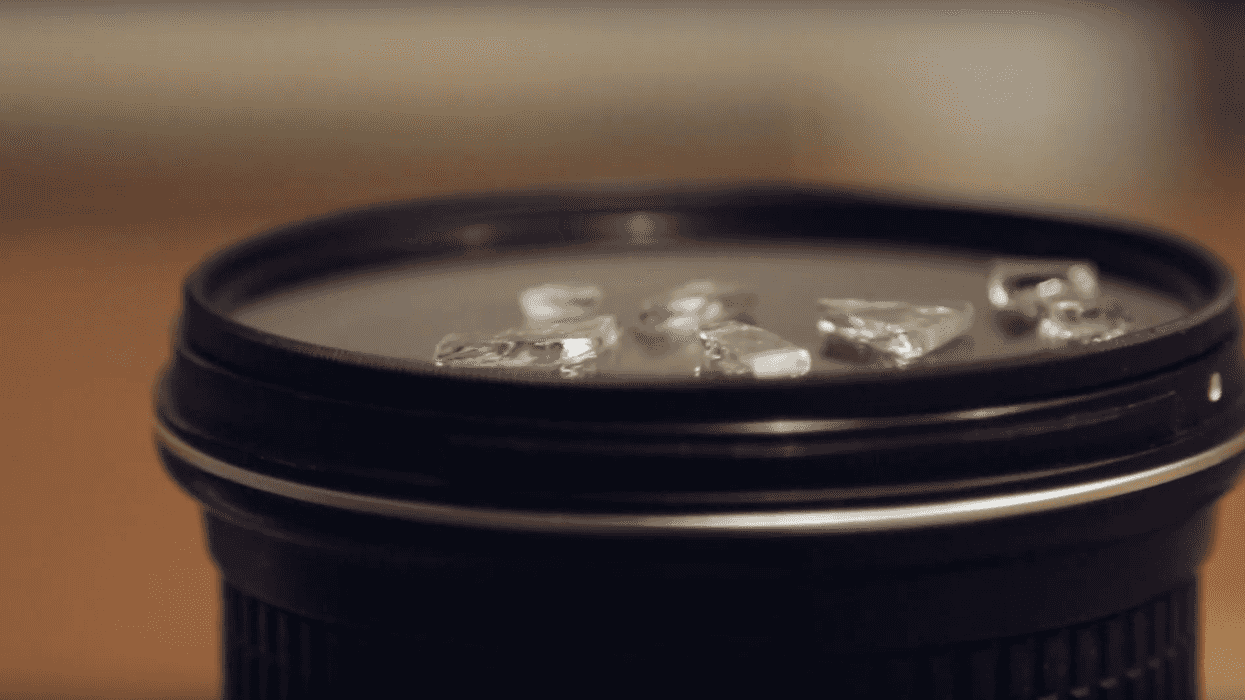
Just get yourself a cheap UV filter (they usually only cost a few bucks), some glass (or whatever you want to attach to the filter), and some glue.
One quick word about cheap UV filters, though. Be aware that some may not be great in terms of quality, causing your images to lose sharpness or making it more difficult to focus. So, test your UV filter out before you go ape shit with broken glass and glue because you might just be wasting your time on a filter that makes your footage look like dump.
Okay, back to the program.
Use a brush to apply the glue to the glass...you know...so you're not plopping globs of glue right onto the filter.
That's pretty much it. And I agree: we all should've thought of this sooner. If you have thought of this and/or have done this before: I salute you, friend.
This project might take a little trial and error. You might place your glass fragments in places that don't really give you the effects you want or maybe the glass you use just doesn't look right. It's all good. UV filters are inexpensive, so grab another one and try again.
Source: The Phlog Photography
- Are Handheld Filters Worth the Investment in 2025 for Your In-Camera Effects? | No Film School ›
- Try Adding Some Creative and Dreamy Effects to Your Shots With These New MAVEN Filters | No Film School ›
- This Center Split Lens Filter Isn’t Built for Everyday Use (and Here’s Why That’s Awesome) | No Film School ›
- Here’s How You Can Turn Your Favorite Lens Into a Macro Beast With One Click ›