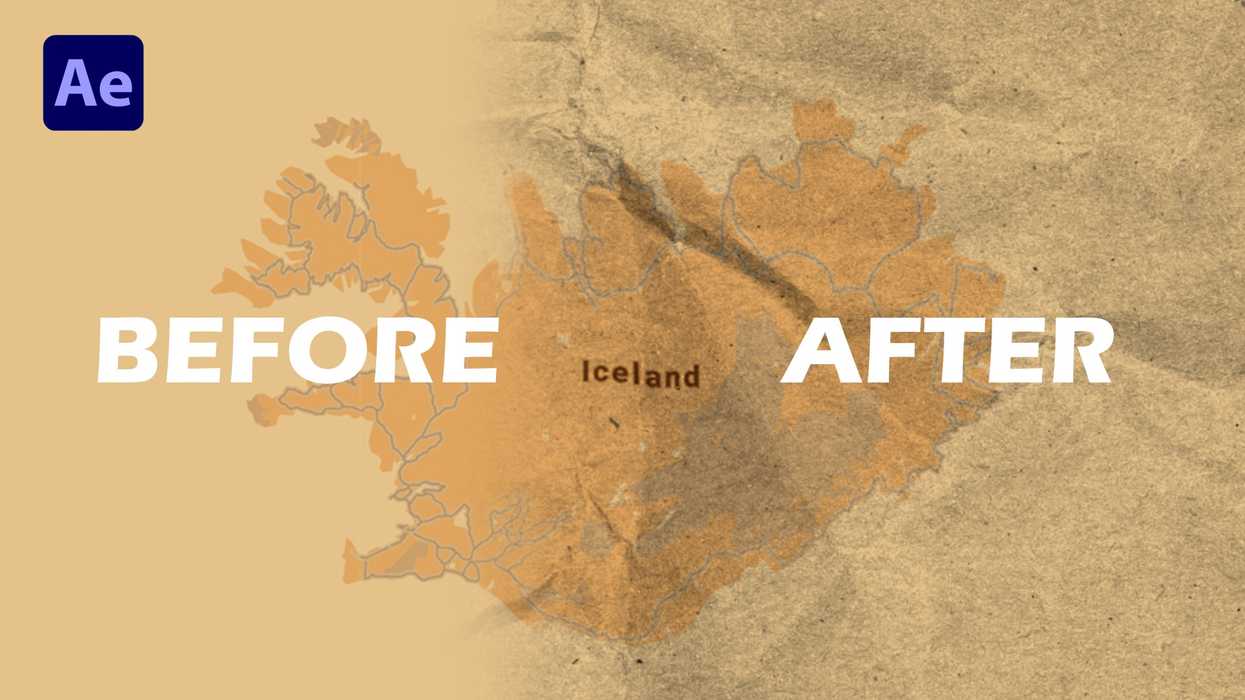
Displacement Maps can seem quite confusing to new After Effects users, but it's an incredibly powerful effect. In this example, I'm going to show you step by step how to add a paper texture to an animated map.
Step 1: Set Up Your Sequence
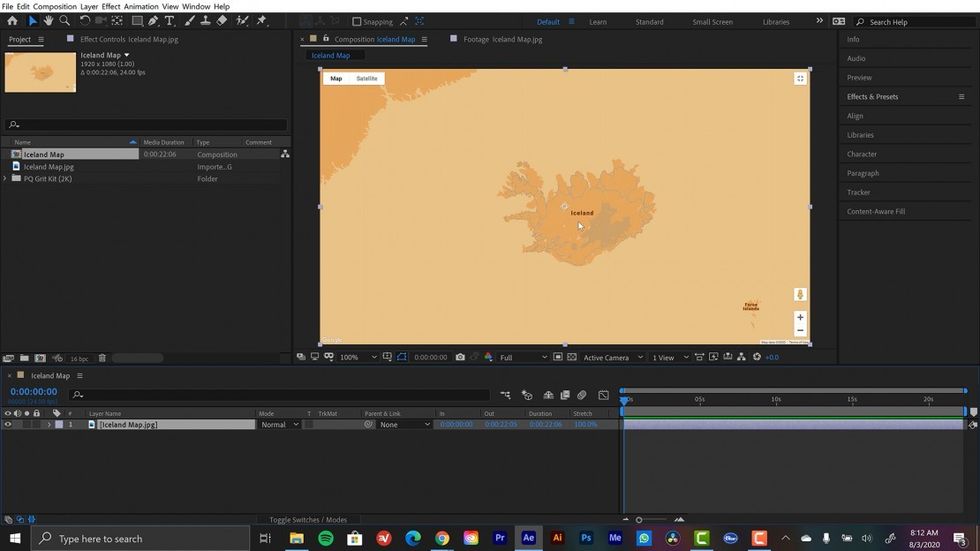
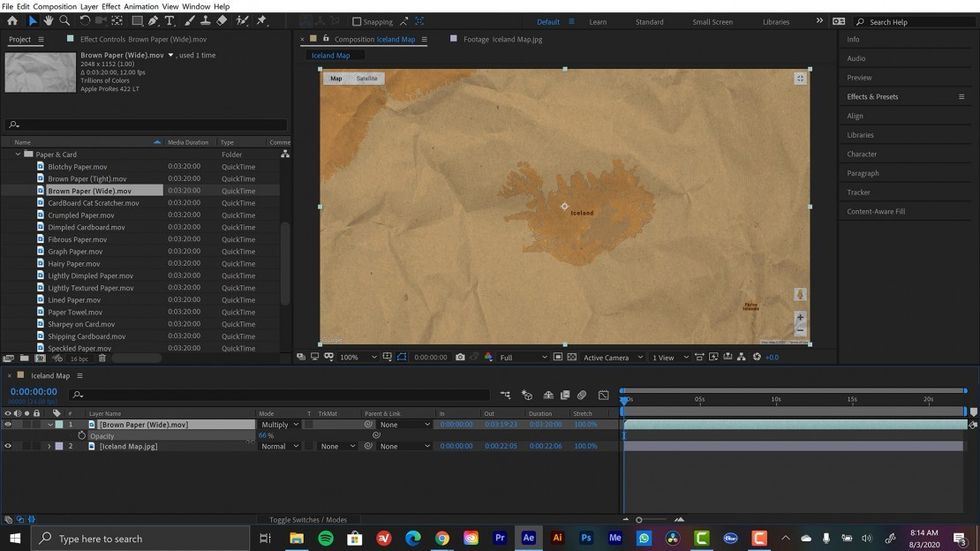
For my map image, I've taken a simple screenshot of a Google Map and set the resolution of my image to 1920 x 1080. I'll create a new sequence by dragging the image over the new sequence button. It's important to pay attention to the resolution of the layer, as I'll be matching the displacement map to fit the source map image. Both the displacement map and a blended texture will need to line up exactly, otherwise the effect won't work. You'll see what I'm talking about a bit later in the tutorial.
Step 2: Blend the Texture
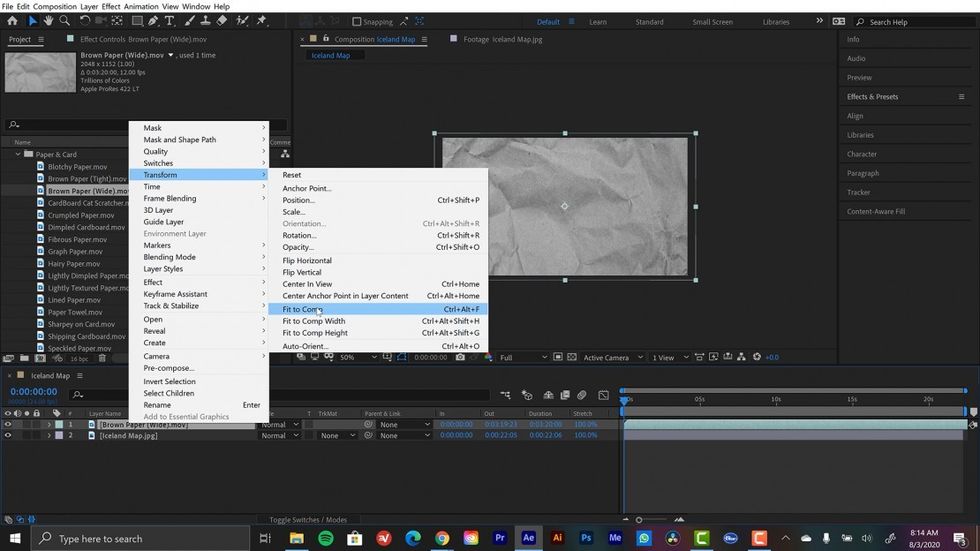
If you'd like to find a paper texture, a simple Google search of "crumpled paper" will yield many great results. Just to be safe, filter your search for items with a Creative Commons license. For this tutorial, I'll be using a premium pack of textures called PQ Grit Kit. Not only are these amazing textures, but they're also animated. With these imported in my project, I'll bring the Brown Paper (Wide) texture and drop in on top of my Iceland map layer in the timeline. It's slightly large than the comp, so I'll select Layer > Transform > Fit to Comp.
Once in place, I'll change the Blend Mode of the texture to Multiply. Right away the map looks much better. I can control the intensity of the texture via Opacity or even via adding a Curves or Levels effects to the texture. While it looks good, the map still isn't following the folds of the paper. For this, we'll need to use a displacement map.
Step 3: Add the Displacement Map
I'll duplicate my Brown Paper texture layer and place it under my map of Iceland layer. Next, I'll open up the Effects and Presets panel and search for the Displacement Map effect, which I'll apply to the Iceland Map layer. A displacement map essentially takes the pixel values of a control layer and uses that information to displace the pixels of a source layer. In this example, I'll use the bottom Brown Paper texture layer as the control, and the Iceland map as the source.
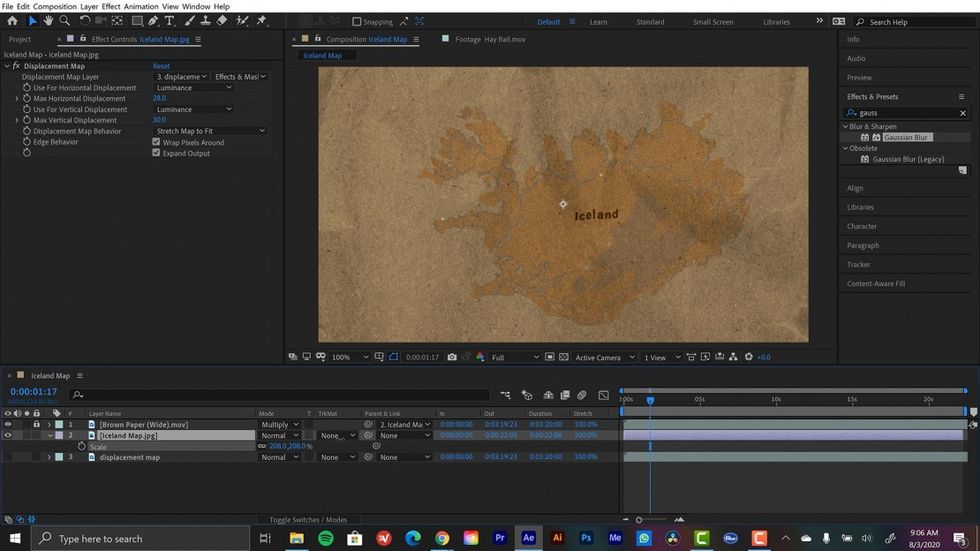
For the settings, I'll put both the Horizontal and Vertical displacement to 30 Luminance. To make sure that the displacement matches the blended texture layer, I'll set the Displacement Behavior to Stretch Map to Fit.
To avoid the fine grit in the texture messing up the displacement map, I'll add a Gaussian Blur to the displacement map layer and set it to 30. To accept the blur, I'll need to set the Displacement Map layer to Effects and Masks via the effect parameters. My last problem is that if I move the map of Iceland at all, it immediately falls out of sync with the blended top layer. This can be solved by simply parenting the top texture layer to the Iceland map.
And voila! Now my map looks better than ever. Again, you can pick up the premium PQ Grit Kit textures pack here.
Disclosure: Boone Loves Video is a participant in affiliate advertising programs designed to provide means for individuals to earn advertising fees by reviewing and linking to products.