Last week I reviewed a tool that helps you work with numbers inside of Adobe After Effects. The Digit Fiddler plugin allows users to sidestep complex expressions and get right to designing and formatting numeric information. This week we’re going to have a look at a plugin that makes working with ALL text elements just as streamlined.
Pins & Boxes allows you to create dynamic layouts in After Effects that automatically adjust when you change or resize specific elements. Instead of writing complex layout expressions, Pins & Boxes takes care of all the technical details with just two very simple concepts: pins and boxes.
Let’s create a quick title graphic and see how it works.
Once installed I’ll open up the Pins & Boxes panel in After Effects via File > Scripts.
Step 1: Add Pins
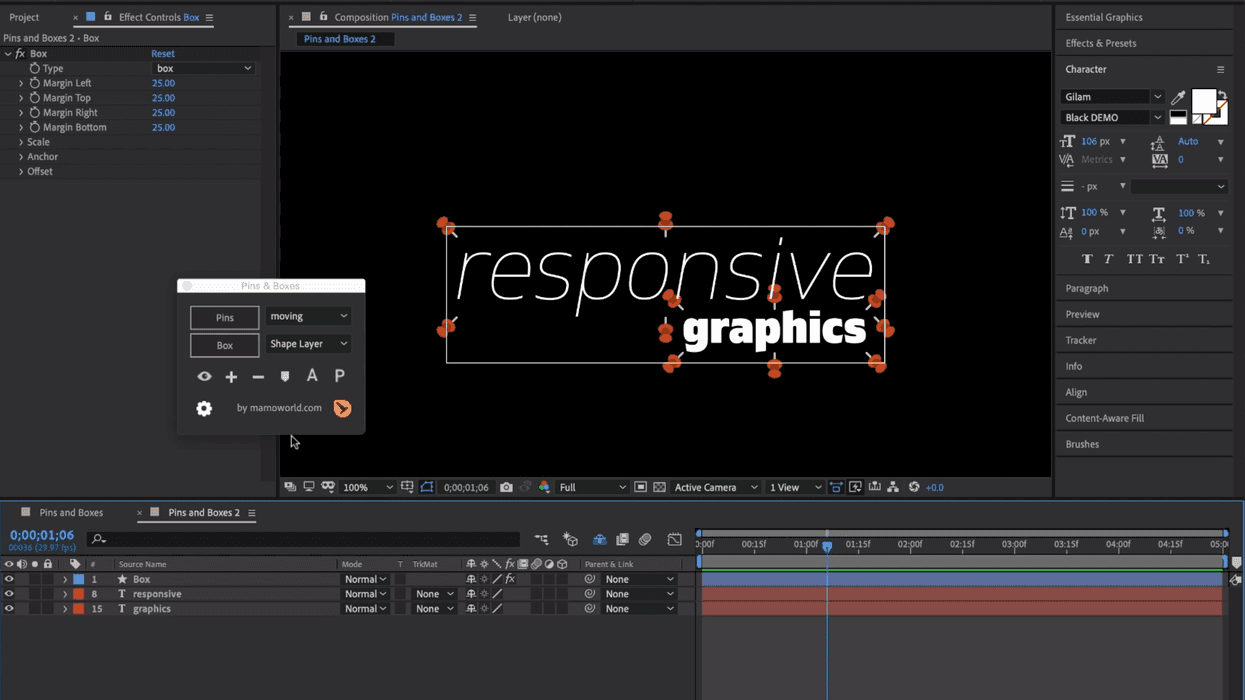
For the first step, I’ll create a text layer and center it in my comp. With the layer selected, I’ll press the Pins button. This will add six new pins around the text. I can shift-click the Pins button to bring up a dialog box that will allow me to be more precise with pin number and placement. So what do pins do?
Pins are small shape layers that are attached to the boundaries of another layer—their mother layer. If the size of the mother layer changes, the pins will automatically adjust their position accordingly. The beauty of pins is that you can attach other layers to specific areas of the mother layer.
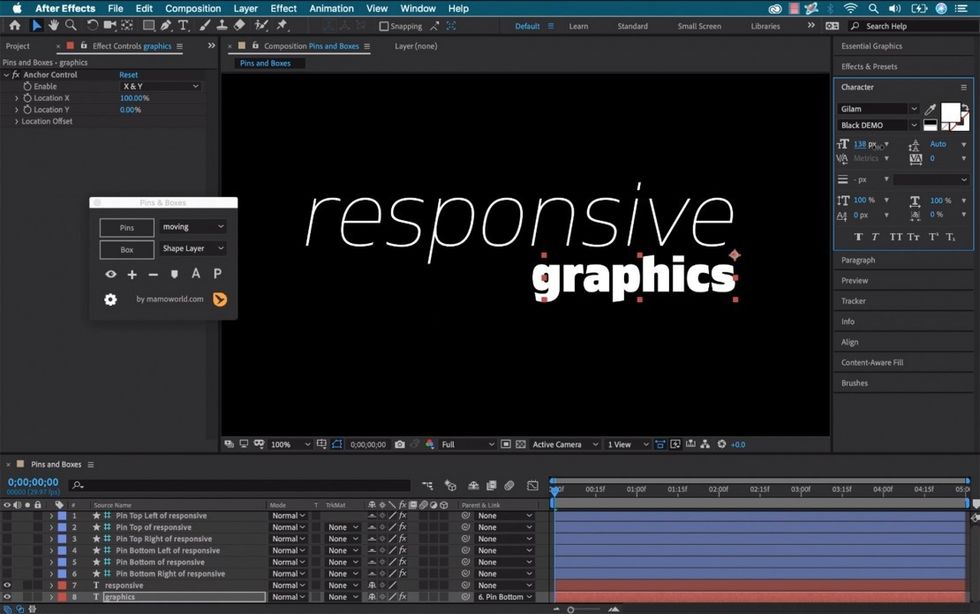
For example, I can create a subtitle text layer and parent it to the bottom right pin. Now if I scale or move the main title, or even change the text, the subtitle will stick to the bottom right corner of that layer.
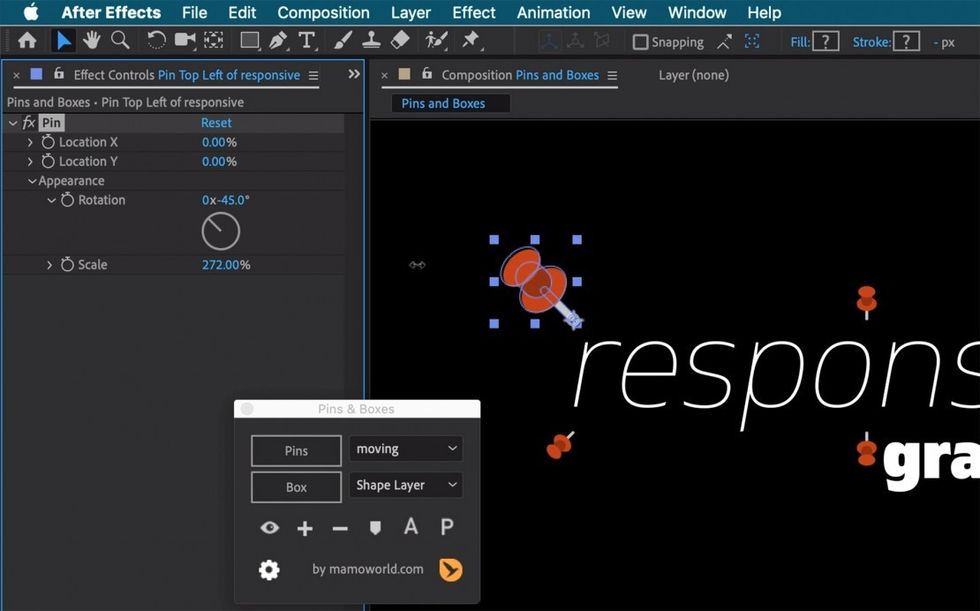
Now this particular subtitle is center-aligned, meaning the anchor point is located on the bottom of the layer, directly in the center. This could pose problems if I want to resize the text, as it will start to overlap the main title at some point. Pins & Boxes has a feature to help avoid this.
To fix this, I’ll grab the subtitle and press the A button in the Pins & Boxes panel. This will add an Anchor Point control effect, allowing me to reposition the anchor point to the top right of the text. Now the element will stay aligned to the right, and scale out and away from the main title.
Step 2: Create Boxes
With the text in place, now I want to add a few background elements. For this, I’ll use boxes.
Boxes are shape layers, solids, or precomps that are automatically resized so that they always include their own set of pins. If any of the pins move, the box moves and resizes to ensure it still includes all the pins attached to it.
Boxes can be created for any selection of pins—simply select the pins from one layer to create a box exactly around its contents, or the pins from several layers to create bigger boxes. In this example, I’ll first select all of the pin layers of my main title and click the Box button to create a new shape element. Now I can stylize the fill and stroke, as well as the margins and placement via the new Box effect in the Effect Controls panel.
The beauty of this setup is that the box background will now automatically resize if any changes to the main title are made. I can also easily animate the box via the scale and anchor controls in the Box effect. I could even switch the box to a horizontal or vertical line. Now I’ll repeat this step to create a box background for my subtitle.

Motion Graphic Templates
The icing on the cake for this plugin is the fact that you can use it in After Effects to create mogrt templates. Adobe Premiere Pro users will be able to use these mogrts without having the plugin at all. Now you can avoid all of those complex expressions and quickly get a dynamic motion graphics template setup with quick access to the effect controls. This example is really only scratching the surface of what you can accomplish with this plugin.
You can get Pins & Boxes for $39.99 at aescripts.
Disclosure: Boone Loves Video is a participant in affiliate advertising programs designed to provide means for individuals to earn advertising fees by reviewing and linking to products.