Hello! My name is Jordan Graham, and I spent seven years creating a film based on a supernatural entity named Sator, who in real life deeply impacted my grandmother (she also stars in the film) and has been a part of my family since 1968. For the purpose of this article, I will be focusing mainly on the tech aspects of this project.

Sator is a film where I did pretty much every job behind the camera myself. I shot for 120 days where most days consisted of only myself with an actor or two. For around 10 of those days, I had someone assist me in doing basic tasks like holding an umbrella when it rained. And there was only one day when I needed three people to help me for an hour, which I will get into later in this article. After shooting the film, I worked alone in post-production isolation for years.
Working alone
Before we get started on the tech talk, why did I decide to make this film by myself? Well, there are a few reasons, but the one I’ll share now is that it’s been really difficult the last 21 years to get noticed by anyone in the industry. There are so many films out there that slip under the radar, so I wanted to create a story that was as unique as possible (the true-story influence of my grandmother) and done in a unique way (making it by myself), in hopes of standing out enough for people to notice what I have to offer in the industry.
As I was writing the script, I attempted a crowdfunding campaign that ended up being a complete failure. Luckily though, a generous friend offered to loan me half the budget for some back endpoints. I happily accepted that offer and dug into my wedding videography savings for the rest of the budget. Since I was going to take my time with the project, I determined it would be cheaper to purchase all of the equipment I would need instead of renting. This did ultimately save me thousands, and since I didn’t have any preexisting gear before the film, now I have some for future projects. As I waited for it all to be delivered, it was time to start building the cabin.
Disclaimer: This is not a tutorial on how to make a film. Since the majority of the time was just me learning as I went along, I thought it might be interesting to share my experiences in trial and error. Oh, and major SPOILER WARNINGS from here on out.
The cabin
I built the cabin over the course of two months in my mother’s backyard, which was in a suburban area near the ocean. I first leveled the dirt and laid the foundation of pallets that I collected around town.

A lot of the building materials I gathered were free. The walls of the cabin were made from boards of our collapsing yard fence. A neighbor just happened to be building a new deck the day I started construction, so he gave me the old wood, which I used for the floors of the cabin. Another neighbor let me borrow his tools, and I collected river rocks from the mountains to create the fireplace along with cement.

Unfortunately, water built up on the particle-board roof the first time it rained, causing it to sag in multiple sections. After that, I bought framing studs to brace the roof during future storms, and I would stand outside on a ladder with a hose draining the puddles.


The most expensive item was the furnace, at $350. The cabinet sink, bookshelf, refrigerator, rocking chair, deer head, and firewood were all donated. Almost all the other decorations came from thrift stores and my grandmother’s house.
The cabin’s grand total was approximately $1,500.
The costumes
I hand-picked every article of clothing for all the costumes. For the creature, I ordered around 60 dead things from Etsy and then weaved them all together with pieces of rope. The deer skull was hollowed out with a Dremel saw so the actors could wear it with a folded sock I stuffed inside for cushioning.

The props
I designed all the in-movie brands, such as the embroidered Cock n Rock patch, Younglove Island Brewing beer labels, and Crooks Vodka flask.
I carved the hunting whistle, built the beer case, and assembled a cross necklace out of nails. All the shotgun ammunition came purple, so I painted each one individually brown and soaked all the cassette tapes in water before mucking them up one at a time.

The make-up
For Gabe Nicholson’s (Adam's) makeup, I would rub a dark red FX cream under his eyes and then brush on a powder to make him not so shiny. I ground up hookah coals I bought from a local smoke shop in a coffee grinder and brushed that on his face to dirty him up.

The camera
The Red Scarlet MX Brain was purchased new, but everything else on the camera was used and half-broken from eBay. It just needed to work!
The main button on the side handle got sticky, so it took forever to adjust camera settings, which I did by using a pencil eraser to press the button just precisely. There was an annoying glitch between the Red Side Module and the Redmag where every so often I would get this little white pixel in one frame which made it incredibly difficult to find and paint out in post.

I also only used one 128GB Redmag, giving me about 40 minutes of footage to which I had to use very sparingly.
On the back of the camera was a Camtree Hunt quick back battery plate to carry 2PC Power-U 150S Batteries, which broke so fast I had to duct tape them to the camera.
I mounted a Wooden Camera Nato Handle to the top and attached the Zacuto EVF with a punctured yellow splotched screen (pictured above) which I could barely see out of. I also used an Olympus ME-51S for scratch audio.
The lenses
I waited a while for the right vintage lenses to pop up on eBay, but I eventually bought a Leica Elmarit-R 24MM, Leica Summilux-R 35MM, and a Leitz Wetzlar Summilux R 50MM.
Later into production, I realized the 24mm wasn’t wide enough for me, so I found my friend’s broken Tokina 11-16MM f/2.8 and got it repaired for two hundred bucks. I bought a cheap Canon mount for the Tokina, but since that lens wasn’t manual like the others, I had to bring another DSLR camera with me whenever I wanted to adjust the aperture.

The lighting
I bought a four-light ARRI Fresnel kit with dimmers and other accessories. There was a 250W, two 650Ws, and a 1K.
To be honest with you, I’ve never used film lights before, so this was very exciting. These lights were mainly used only in the cabin or garage, usually just one or two at a time, bouncing off the ceiling or shining through muslin. Each practical light in the cabin had a 500-watt bulb that I dimmed down to avoid clipping.


I only used natural light in the forest during the day, sometimes using a piece of white poster board to help brighten up the actors’ faces.
I had one big rule: no evidence of the sun. I am so used to shooting on DSLR cameras with a horrible dynamic range that when the sun was peeking through the trees, the lighter spots are usually overexposed with the shadowy areas underexposed. I wanted everything outdoors to be soft, visible, atmospheric, and beautiful. So sometimes we would get out to a location and wait hours for the sun to hide behind the trees.
Other gear
I purchased a DJI Ronin gimbal, which I did something incredibly careless with on the very first day of using it.
I wanted to get some smooth shots of a truck driving through the forest, so I sat with the gimbal on the hood of another vehicle, while it followed closely behind the truck. Once I finished that take, I put the gimbal on its stand, took the camera off, and secured it to my Manfrotto 536 Tripod with a 509HD fluid head.

I set up for a static shot of the truck driving, called action, and forgot that I had set the gimbal down in front of the truck where the actors couldn't see it. So they proceeded to drive over the gimbal, bending the metal slightly—but it was still usable!
Luckily the camera wasn’t on there. Since the gimbal stand snapped in half, I had to use an ARRI light stand for the remainder of the shoot.

Most equipment issues I had were just minor nuisances, but the one piece of gear that gave me the most problems was my dolly.
It was made out of two pieces of PVC pipe with three sets of wheels the tripod snapped into. The pipe wasn’t lying on anything but the terrain, so the wheels were constantly snagging on dirt, twigs, and leaves. Trying to keep the dolly smooth while panning, tilting, keeping focus, and paying attention to the performance was extremely frustrating.
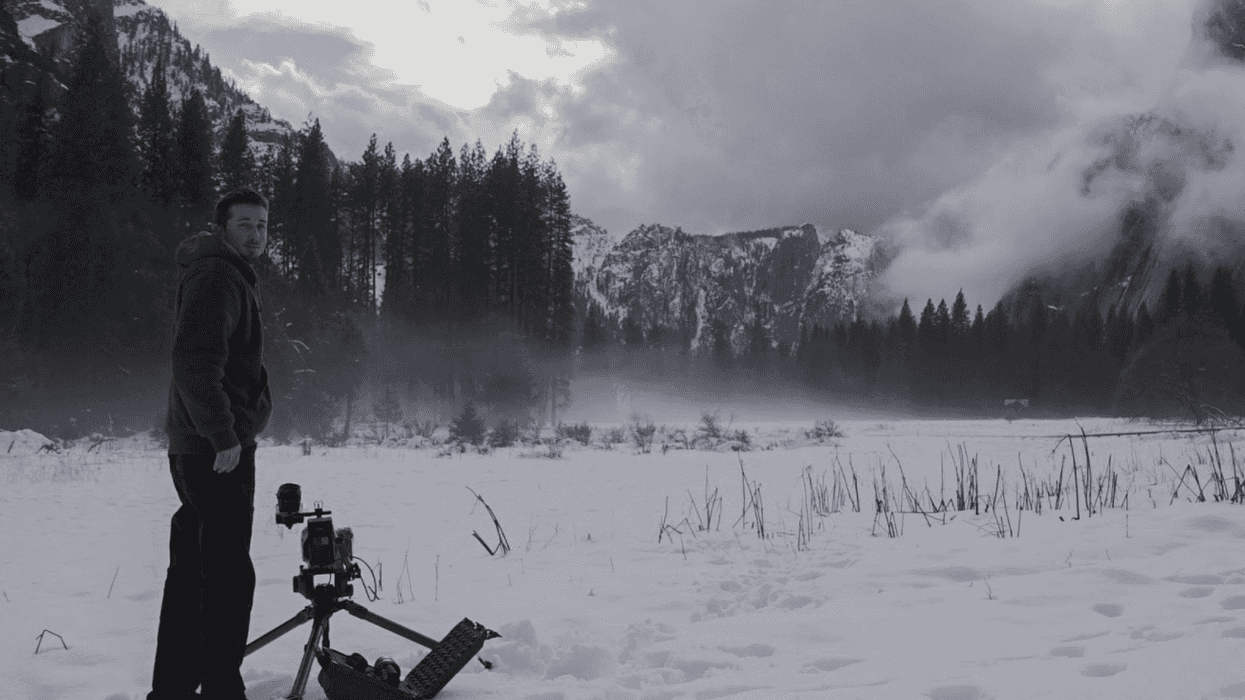
I love camera work that’s either still or moves smoothly and steadily. Since I’m a very visual person, one of my absolute favorite aspects of filmmaking is finding that perfect composition. So the tripod became my best friend, and if I happened to be caught in the forest without one, I would have to build one out of logs (seen above left). It wasn’t perfect, but it got the job done.
Production stories
Blue the dog was interesting because I couldn’t stand behind the camera during a scene, or else he would either look at me or right into the lens. So after I pressed record, I would go hide somewhere he couldn’t see me. Also, to get Blue running through a shot, I had to position him, go press record, call action, run to another location, and yell, “Come here, Blue!”

There were a few times I had to be innovative when working all alone. There’s a shot where the camera pans to a door opening, revealing a candle outside, which is then blown out.
How I achieved this was by having one hand on the tripod handle and the other hand holding a broom that kept the door closed. As I panned the camera, I pulled back on the broom which would let the door open automatically. Then I took a step back, dimmed the light, ran around the cabin, and blew out the candle.

When you see Sator at the end of the film, the ram skull was actually too small for anyone to wear. So I created a wooden cross, laid the costume over it, secured the ram skull to the top piece, and tied a fishing line to the skull so that when I pulled it, the skull would slightly move.

We had plenty of problems with the truck. A big one was at the dirt road location deep in the forest where the truck just loved to break down, leaving us stuck for hours.
This happened on at least five different occasions, but luckily there was cell phone service. I had to call the tow truck a couple of times to come to save us.
One evening, the sun went down and we were stranded in the dark hearing gunshots in the distance. That was pretty scary.
With Pete’s death scene, I filled a water extinguisher full of red water and connected a plastic tube to it. I taped the tube along Gabe’s arm until it reached the deer antler in his hand. I sawed off the tip of the antler before the scene and added it back in there later with photoshop. Once Gabe (Adam) jammed the deer antler into Michael Daniel’s (Pete) neck, I had someone offscreen to squeeze the fire extinguisher, releasing the blood. We had only one take for this before blood ruined Michael and Gabe’s costumes.

Next, it was time to burn Michael’s beard.
Yes, we actually did that.
I taped the blood tube to his neck and stuffed the end of it into his beard. Since his beard was saturated with red water, it wouldn’t light on fire. Then Michael had the idea to brush lighter fluid onto his beard, and that worked quite well. His whole face was engulfed in flames for about two seconds.
We did this only twice since his beard was disappearing, and it was the only day I needed three people there to help make sure Michael didn’t burn his face off. There was someone to light the beard, someone to put it out, and someone to release the fake blood.
(Editor's note: Please don't light your actors on fire unless they are stunt performers with trained safety personnel on hand.)

Even though the final death scene takes place outdoors in the snow, I actually shot it in my garage against a black curtain. I did that because I couldn’t afford some fancy snow machine. Instead, I built a large wooden box, wrapped it with a fishing net, filled it with fake snow, and fastened it to the ceiling. Then, when the sides are tapped, snow would fall through the netting and onto the actors.
Unfortunately, I screwed up one of Gabe’s eyebrow-cover prosthetics in this scene, so I had to film his shots mirrored. This was a struggle because I had to make sure the light on his face was coming from the correct side and that I wasn’t breaking screen direction. Then I mirrored the image in post.
Computer and storage
I purchased a Mac Pro trashcan, an HD Asus monitor, and an LG 4K monitor for color grading. I picked up an HP LTO6 Ultrium 6250 External Tape Drive that connected to an Atto TLSH-1068-D00 to back up all my footage on LTO 6 tapes.
The main hard drive I used was a Lacie 5BIG 20TB Thunderbolt 2 hard drive.

The visual effects
Since most of the film was shot in-camera, it took me only about a week to do all the effects shots. I did use greenscreen made out of poster board from the dollar store, but I wasn’t skilled enough to key most stuff out, so a lot of those shots didn’t work.
The software I used was After Effects and Photoshop. If there were white spots of light poking through the trees, I would paint it out. I wasn’t very good at covering the eyebrows with prosthetics and makeup, so I had to smooth those shots out. The waterfall tunnel near the end of the film was covered with graffiti that I had to paint out.

I took photos of different cabins I found in the mountains and then combined them together in Photoshop to make the cabin exterior.
The shot of Gabe levitating was just a still photo of him lying on a raised platform with his arm, torso, head, and legs being its own separate layer that I moved individually in After Effects, making it seem like he is in motion. I could afford to make only one creature costume, so I had to do some tricks to make it look like there were multiple. I had my grandmother write out the credits by hand and then digitized them. If I had to add a credit later on, I would have to separate existing letters in photoshop and arrange them to make a new name. It took an hour to create just one new credit.
The scene where Evie (Rachel Johnson) was flung up into the trees I thought was clever.

After getting the shot of Gabe chasing her, I filmed Rachel performing different jumps and cartwheels. Then in Photoshop, I painted Rachel out for 17 frames near the end of the take where she is running. So basically she runs and then becomes invisible for over half a second. Next, I painted her back in but made it look like she was running into the trees. Finally, I brought in the cartwheel shot and merged the two together to make it look like she gets flipped upside down.
Color grading
I used DaVinci Resolve, which I had to learn. I probably colored the film three times before settling on a look I liked.
To help me out, I used screengrabs of The Witch by Robert Eggers as a reference, and since Sator is quite dark, I would find the darkest parts of his film and make sure I didn’t go any darker.
Eyes were pretty important to me as well. I would isolate them as much as I could, brighten them up, and sharpen them just a little.
My workflow was also strange. After the film was graded, I would export it back to Premiere and use Neat Video to denoise it. Then I would export it again so I could actually play it back while doing final touch-ups with color and adding 35mm grain. The whole color grading process took a thousand hours.

The sound design
I purchased two mics: a Sennheiser MKH-416 for SFX, foley, and ADR, and a RØDE NT4 stereo condenser for ambiance and music. I used an H4N recorder to capture audio for about a day, but it produced way too much noise, so I got a Tascam DR-60MKII which was perfect for my needs.
I did combine it with the Sound Devices MM-1 preamp but found no difference in sound quality and felt it was a waste of money. Since this film is very quiet, and I had no one to help me, getting audio while shooting was just not going to happen. The cabin was not insulated at all, so you could hear everything outside. Traffic, music, TV, ocean waves, and sometimes the neighbors in their hot tub right next door.

Other than Nani (June Petersen) speaking, all the audio had to be recorded in post-production. Since I wanted everything to be from me, I refused to use any sound libraries and recorded every click, clack, crunch, creak, bang, breath, step, and piece of cloth separately from scratch, resulting in thousands of audio clips.
Finding a quiet place was nearly impossible. I went as deep into the forest as I could but would still hear planes, rivers, and birds. I ended up making a little dirt foley pit in my garage surrounded by mattresses, but I could only record from 11 p.m. to 4 a.m. Even then, I would still hear the sea lions, cars, the lighthouse, and a mile buoy that I could never predict when it would go off.
To get the audio of Gabe running through the river, I dug a hole next to the cabin in the backyard and filled it with water. Then at 2 a.m., I would splash around just in my boxers so I wouldn’t hear the water hitting my pants or shoes.
The score
This was the only aspect of sound design I actually enjoyed, and I am not a musician by any means. What you see in the photo were my only instruments for the score. I positioned a mic under the pots and pans and then rubbed on the top or dropped nuts and bolts on it for a drumming like-effect. I then plugged a cheap bass guitar into the computer and used a violin bow to create eerie sound effects.

Mixing
I used Adobe Audition to mix the film. Again, I had to learn the software and figure out how to mix the film in 5.1 surround sound using a Yamaha Receiver with five Audioengine A5+ speakers and the S8 subwoofer. In Audition, I had five tracks of dialogue, seven tracks of ambiance, one track for cloth, 20 tracks of foley/SFX, and 15 tracks for the score.
I watched some YouTube tutorials on how to beef up and clean up the dialogue like going into the waveform and erasing any imperfections. I also did a lot of experimenting by slowing things down with music.
Most of my ambiance was the exact same 30-second clip throughout the film. I just messed around with an EQ to make it sound different. All in all, recording and mixing the sound took me a year and four months.

Wrapping it up
After the film got accepted into the Fantasia Film Festival, I had to get a DCP made and make promotional material. I had a huge display poster printed and had a friend help me run an Instagram/Facebook ad in the Montreal area to get as many people into the premiere as possible. The film didn’t officially sell out, but all the seats were taken with people standing in the back so that pretty much counts! After the first screening, I noticed some frame rate issues so I went back and began fixing those.

Then when the film found sales representation, I had to deliver everything. I already had my stereo and 5.1 mix, but I still needed to create a DME and M&E mix which took several months of going back into Audition and sorting through everything.
Then there were a bunch of little things I had to handle, such as subtitles, a new poster, and a director's commentary, which you should listen to if you’re interested in learning more about my process in fine detail with many more stories.

In conclusion, I will never make another film on my own again. It really did take its toll on me, so I just hope I did enough to prove myself and show how dedicated I am to this medium/artform that I Iove so much. A few doors have opened since the film's premiere, so that is encouraging. I am now ready to work with talented people, but I still remain cautiously optimistic until that happens.
Sator was picked up for US distribution by 1091 Pictures and first released on streaming platforms on Feb. 9, 2021.
This guest post was written by director Jordan Graham. You can buy or rent Sator now on Amazon Prime.