When it comes to recording sound, one day you will inevitably have to place a lavalier on talent. If you're new to the concept, it can be tricky to navigate not only on a technical level—where to place it to capture the best sound—but also when it comes to communicating with the actor.
This guide will help you get through it all. Let's get to it!

Set Etiquette
Before we get into the how-to's of wiring, let's talk about set etiquette.
It doesn't matter if it's a group of your friends getting together to shoot a short, or if you're working on a Patty Jenkins film. Be professional. You never know when a producer is going to walk in the room, and you'll never truly know what someone is thinking based on your actions. If they're high-profile enough, they can easily get you kicked off a project. Or worse yet, never want to work with you or hire you again.
The relationship between sound and the rest of the film crew is unique. If you're good at your job as a production sound mixer, you'll rarely be noticed. And believe it or not, that's a good thing. A good production sound mixer doesn't want to slow production down, nor do they want to stop a take because of an audio issue like a plane flying overhead, a police car screaming by, or a dead battery on a transmitter.
If something does occur, you need to recognize when to bring it up with the director and let them decide if it needs another take. That said, you don't want to be the sound mixer who's calling for another take all the time. Understanding what's usable and what's not will take time to learn, and that process can be accelerated by sitting in on the post mix. Doing so you'll gain a wealth of knowledge in terms of what can be saved and what cannot be.
More importantly, you want to have clear communication among all departments including locations, wardrobe, production design, camera, grip, construction, and transpo. Having good relationships with those on set will come a long way if you ever need a generator turned off for a shot or a flag put up near a light to help with a boom shadow.
What is a lavalier mic?
A lavalier, or "lav," "lapel mic," or "body mic" is simply a very small microphone that can be used to capture sound. They're most commonly used to record dialogue and are attached to the talent using small clips to collars, ties, or clothing. If you've watched the news or late night shows like Jimmy Kimmel Live, you've probably seen a lavalier pinned to his suit jacket.
Lavs are designed to be discreet and lightweight so they can be hidden (or not hidden) on your talent. While all lavs have a wire that's attached to the microphone, their use case is generally referred to as either wireless or wired. When wired, the lav is attached directly to a recorder which can restrict the movement of the talent. Situations where the talent is sitting for an interview or doesn't plan to move are examples of when a wired lav can come into play. A wireless setup involves connecting the input of the lav into a wireless transmitter, which sends the signal to a receiver to be recorded.
Now that you know what a lav is, let's talk about when to use it.
When to use a lav
When it comes to filmmaking, the best choice is to try to place a boom mic overhead in a scene. But that may not always be possible. Lavs are very helpful when a boom mic is impractical or impossible to keep out of the shot. Wide frames with excess headroom or shots with complex movements and even car work are typical scenarios when a lav can work best.
Lavs are also great for noisy environments like the bustling sounds of a city, a noisy cafe, or a concert. Lavs help isolate the dialogue of an actor in those types of environments. When mixing, lavs are sometimes referred to as ISO tracks.
Lavs can also be used for redundancy. It's common practice today to not only place a boom overhead but to also wire the actors, especially for comedic performances where improv can come into play. Even if you have a boom mic in the scene, a well-placed lav mic can pick up any dialogue that might be off-axis from the overhead mic. Some producers and directors ask for talent to be wired all the time, although it may be unnecessary.
Outside of film, lavs are great for cross-talk environments, interviews, news programs, or as a plant mic. If you're a one-man crew, they're almost essential since it will be difficult to hold a boom and operate the camera at the same time. Onboard camera mics can only take you so far.
Placing a lav on talent
If you're calm, confident, and clear with your talent about what you're going to do and why, putting a lav mic on them doesn't have to be nerve-racking.
The first thing you'll want to recognize is their wardrobe. If you're on a feature, you'll most likely know what they will be wearing ahead of time and be able to coordinate with the wardrobe department if a special pocket needs to be sewn into the outfit to hide a wireless transmitter. If it's someone wearing a form-fitting outfit, you may have to provide instructions to the talent on how to run the lav wire and where to place the mic and then check it after they're in costume.
For most of us, we won't have that luxury. You'll first need to figure out where you're going to place the lav. If your subject is wearing a jacket with lapels, or a tie, it's going to be easy. If you need to hide the lav, that will ultimately depend on the wardrobe they are wearing.
Lavaliers can be placed in many different areas, like inside a wig, hats, helmets, lined between fabric, or used as plant mics. One of my favorite placements is the mic sewn into the hair of Chewbacca’s mask like they did in the latest Star Wars films. But overall, a good rule of thumb is to place the lav center chest.
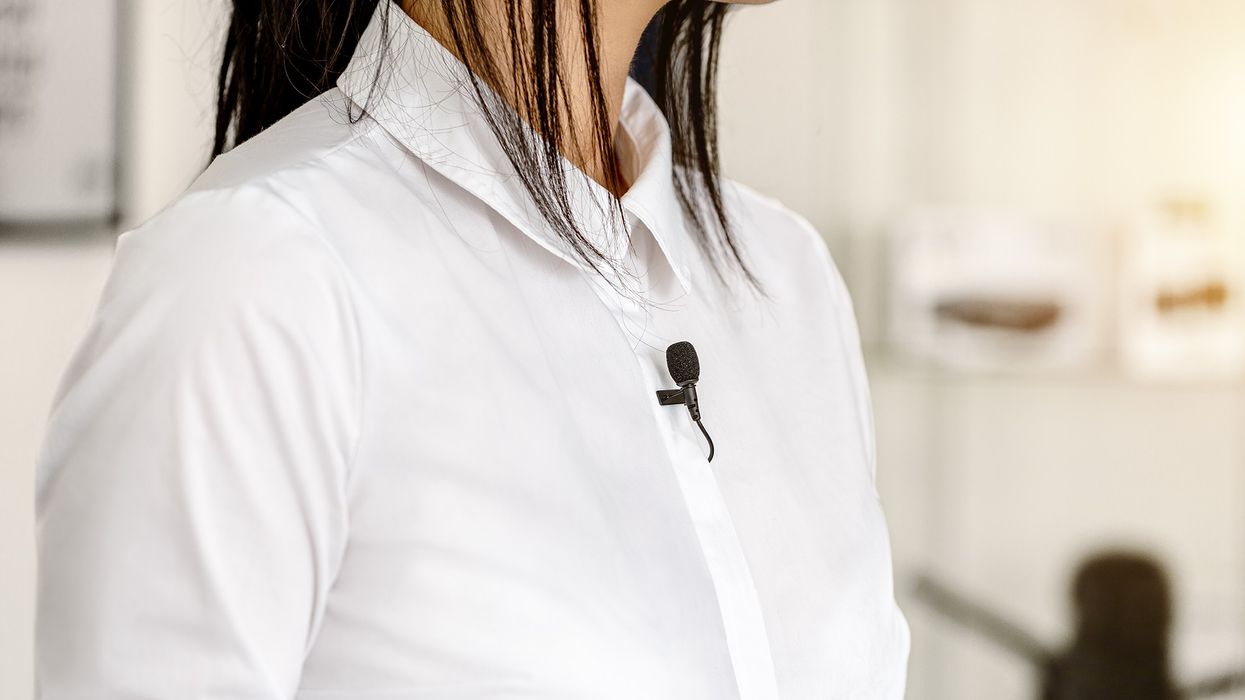
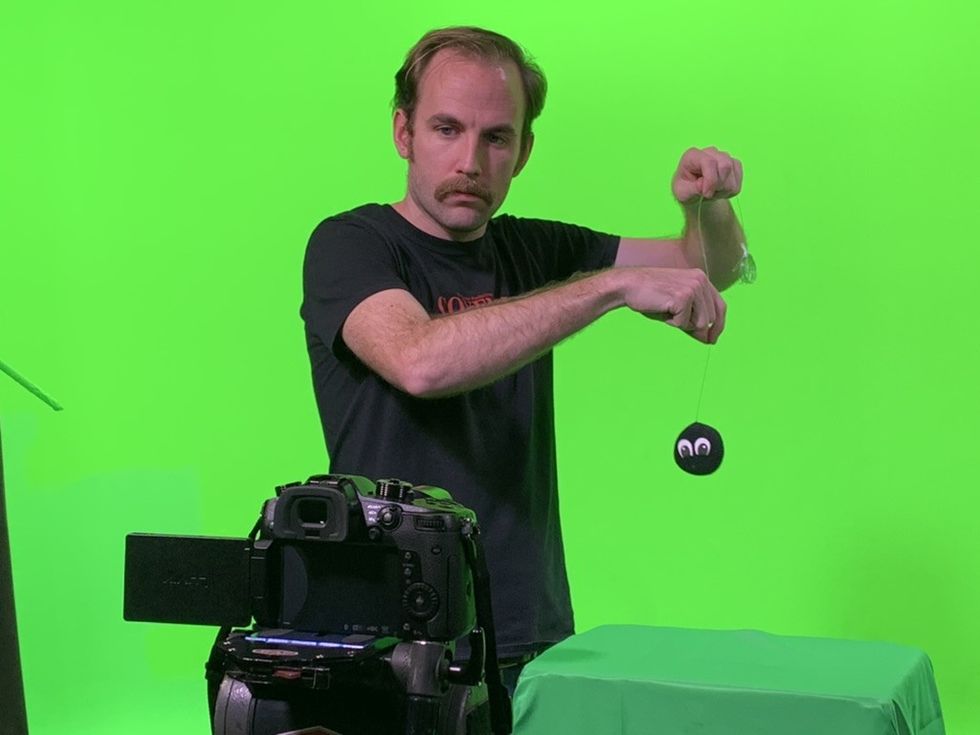
One of the first things to consider when placing a lavalier is if it needs to be hidden or not. If exposed, it will traditionally make things easier as you can use lavalier clips, vampire clips, rubber mounts, or other tape-based mounts to secure the microphone. If weather conditions are windy, you may need to apply a windscreen to your mic to prevent wind noise. And when using a tie-clip mount, a windscreen can provide extra protection from plosives, or stops in speech.
Since a dress shirt is rigged differently than a loose t-shirt, you’ll want to choose the mount that fits your needs. Traditionally, lav clips are used for jackets and ties while vampire clips are used for t-shirts.
When lavaliers need to be hidden, it can get a little tricky. You may find yourself passing the cable wire under shirts and dresses or through tight-fitting clothing. If you're wiring a person who may be uncomfortable with you micing them, you can ask them to step off the set, and then ask another crew member of the same sex to help, or you can ask the talent to run the cable themselves.
As a general rule, placing the mic capsule over the talent's sternum will give you a nice balance of close proximity and natural sound reproduction. Another consideration is that cotton and wools fabrics are less prone to clothing noise, while silk and synthetic materials tend to make more noise.
Since lavs are nestled in the clothing of your subject or against their body, any movement can produce noise. Make sure that the lav is firmly attached to your subject and isn't wiggling around. You can do this by attaching the lav to both your subject's body and the inside of their clothes.
Above all, it's important to be professional. Placing a lav on a talent requires you to be in close proximity. You must communicate clearly with them before you start, while you're mixing, and after to make sure they are comfortable wearing them. And remember, warm hands are better than cold ones.
Types of lavs
Most lavaliers are directional or omnidirectional.
Omnidirectional means the mic has a pickup pattern that picks up audio from all directions. Having a wider pickup pattern can be useful to prevent a moving source from going off-axis, or recording sounds coming from multiple directions. These types of lavs are great for studio environments and on location, as they're able to pick up the cues and room tone. Directional lavs have a more narrow pickup pattern. They work best for windy environments, as they capture sound in one direction.
As with most gear, the price point is going to determine the quality of the sound. There are other factors to consider, like the size, if it needs to be waterproof, and how it sounds for a particular voice. Some of our favorite lav mics are below:
No matter which one you choose, there are accessories you can incorporate to make mounting them on talent easier.
Lav accessories
While strictly using tape is a very cheap alternative, there are several accessories used by sound mixers that can help speed up and perfect the process. Here are just a few that are worth considering:
Rycote Stickies, Undercovers, and Overcovers
Besides tape, these Rycote accessories are probably the most widely used because of their versatility and speed. Stickies are basically oval-shaped stickers that can be placed on the talent. The design allows the microphone to be placed on the pad where you can apply an Overcover for windy applications or an Undercover when hiding the microphone underneath a shirt. When removed, they won’t leave any residue on the fabric.
Moleskin
Moleskin was made to protect our feet, but the soft and pliable material can be used to place a microphone beneath clothing. The material can be cut into any shape and has a peelable, sticky backing, making it easy to mount and remove. It comes in multiple colors too.
Transpore tape
A must in every sound mixer's bag, this extremely tacky tape works well on clothing and directly on the skin.
Transpore tape is essentially a medical tape that won’t hurt the talent during removal. If you're applying it to the skin, make sure it's dry first. Also, a piece of transpore tape a few inches away from the microphone element can provide tension relief if your talent is moving around considerably.
Topstick
This clear, double-sided tape is very sticky and comes in a variety of sizes. You shouldn’t place it directly on a hairy chest, and while it’s more used in conjunction with other products, like the aforementioned Rycote products or Abetek’s Button-Down Mount, it can also help pin down loose clothing or a wire.
Static Guard
Yes, we’re talking about that can of spray you see in your mom’s laundry room. In dry winter weather, static electricity can build up, leaking into your track. Try using a little Static Guard on the talent's shoes as well as the clothing to reduce the friction between the fabrics that can cause static electricity.
Abetek Button-Down Mount
Available for Sanken COS-11D, Countryman B6, and DPA 4060 lavaliers, the Abetek Button-Down Mount is perfect for noisy fabrics as it separates the head of the microphone away from the fabric.
By using double-sided tape, you can mount it directly onto the talent's wardrobe. It’s made from a strong and flexible thermoplastic elastomers (TPE) material and comes in black or white.
Lav-Bullet/Lav-Rod
Sound Guys Solutions has come up with two quick ways to transfer the lavalier wire through clothing. The Lav-Bullet acts like a weight, allowing the wire to pass through wardrobe. Instead of fishing around for a cumbersome wire, the Lav-Bullet uses gravity to drop it to the ground.
The Lav-Rod is a very thin carbon fiber rod that aids wiring talent wearing extremely tight clothing. It comes in various lengths, but the standard 42” cut covers talent up to 6’ tall.
RØDE invisiLav
If you use RØDE lavaliers like the smartLav, you might want to consider grabbing RØDE’s invisiLav. The functionality of the invisiLav is very similar to Rycote products and the Abetek Button-Down Mount. It’s made from medical-friendly material so it can be mounted directly on the skin, and there are two mounting points if you need to run redundant mics. The soft construction absorbs noise and vibration while providing versatile mounting options.
Bubblebee Industries
This Denmark-based company has several different offerings for wind protection. Its Invisible Lav Covers are ideal when mounting a mic to clothing. What we like about these is they give you an option to leave the microphone covered or uncovered when placing them.
For more serious protection against wind, Windbubbles offers some of the best protection against wind in the industry. Available in a variety of colors and different sizes, they’ll have what you’ll need.
Neopax
If you imagine a beige Ace elastic bandage wrap, you’re already halfway to understanding Neopax. A standard in the industry, Neopax is a neoprene belt that secures and conceals a transmitter on a talent’s body. Available in different colors and sizes for waist, thigh, and chest as well as different transmitters, it’s ideal for hiding wireless microphones when the talent has more pace to their movement.
Joe’s Sticky Stuff
This is another versatile double-sided tape that’s both pliable and removes residue-free.
Besides mic placement, Joe's Sticky Stuff can be used for many other applications like keeping a rug from moving or, if you place a small strip on your shirt, it can hold in place a second wire while you mic the first talent.
Summary
Lavs can be a viable solution to recording sound when used properly. It's important to not only be aware of when it's appropriate to use one but to be professional when wiring the talent.
If you have tips on how to wire, share them in the comments below.
For more, see our ongoing coverage of Sound Week 2020.
No Film School's podcast and editorial coverage of the Sound Week 2020 is sponsored by RØDE.


