This post was written by Hyuri Constâncio.
Have you ever worked on an idea for years, hoping it would be your first short film, your directorial debut, but hesitated writing the script for a fear of ruining it, or because you felt you weren’t ready to write that script yet?
Well, sometimes you just have to put that idea aside for a moment, come up with a simple story, grab your phone and just make a little movie, so you can fail fast, make all the mistakes, learn the basic lessons and gain the confidence before making a proper, well-produced short film, but also to test yourself as a director and see if your intuitions are really there.
My name is Hyuri Constâncio, a new director/writer based in Brazil, and that’s exactly what I did. And I want to show you how.
The Movie
Now, this may not seem like a big accomplishment, and, in a way, it isn't, but for someone who was born in near-extreme poverty to a hippie and a punk, descending from indigenous people and slaves, in a small crime-riddled tourist town in a corner of Brazil, it was a long arduous journey to teach myself English, study filmmaking like mad on my own while the odds were against me even at home—break the educational barrier, essentially—and get here.
That's why this short film, as simple and flawed as it is in many ways, is a small but important step for me as it marks the beginning of my journey as a director. But I also think it highlights a larger point for all aspiring filmmakers, but I’ll get to that part later.
Okay, now let’s get to how I made the movie!
The Making Of
The Story
Without story development or a script, I wrote down ideas and shots that came to mind for a week, and that became this half-baked shot list I made on Windows Notepad.

The protagonist is my sister. The antagonist is my mom.
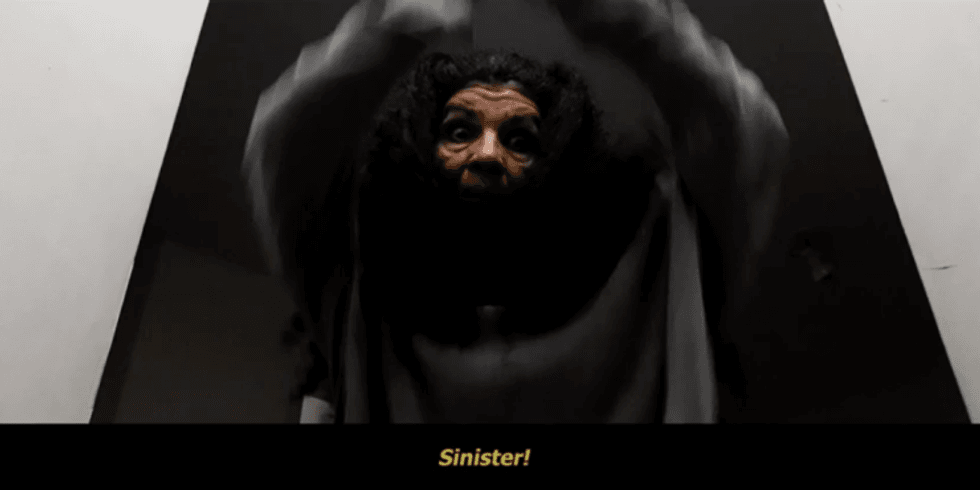
Initially, I wanted the antagonist to be a tall guy wrapped in toilet paper—or, bathroom tissue—with his hair sticking out. But I called a friend of mine to do it and he was not available so when my mom made an unexpected visit a few days before shooting began, and she was very excited about the film, especially considering she's got a lot of hair and a very expressive face, I looked at her and thought, “She would do a great villain!” And she loved the idea.
 Credit: Hyuri Constâncio
So it was all set, but, the night before we began shooting, I scrapped the idea of wrapping the villain in toilet paper. Toilet paper is fragile, and it was going to get messy and dirty, we’d have to keep rewrapping her and it would just be a big hassle. At the same time, I kept thinking about the villain’s motivation—why she goes out and kills people. I kept looking at my mom and thinking about it, until it hit me. The hair! She's all crazy about hair! And she kills people to get their hair, maybe to attach to her own hair or some other weird reason.
So that's how the antagonist and the ending came about, the night before shooting the film.
Why horror, you ask? Low barrier of entry. I knew I could create a few simple scenes with what I had around me. Plus, I grew up watching horror films, my mom and I were fans, and I felt I had some intuition on how to create a scary atmosphere.
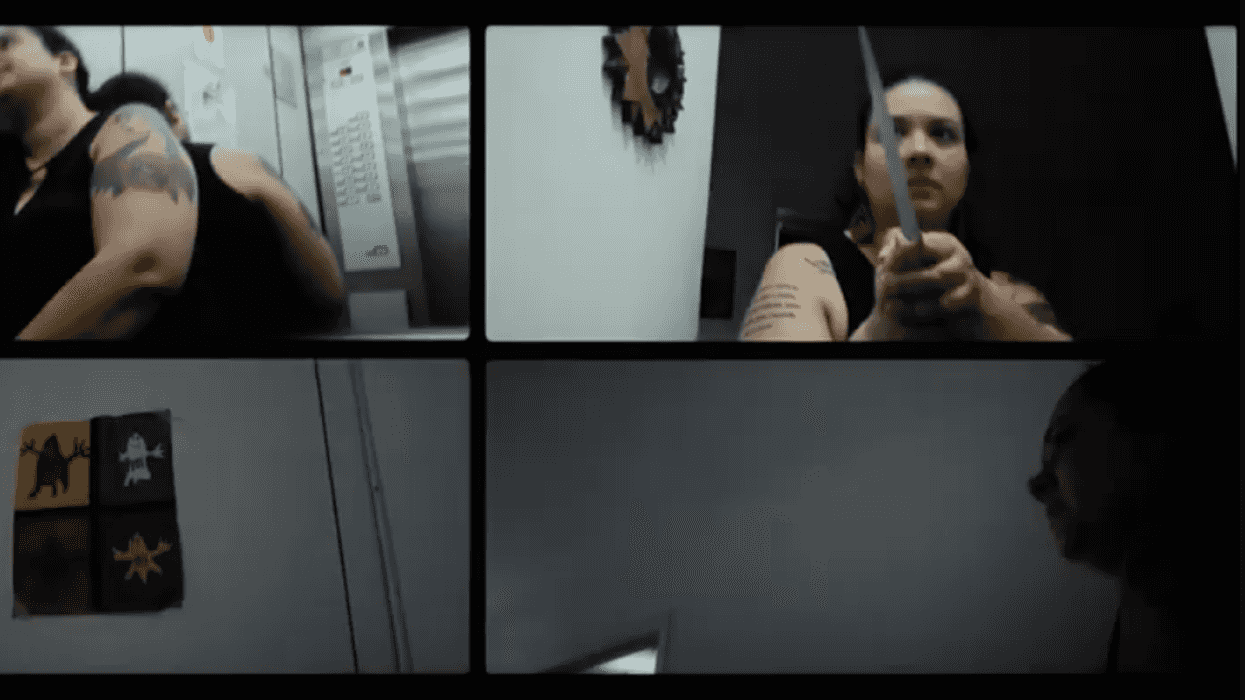
The Stabbing
For the stabbing, I had an idea of the shots I needed and that there would be lots of quick shots, so I decided to skip this part in the shot list, improvise and figure it out in the moment, on the spot, and put it all together in post. That’s until I got to post and it turned out an absolute mess. Very confusing, disconnected, feeling random, and not cutting together at all.
So I had to step back and think about why it wasn’t working. I eventually rewatched the shower scene in Hitchcock’s Psycho, my first favorite movie, because that scene had been with me since I was three years old, and I realized something that changed everything. The stabbing in that scene is not just “stabbing, stabbing, stabbing,” there is a story to it, a beginning, middle, and end.
It goes like this:
- She’s caught by surprise, barely able to react, overwhelmed by the attack
- She tries to fight back, trying to hold the attacker, without much success as she’s in a disadvantageous position
- Now stabbed several times and weak, she’s overtaken by the attacker who then finishes the job
After I realized that, a light bulb lit up in my head. I knew exactly what to look for in my own scene, I knew I had to find a story in my footage. And that’s how I managed to solve the problem and the scene finally had the flow and intention that I was looking for.
The lesson there for me was that there is a story—a beginning, a middle, an end—in every scene, every moment, every shot. Each element is its own little movie. And, as a director, you always have to make sure you understand what the story is in every moment so you can better plan how to play it out.
I’m glad that scene was saved in the editing this time, but I know I won’t be letting myself make the same mistake next time—phew!
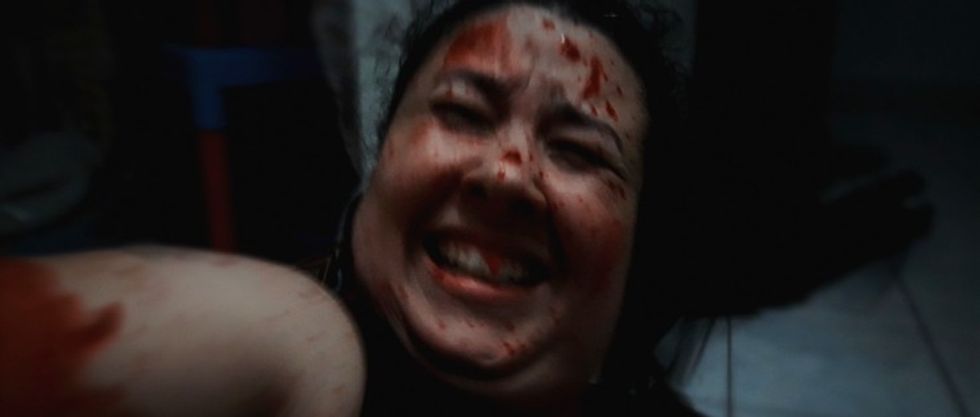
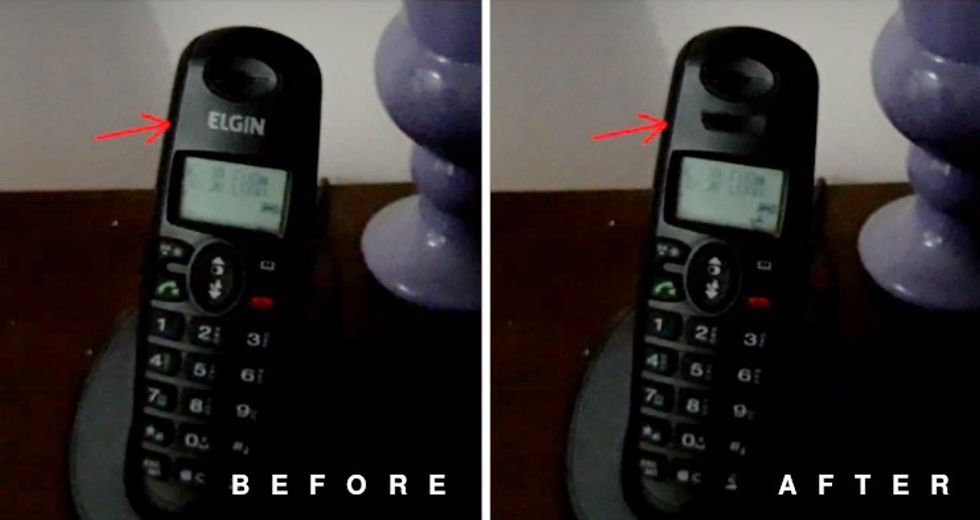
On the technical side, much like in Psycho, the knife never actually touches the victim on camera, so to give the feel that the knife was puncturing her, I used that old technique of shooting in reverse where I had the villain pushing the knife down slowly then pulling it up quickly, and, in post, I reversed the shot, sped it up 50%, and voilà! In a fast cut, if you use a short piece of the clip, plus music and sound effects, it feels like she's stabbing aggressively.
For the fake blood, it was a simple combination of red food coloring, fake honey, and water. In terms of quantities, I just eyeballed it. It’s a recipe I learned back when I used to do stage acting. It’s always hard to clean off anything it touches, so be warned, but I think it looks pretty realistic.
Technical Stuff
I shot the whole movie—video and audio—on my phone, a 2016 Samsung Galaxy J7 Metal.
The most artistically frustrating thing about shooting on a phone for me, at least today, is the lack of lens options. You can remedy that to some degree with those clip-on lenses, but I didn’t have the money for that.
Video
For video, I used the app FiLMiC Pro which let me manually control exposure, frame rate, and color, and set the highlights to -25, which gave the image a nicer highlight roll-off.

I only had 5 GB of storage free on my phone, so I was only able to shoot for a few minutes, then stop to log the material into my laptop, then go back to shooting some more and repeat. To make matters worse, when my phone ran out of storage in the middle of a recording, the video file would get corrupted and I would lose the whole take, so I had to keep a very attentive eye on the storage on every take, which was an unfortunate layer of distraction from telling the story.
This was one of the biggest pain points in the whole experience. If you’re planning on doing something similar, get yourself a Micro SD.
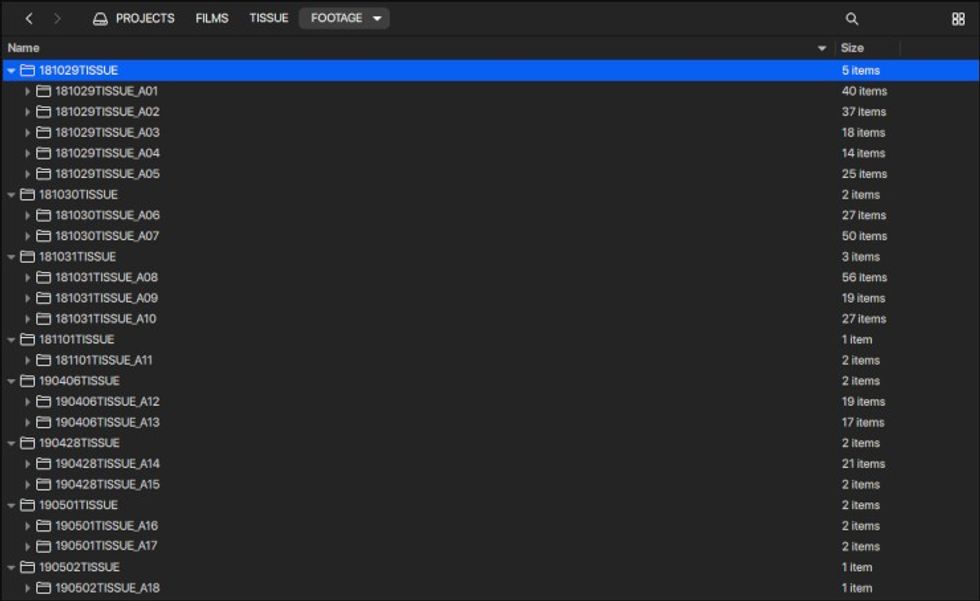
Organization was key to keeping all the material manageable throughout the process.
Support
I shot most of the movie using my Benro KH-25 tripod. I attached my phone to the tripod using one of those cheap adapters used to mount phones to selfie sticks that I found in a store nearby for about 3 bucks.
For the dolly shots, I found this piece of wood with a smooth surface lying around in the neighborhood and used a piece of cloth to smoothly slide my tripod on it, inspired by that classic “putting your camera on a piece of cloth and sliding it on the counter” trick. I don’t have good pictures of me using it as I shot most of the dolly shots alone and I had no other camera, but here’s the setup.
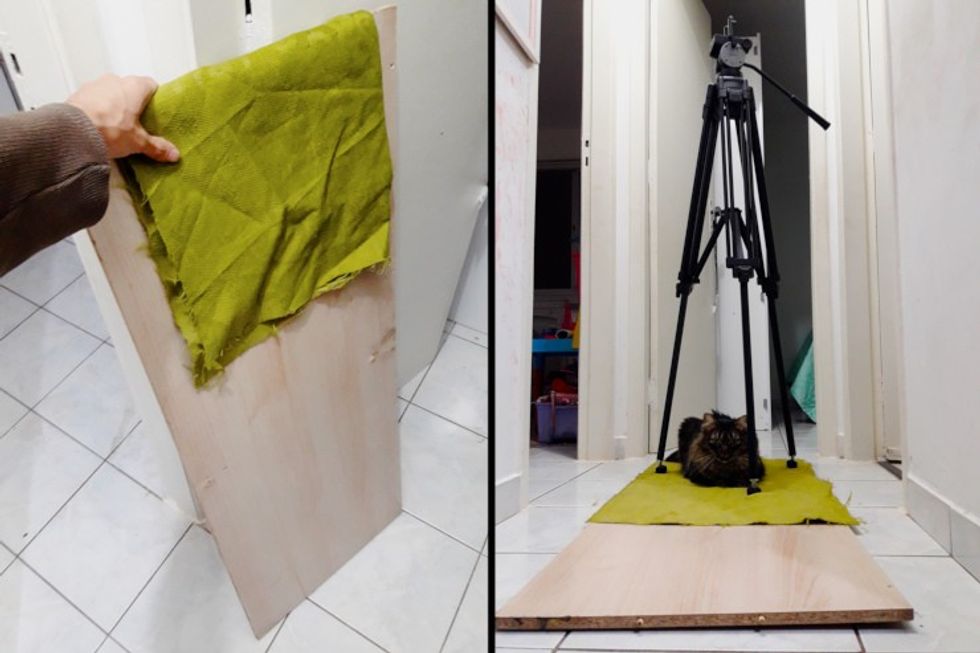
It was a pain to use and I had to press record, run in front of it, pull the piece of cloth very carefully to avoid a small bump in the middle of the wood while trying not to drop the ball on the camera movement—most of the time I wasn’t even seeing what I was shooting—but I managed to get most of the dolly shots I had in mind.
Oh, and I also used my tripod like a Steadicam—worked pretty well.
Sound
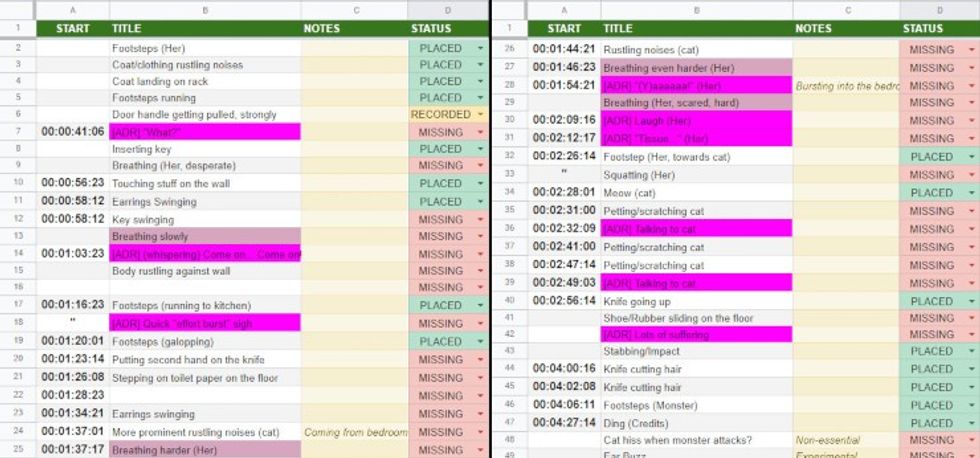
Once I shot and edited everything, I watched the whole movie in mute and wrote down all the sounds, foley and ADR, I needed, which became this cute sheet—I highlighted the protagonist’s dialog in pink:
For capturing those sounds, I used a free app called MOTIV Audio from ShurePlus. It records in uncompressed WAV files, without the baked-in effects that regular sound recording apps usually apply.
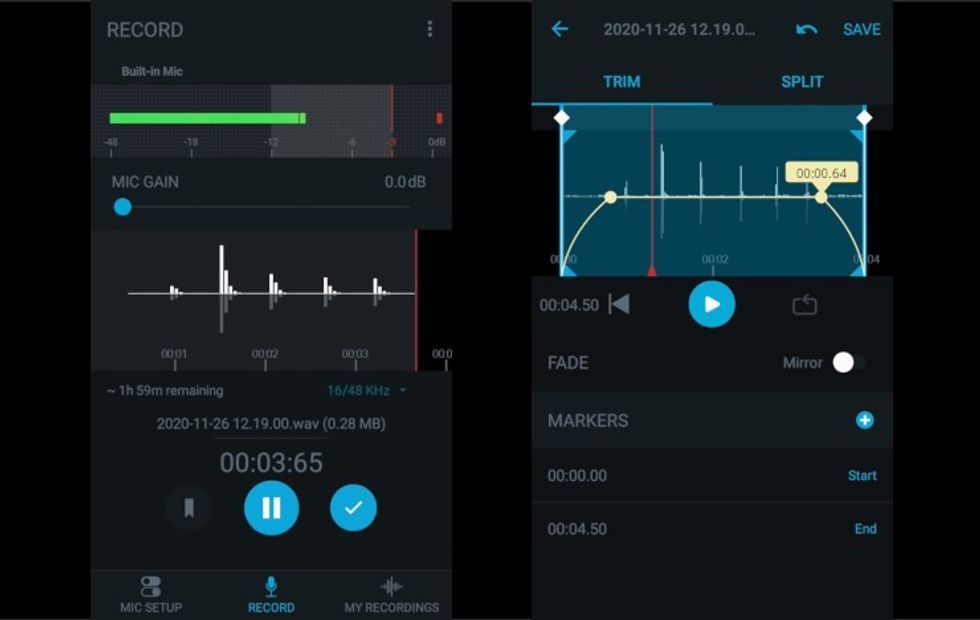
I recorded every footstep, door opening and closing, and everything. It was a pain to record and place them, and I only used a portion of what I recorded, but when I put all of these little sounds together in the movie, it really made a world of a difference, the movie came alive.
Sound really is half the picture!
I did most of the sound editing and "mixing" in Premiere Pro itself to simplify the process, but music and sound effects I did in Reaper.

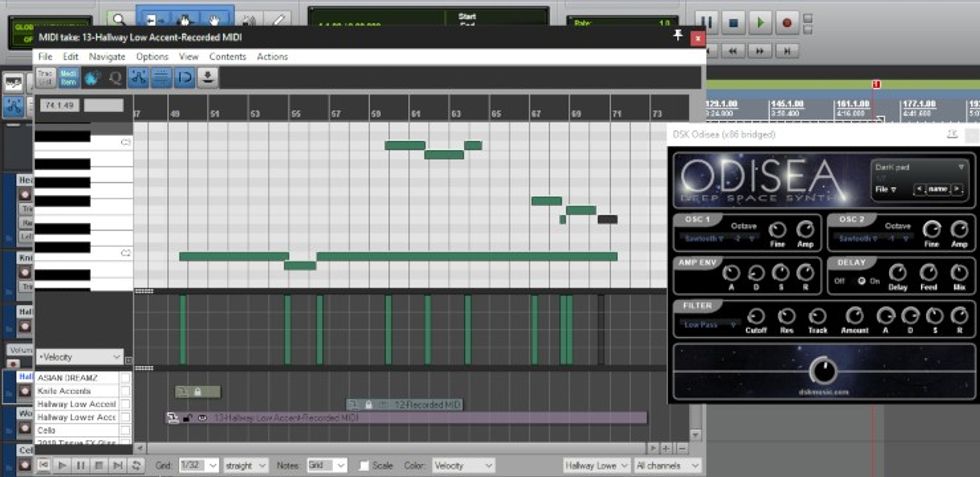
It’s a really great program for this kind of stuff, especially when paired with Vordio, that lets you export a timeline out of your video editor of choice and import into Reaper for recording, mixing, editing, or whatever you want to do.

I only did some of the music and sound effects, though. Some I got from Freesound.org, Soundly (the free version), and Epidemic Sound (which, by the way, were very kind via Alex and Sam of the sales and digital rights teams to give me an extra month of subscription time to publish the film).
Lighting
I had no lighting equipment, and the lamps in the location weren’t strong enough, so I shot day-for-night and brought the exposure down in post.
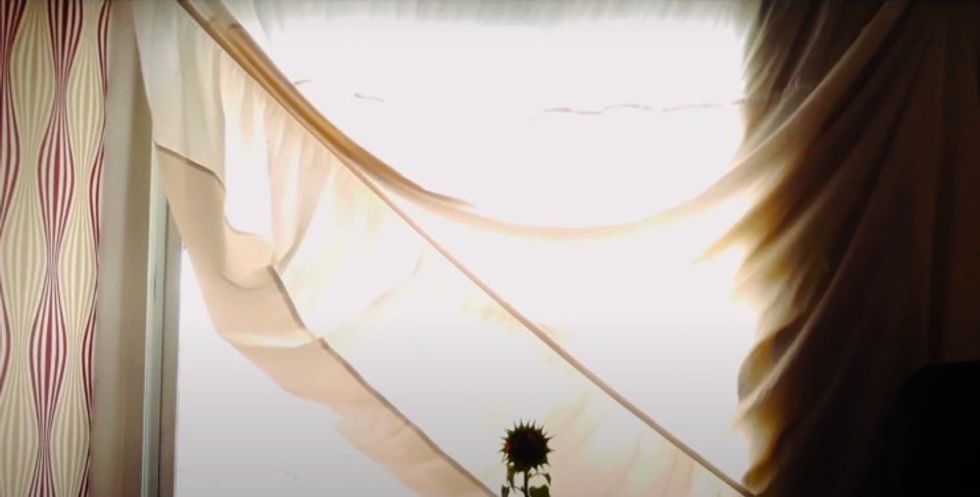
I opened all the windows and clamped white bed sheets to them to soften the light and avoid hard shadows.
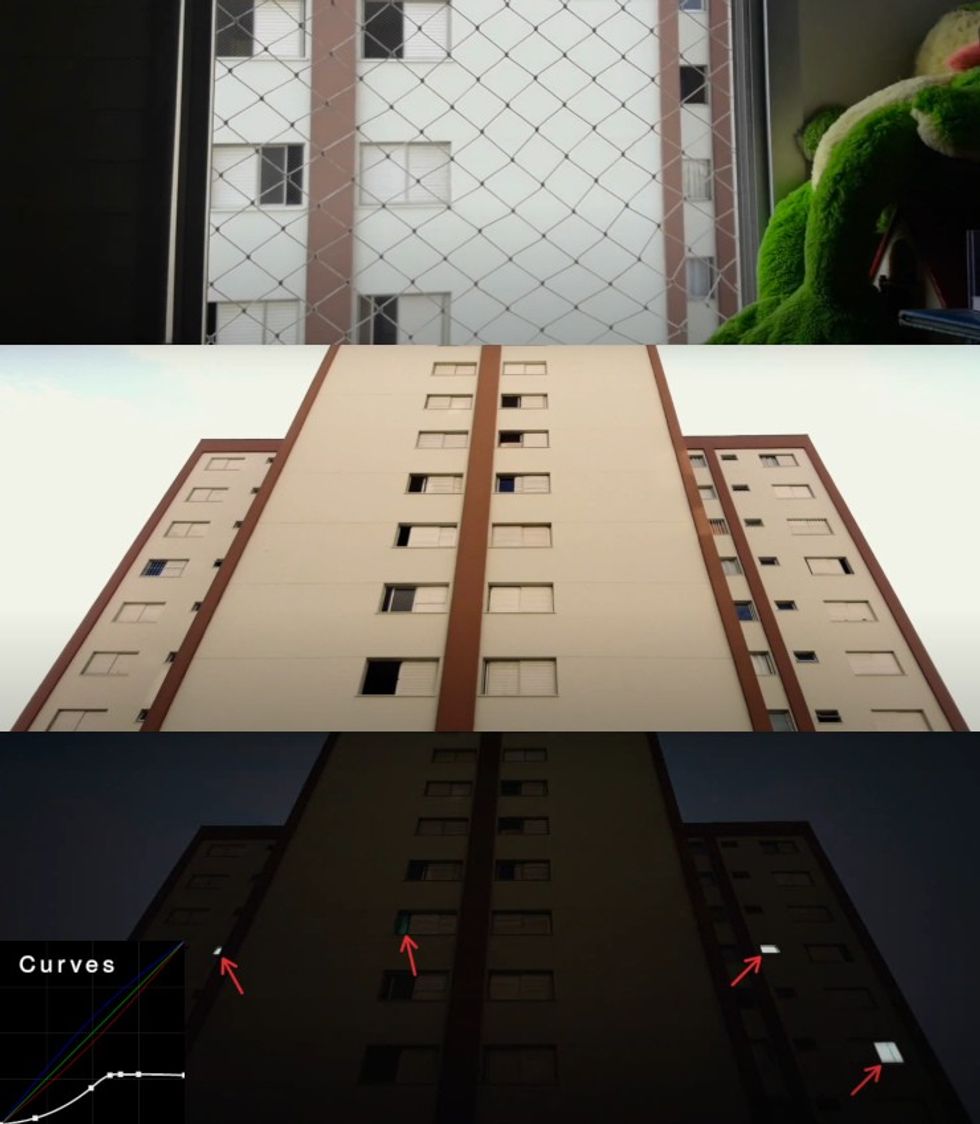
My phone is terrible in low light, so even the first shot, establishing the building, was shot day for night. That building is actually the building in front of the one we were shooting in. I shot it through my niece's bedroom window, and later in post I brought the exposure down, overlaid some lit windows from a still photo I captured at night, and did some RGB curves gymnastics to make it work.
For some shots, I just had to improvise in the moment and use someone else’s phone flashlight as a light source to elevate the exposure on the protagonist’s face a bit.
My recommendation here, which I didn’t have the money to do at the time, is to buy yourself a few of those 50 or 60 watts LED light bulbs directed at home use. They usually have a low CRI of 80 or 85, but that is so much better than not having any lights, and it’s probably even going to help in creating a grungy atmosphere if you’re making a horror movie.
Color Grading
Speaking of grungy atmosphere, let’s look at the grungy touches I made in the grading.
Apart from the establishing shot of the building, the rest of the color correction and grading was pretty straightforward. I leveled all the clips, so they matched in exposure and color; brought the exposure way down to make it look like nighttime; added a vignette and brightened the center of the frame; added a slight greenish tint; added the plug-in FilmConvert, to add some filmic colors and grain, and to make the image feel a bit gritty and alive—also to cover up the crappy phone camera look.
I also removed some red colors from the villain’s face to make her feel pale and kind of dead.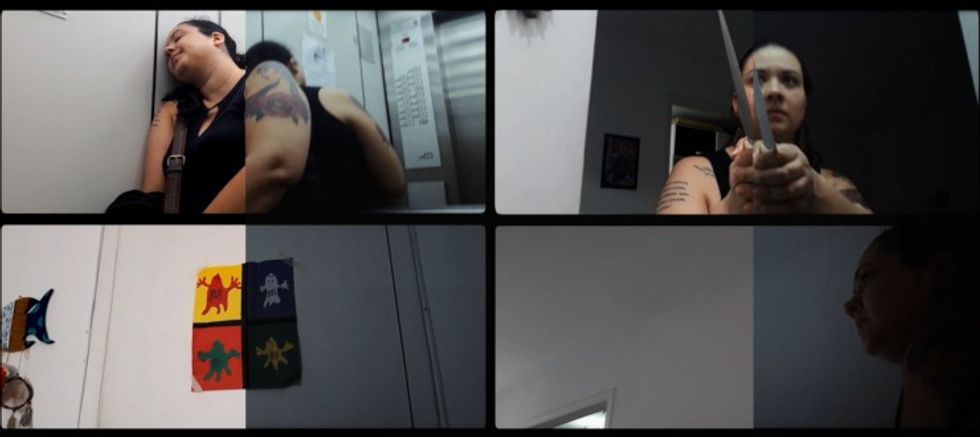
Visual Effects
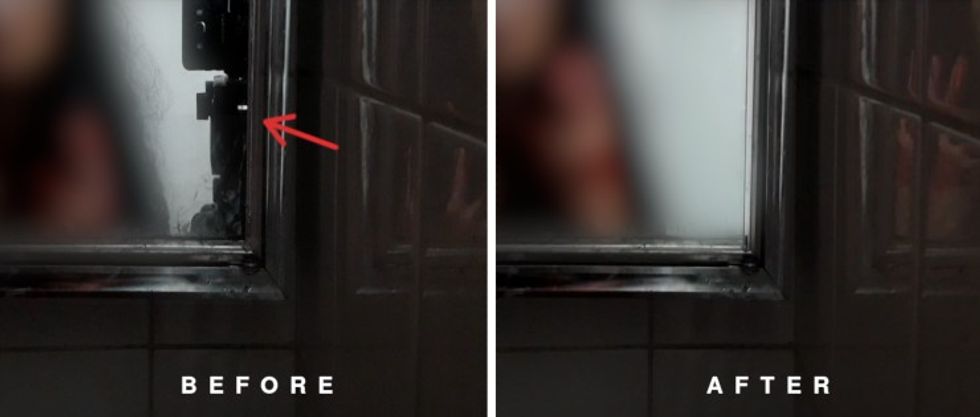
Mostly removals. To capture the final shot, the camera had to be in front of the mirror, so I masked myself out in Premiere Pro using the “Offset” effect.
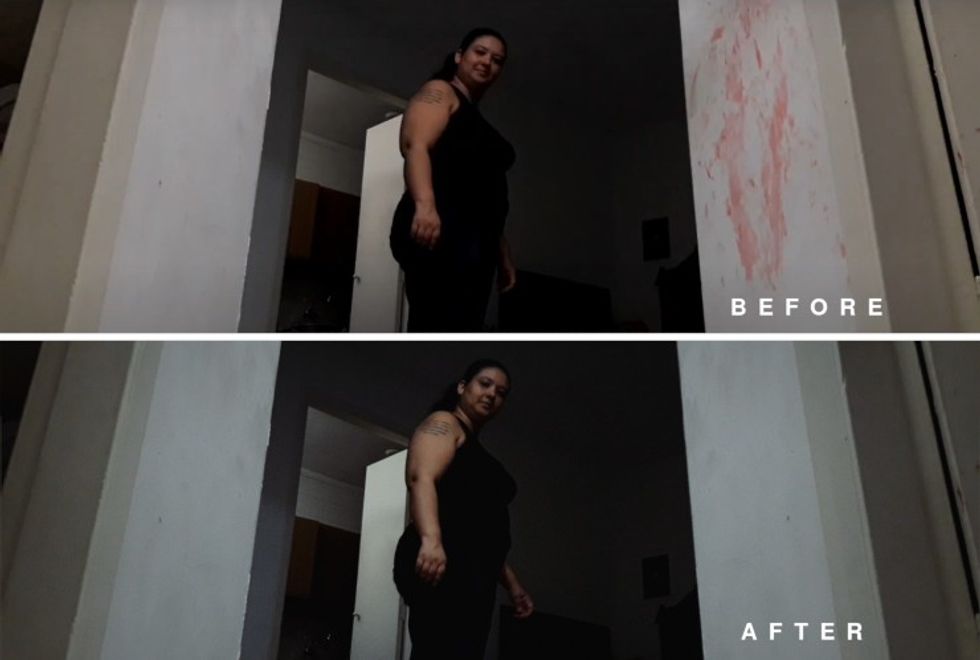
I also reshot the part where the protagonist meets the cat in the hallway, so I had to paint out the fake blood in post—it was really hard to wash it off the wall. It later had to be repainted.

For that shot, I used After Effects because I needed better masking tools than Premiere Pro had to offer, and also because it connects with Premiere via dynamic link, and that was a plus because I was running low on storage space. Free alternatives I recommend to get the same effect are Natron (Nuke clone) or Blender, both of which are free and open source and I use them myself sometimes, you just have to export the results.
For many simple shots, I simply used the handy “Offset” effect inside Premiere.
Speaking of Blender, I used it for recreating one shot in 3D. I tried several takes in-camera but it didn’t work because my improvised dolly track (the wood) wasn't long enough, so I ended up going into Blender, projecting one of the takes onto some simple geometry, and doing a very basic camera move.
Then, I added some film grain, and, finally, some camera shake with Jarle’s Deadpool Camera Shake presets that are available online for free. It was actually just a test to see if the idea was going to work and, if you pay attention, it looks pretty crappy, but I just wanted to move on with the visual effects so the test ended up in the movie.
Editing
There was nothing special to the editing, I did pretty much what I always do in every project. First, I organized the bins.

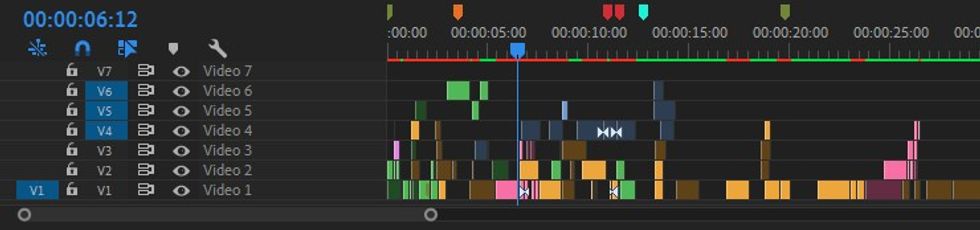
Then I made a stringout for each part, selected the best takes, edited each part in a different sequence, always working on a new duplicate for each step, then put all of the parts together in one sequence and kept refining it for a total of 36 revisions.
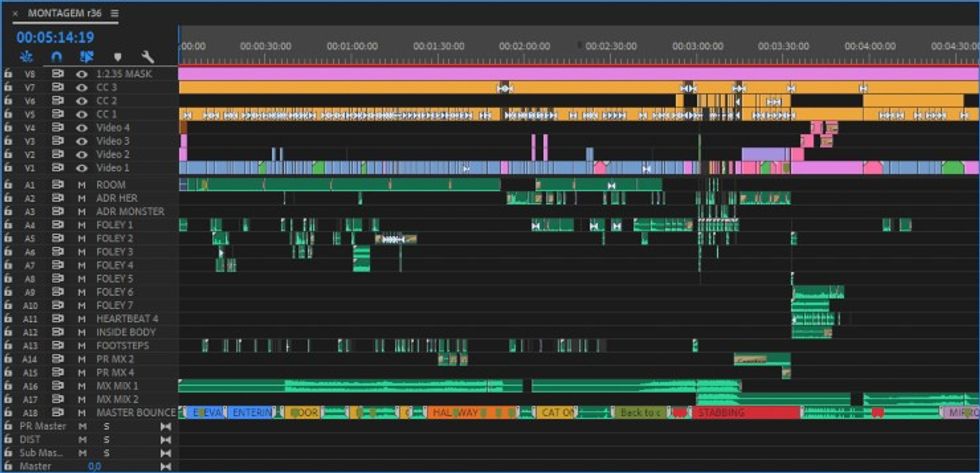
The video tracks labeled “CC” contain adjustment layers for color correction and grading (one adjustment layer for color correction of each clip, and one for the grade over the whole sequence). The rest of the video tracks are pretty straightforward, nothing special.
The audio tracks were way more involved, each separated by type and piping into a different submix so I could apply different sets of mixing effects to each group, and they all combined into one at the end.
Title
To make the title, I gathered cat fur and hair, rolled them thin, shaped them like letters, photographed one by one against a white piece of paper with my phone, and turned them into grayscale on the GIMP photo editor.
And I overlaid that on top of the video.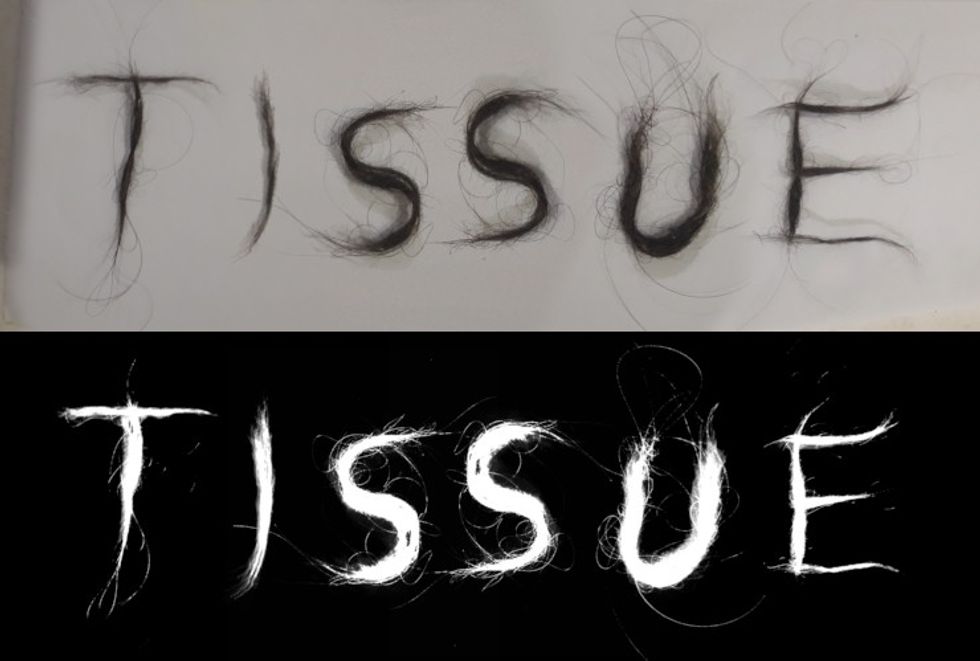
Post-Production Equipment
I did the whole post on my 2012 14” 8 GB RAM (with a half-working end-of-life GPU) Asus laptop and a crappy pair of headphones, sitting on the bed most of the time.
It was a torture to edit and color grade as the lack of GPU acceleration and low RAM made it painfully slow, but I made it through the end.
Conclusion
I think the key message in this experience is that there is a lot of value in not worrying too much about production quality when you are making your first short film. Come up with a little story, get your friends together, and make it happen! You’ll learn a lot and gain confidence to make your next one.
Don’t worry about it looking crappy, because it most likely will, focus on how you’re telling the story, on honing your craft. No big director began by making great movies, they began with their homemade Super 8 movies, failing over and over, with each new movie teaching them and preparing them for the next until they made their great movies. Fancy equipment and pretty pictures don’t matter if you don’t know how to tell a story, so don’t worry about that because if you do a good job telling the story, people will notice, and all of that will come later.
That being said, if I had to recommend one type of equipment to improve your cinematography, it is lighting equipment. Better lights are more important than a better camera. Interchangeable lenses would be a close second as that opens up the palette of looks you can get. If you are shooting on a phone with one fixed lens like I did—well, just focus on the lighting.
One last thing. I got pretty ill in the middle of making the movie, and that made me realize something very important—the time to do what you aspire to do is right now. Whatever it is that’s important to you, that's been itching to materialize but you’ve been postponing, the time is now, the time is always now because “now” is all we have, and the future is just imagination. So I encourage you to pick up whatever camera you have available and go make a movie!
Don't forget to watch the film! I can't wait to show you what I have in store for my next film!
Bye!