After taking the world by storm, Stranger Things is back with a second season that includes all its signature throwback horror themes, effects and homages. One of the most iconic elements of the Stranger Things universe is the scary and macabre "upside down" world which is responsible for some of the most terrifying creatures and moments in the Duffer Brothers' show. In this tutorial by Red Giant, Seth Worley shows us how he created a Stranger Things inspired upside down world of his own using After Effects and Red Giant products.
Let's dive a little more in-depth into this tutorial to help you create your very own upside down world look for your projects and '80s horror-loving amusement.
1. Create your plate
The first step is to shoot or find your footage to create your plate. In Worley's tutorial, he uses some handheld footage of a parking garage which fits perfectly. It's a little shaky which makes it a little more difficult for tracking purposes, but it's nice and short and has some interesting parallax action, walls and textures to work with. Once you find your footage, you can take it into Adobe After Effects and create your plate to begin the next step.
 Credit: Red Giant
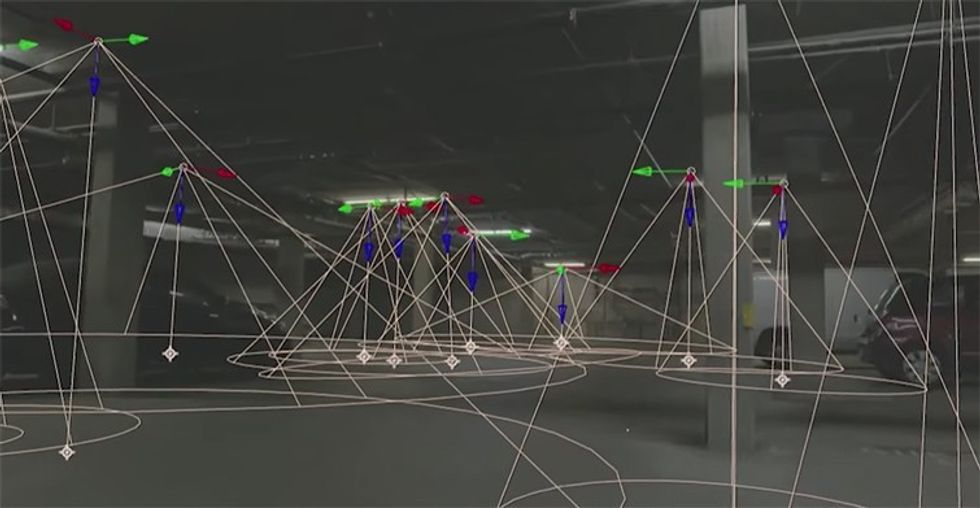
2. Use camera tracking in After Effects
Worley then uses After Effects built-in camera tracking to create all the location data for later. For those who haven't used it much, camera tracking is one of After Effects' greatest and most useful features that can be used for all types of tracking, overlays and even stabilization. Here are some great links for working with tracking in After Effects as well as some free camera shake resources if you'd like to add some more in post as well.
![]() Credit: Red Giant
Credit: Red Giant
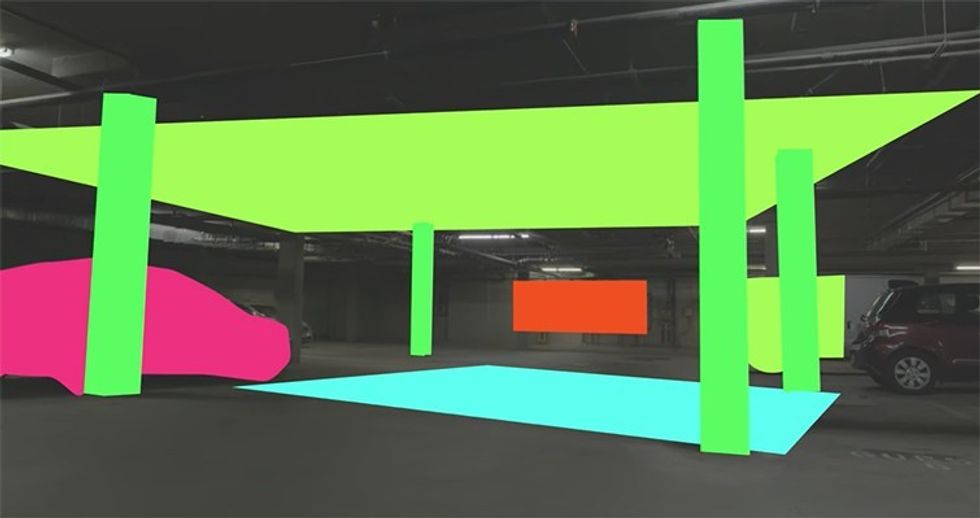
3. Place solids
Once Worley has his location information, he then uses the data to place solids on all the walls, floors and objects for him to work with later. You can work with a different array of shapes and sizes, but overall the solid layers will be helpful for adding things like vines and ivy later. If you're a little rusty on working with solids and layers, here's Adobe's article on the process.
 Credit: Red Giant
4. Add lights
With the solids in place, Worley also adds 3D lighting in After Effects. In the tutorial, Worley blows past this as it's pretty straightforward, but it can be a quite time consuming if you're unfamiliar with the process. For this upside down world effect, we can see that Worley isn't just adding lighting for lighting sake. He's giving a boost to the light sources in the shot, but more importantly, this additional lighting will play off the effects he's going to add later. Here's a good place to read up on the process.
 Credit: Red Giant
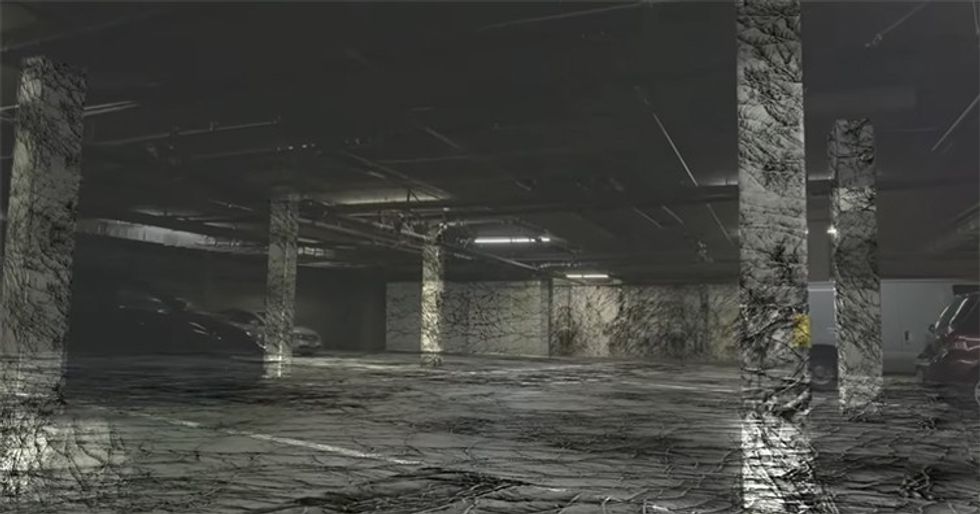
5. Apply ivy
This is actually quite creative on Worley's part and is also some good insight into how the show's creators possibly achieved the same effect as well. However, as he points out, just applying stock images over the surfaces with a blend mode causes some overlap issues which Worley has to fix by creating a whole pre-comp layered normally, then overlaying and blending the pre-comp back on the plate.
 Credit: Red Giant
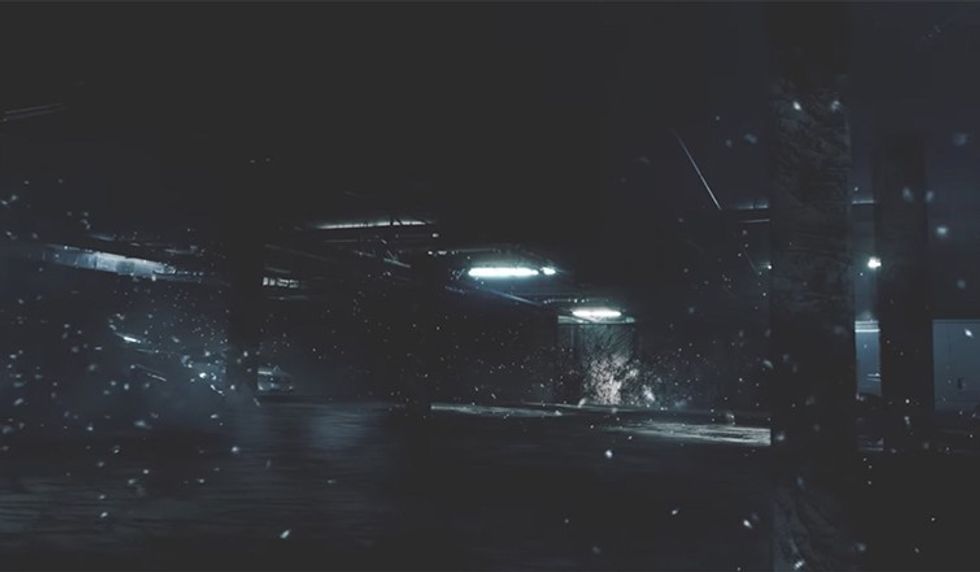
6. Add particles
Once Worley's pre-comp solution is in place, he adds the upside down world's signature white ash flurries. This is where he hops into the Red Giant products (specifically, Red Giant's Trapcode Particular). If you're interested or have this software, I'd recommend taking the time to mess around with the many different options with the particle types and elements. Worley also shows another rather creative technique to give the world a more cloudy effect with an array of giant cloudlet particles at a super high opacity.
 Credit: Red Giant
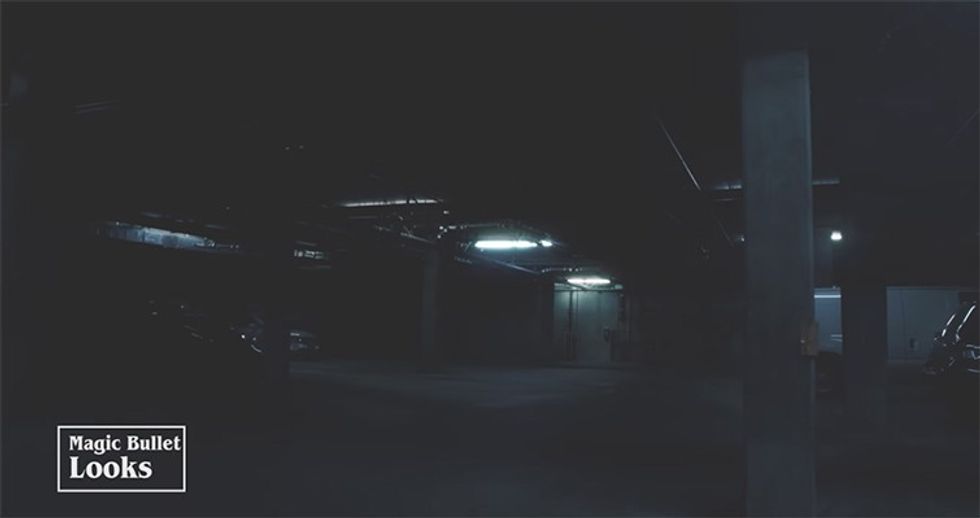
7. Create a look
The last step in Worley's process is to dive into color and looks with the Red Giant products Chromatic Glow and Magic Bullet Looks. You can read up on working with both those programs here and here, but your overall look should replicate the glowy day-for-night look to really make the particles pop and maximize the effects.
 Credit: Red Giant
Here's the final product from Worley's Red Giant tutorial to compare with an image from the show.
 Credit: Red Giant
 Credit: Netflix
You can check out Red Giant's whole post on their Stranger Things Upside Down World tutorial here.
Source: Red Giant