The artful craft of booming on location or in studio can be tasking. You're competing with camera space, people space, long takes, improvised dialogue and last minute changes while trying to keep a microphone out of the camera line for the production sound mixer to record usable audio. And that's in a 'professional' environment. What about the run-and-gun, one-man-band and skeleton crews who don't have the luxury of time, multiple takes or even equipment to capture clean sound?
Griffin Hammond over on the Tube explains why hiding your microphone in plain sight might be an option. While basic techniques like these have been around for a long time, and there is no doubt some of you already know them and have used them, it's nice to get a refresher course on something so essential as sound recording—many would argue that it's the more important half of your project. Check out the video and read our top takeaways below.
Wide Shots
We all know what these are and they are a sound recordist's nightmare—especially if a DP is using multiple cameras, shooting wide and tight. Most sound mixers will place a lav on the performers in the scene to pick up any dialogue before they punch in. But if you don't have a lav or long enough boom pole, what can you do? If it's a locked shot, try placing the microphone into the frame somewhere it can be easily removed later in post for better sound.
Pro tip: Before doing so, it's important to discuss this with the director, editor (possibly the VFX dept) and anyone else involved before making this decision. If the piece of dialogue is important enough, and they do not want to loop in post, chances are this could be the best solution. Having interviewed sound mixers over the years we've noticed mic placement isn't as mission critical thanks to the advancements in visual effects. Some television shows like Modern Family, for example, buy VFX packages that include time to clean up the boom in shots. It's good to find out the parameters of your particular project before shooting so when you find yourself in a tight situation you know your options.
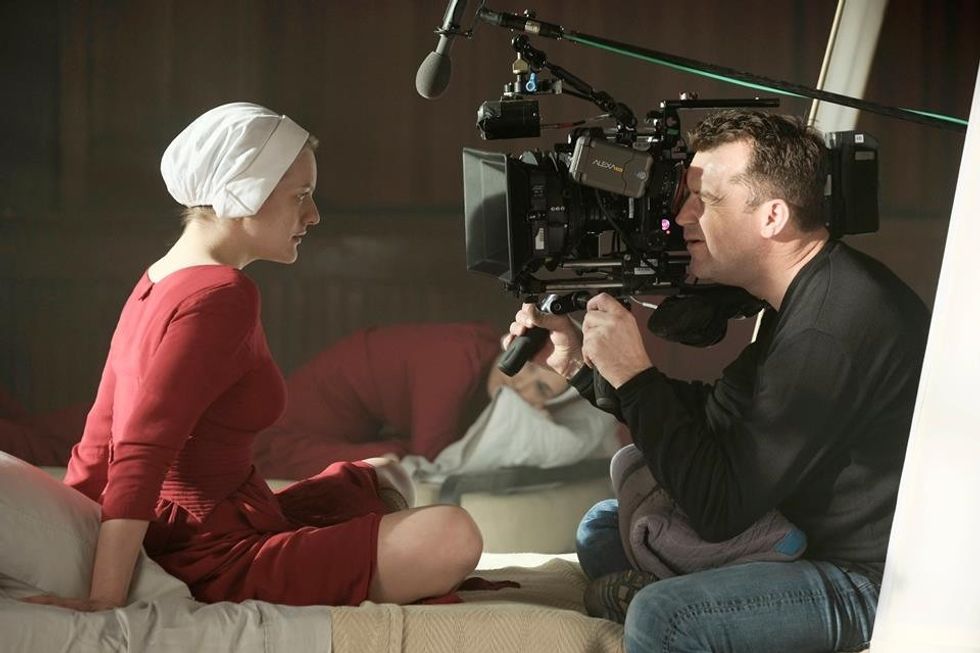 Elizabeth Moss and DP Colin Watkinson on the set of “The Handmaid’s Tale”Credit: George Kraychyk/Hulu
Controlling Eye Line
While shooting interviews, controlling the performer's eye line is as important as camera composition. If you find yourself working with "green" actors or those who've never appeared on camera before, making sure they look in the right direction can be tough. If the shot allows for it, try inserting yourself into the scene for more influence. You can then mask yourself out later.
Green/Blue Screen
With a stripped down set minimizing sound reflection, shooting in a green or blue screen environment is usually an audio recordist's best friend. While Hammond doesn't touch on the subject, it's important to give it a brief mention. Even though backgrounds will be replaced, it's still in your best interest to approach scenes as you would any other practical set. The best solution is to always keep the microphone out of frame. If you find yourself needing to do something differently, use the pro tip from above and find out exactly what you can do before you do it.
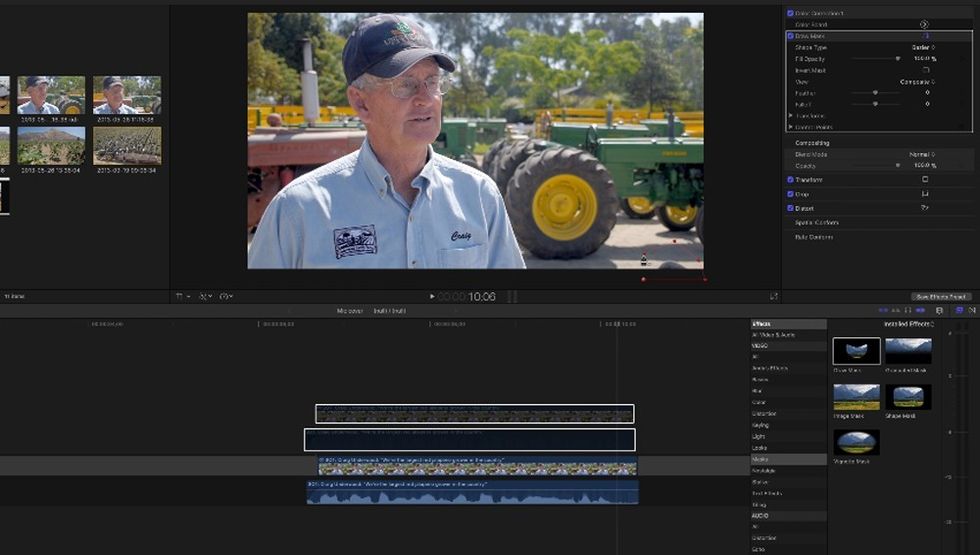
Mask Clean Up
If you are the shooter/editor, the masking technique Hammond suggests can be easily done while on a tripod or locked shot. After shooting your scene with the performers, but before moving the camera, shoot a clean plate of the background to use later in post. This clean plate will help mask out the microphone in the shot.
Sometimes you won't need to use the clean plate but, rather, a duplicate clip will work. In your NLE, copy the clip above the original video and look for a spot where the microphone doesn't appear in frame. Using the draw mask tool, outline the area where the microphone appears. This new video layer will remove the microphone in the original shot. Adding a bit of feathering can help soften the look and blend the two layers further.
While we emphatically suggest the best practice is to always keep your microphone out of frame, there are situations where it can be useful to do the opposite. If you'd like to explore more indie film techniques from Griffin, visit his page.
Have you had success with any of these methods? Let us know in the comments below.