Bad Weather Ruining Your Shot? Here's How to Fix It in Post
You can't control the weather, but you can control the way it looks in your image if you know a few tricks in post.
As filmmakers, we try to prepare for anything and everything that can go wrong during a shoot, including checking the weather conditions if we're shooting outdoors. We read forecasts, watch the news, or use mobile apps that tell us days in advance what to expect from the skies, but no matter how diligently we plan, the weather has a way of sneaking up on us and threatening to ruin our most important shots.
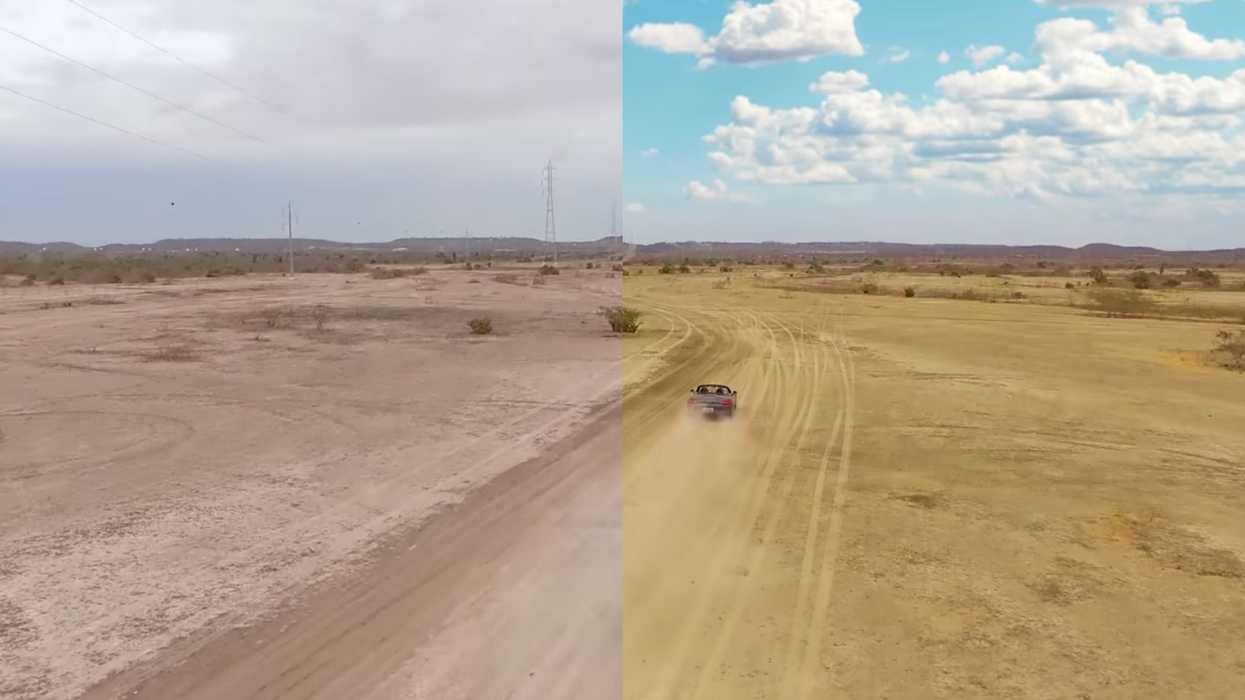
Most of the time, you just call for a reshoot, reschedule, or just kind of do the best you can with what you've got, but sometimes you can actually fix bad weather conditions in post. In this After Effects tutorial, Tom Antos shows you how to perform a sky replacement, effectively turning a dreary, overcast sky into one that looks vibrant, dynamic, and best of all, realistic.
There are some things you'll want to think about before choosing which asset to use in your sky replacement. First of all, what kind of look are you trying to achieve in your scene. In Antos' case, he wanted something bright and beautiful, which is why, I'm assuming, he went with an image that was slightly more stylized. (Those clouds are so fluffy!)
But regardless of whether you go for something stylized or more true-to-life, the name of the game is blending. You'll (most likely) want your sky replacement to blend in with the surrounding image, because, after all, even though you're focusing hard to make the replacement work, it's probably not the focal point of the shot.
Antos does this in a few ways. He feathers the horizon line so that it blends in with the horizon line of the footage, emphasizes elements from different planes with a luma mask, and finally, gives the final composition a color grade that brings out the rich colors of both the video and sky replacement asset.
Of course, you could skip this long and labor-intensive process and settle for a less than ideal shot, but where's the fun in that?
Source: Tom Antos