Tutorial: Learn How to Sync Your Text Graphics to Music
Want to transform your boring text graphics? Why not give them some rhythm and energy?
Okay, so you're editing a project and you've come to the part where you need to include some text. This is always a struggle, right, because you could always just slap some words onto your composition and call it good, but really, it's not very good; it's boring. What do you do? Well, you can always animate the text! In fact, you can take it all a step further and animate them to the beat of a high-energy song. If that seems like something that could take your project to the next level, Josh Noel of SonduckFilm walks you through the entire process in the video below.
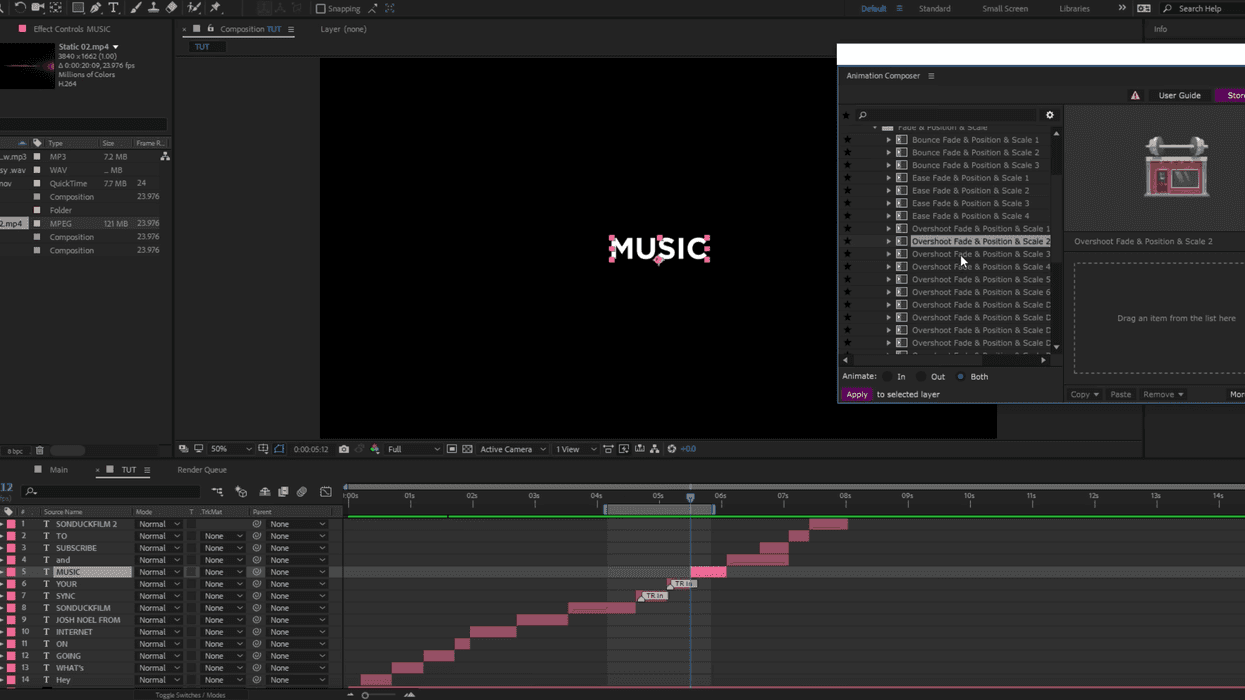
Noel's approach to syncing text to music utilizes the waveform monitor in After Effects, so you have to make sure to pull that up and zoom in. From there, you'll just have to use your excellent vision to spot each spike so you can add a marker (you may have to zoom in closer to be able to see them). Then, simply place text layers at each of the markers you set down. If you want to include animations like Noel does in his tutorial and apply them to each text layer, you can save time by copying and pasting the original that contains all the animations and then changing the text that's written.
Easy peasy! However, there is a much simpler way to do this, in my opinion, if you're a rhythmically inclined individual. I'm a drummer, so I'm all about this method. All you have to do is make sure that you have a shortcut programmed for "Add Marker" (generally it's going to be "M" on your keyboard), play the audio to which you're syncing your text, and then hit the shortcut key every time you hear the beat. You don't have to deal with waveforms, you don't have to locate every audio spike, and it's just super friggin' fast. You can thank Peter McKinnon for that little gem!
Source: SonduckFilm