As filmmakers, staying organized is a key skill we need to keep our lives operating smoothly. Sometimes, it almost feels impossible to stay on top of our organization, and that leads to uncharged batteries, missing gear, and a slew of headaches.
There is no need to worry because we can help you keep your gear charged and organized with this sleek DIY charging wall. Filmmakers Becki and Chris created this awesome charging wall for their at-home studio and shared how you can make one that looks just as amazing as theirs.
Let’s get ready to build your new charging wall!
Here is what you'll need:
- Metal Pegboard
- Mesh Organizers
- Mesh Letter Sorter
- Black Zip Ties
- 3M Velcro Command Strips
- Cable Clips
- USB Hub
- USB-C to USB-C Cables
- Lightning Cables
- USB-C to USB-A Cables
- Power Bar
- Velcro Straps
- Ikea FJÄLLBO Shelf Unit
How to build the charging wall
First, decide if you want to layout your charging wall horizontally or vertically on an empty wall. Then, plan out where you want each shelving unit and organizer to lay on the metal pegboard. Your layout on your charge wall is going to be dependent on what you are using it for and what you are putting on it. As you’re laying each item out, use tape to keep the items in place until you are ready to zip tie them to the metal pegboard.
To keep the charge board looking sleek and visually satisfying, try to keep the plug running along the side so the wires that are running off of your gear can be tucked behind and hidden until it comes up over the side.
Once you decided how the layout will look, it is time to start zip-tying all of the organizing shelves to the metal pegboard. It is extremely difficult to get to the back of the metal pegboard once it is screwed into the wall, so this step will save you the frustration of undoing some of your work.
Feed the zip up through the back of the metal pegboard, through the mesh organizer, and then back into the back of the pegboard to hide the zip tie. Not only does this look clean, but it will also give you more space to move gear in and out of the organizers.
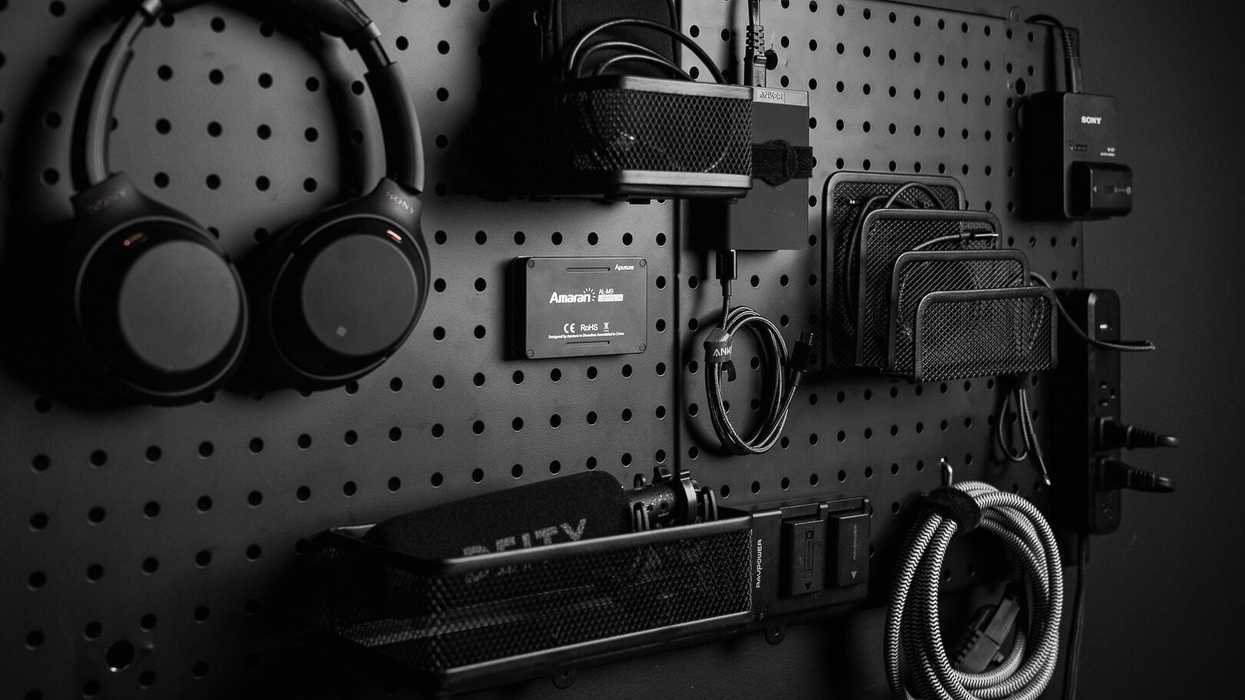
 DIY Charging wallCredit: Becki and Chris
Velcro straps are great for attaching things to the charging wall that you might need to remove and take with you. Attach two velcro straps and fed them through the holes from the back of the pegboard, then wrap them around the item of your choice to hold it in place.
The idea of the charging wall is to be able to have all different kinds of cables hanging out of it. You can also use cable clips on the edge of the power bar to hold the cords in place. You can use one directly on the pegboard to hold a lightning cable for easy access.
Once everything is in place, it is time to get the board on the wall.
Here is a fun hack you can use so you don’t make a mess on the floor while drilling holes into your wall. Take a sticky note, fold it in half, fold the bottom corners in so it won’t open up on the sides, and stick underneath where you are going to drill your hole. The dust that will come off your wall will fall into the sticky note, making cleaning up so much easier for you in the end.
After your board is up, start placing your cables and enjoy the process of cable management. The key is to hide all of your feeder cables on the top and sides of your board, so use the velcro straps to keep the cords tightly down.
 DIY Charge wallCredit: Becki and Chris
Your board will be specific to you and your needs, so have fun crafting something that will look nice and save you from having an unorganized crisis. You can make this board as big or as small as you need it and can tune it to fit your unique aesthetic.
Did you make this charging wall? We want to see it! Post a photo of your charging wall on our Facebook or Twitter.
Do you have any tips to improve this charing wall? Let us know in the comments what they are!
Source: Becki and Chris