Car scenes are an essential and inevitable part of filmmaking. Big budget projects use process trailers—you know, those trailers that Hollywood uses to tow cars so the talent doesn't have to worry about driving while acting—to get it done, and while everyone can appreciate a big, complicated rig that is used to do something seemingly simple, I'm guessing the vast majority of us don't have the resources for something like that.
In this tutorial, Shutterstock's Todd Blankenship shows you several techniques you can use to light and shoot car scenes in your driveway, including how to add weather effects and add realistic car movement. Check it out below:
Car scenes are not only fun to watch but they're fun to make. Unless you're shooting your subjects actually driving from the back or passenger seat, these scenes allow (and require) you to get really creative in order to solve the many problems that come along with them.
Moving Backgrounds
Unless your scene takes place in a parked car, you're going to have to figure out how to get your background moving without moving your car. There are several approaches to this, but perhaps the most popular is using green screen.
There are a few essential techniques you'll need to know before using green screen, namely how to light it so you can get a good key, but aside from that, it's just a matter of choosing the right background plate, or video you use to replace your green screen in post, and there are plenty of stock footage sites online that provide quality content.
Another option is to use an old projector to, well, project your stock background onto a white sheet.

Moving Lights
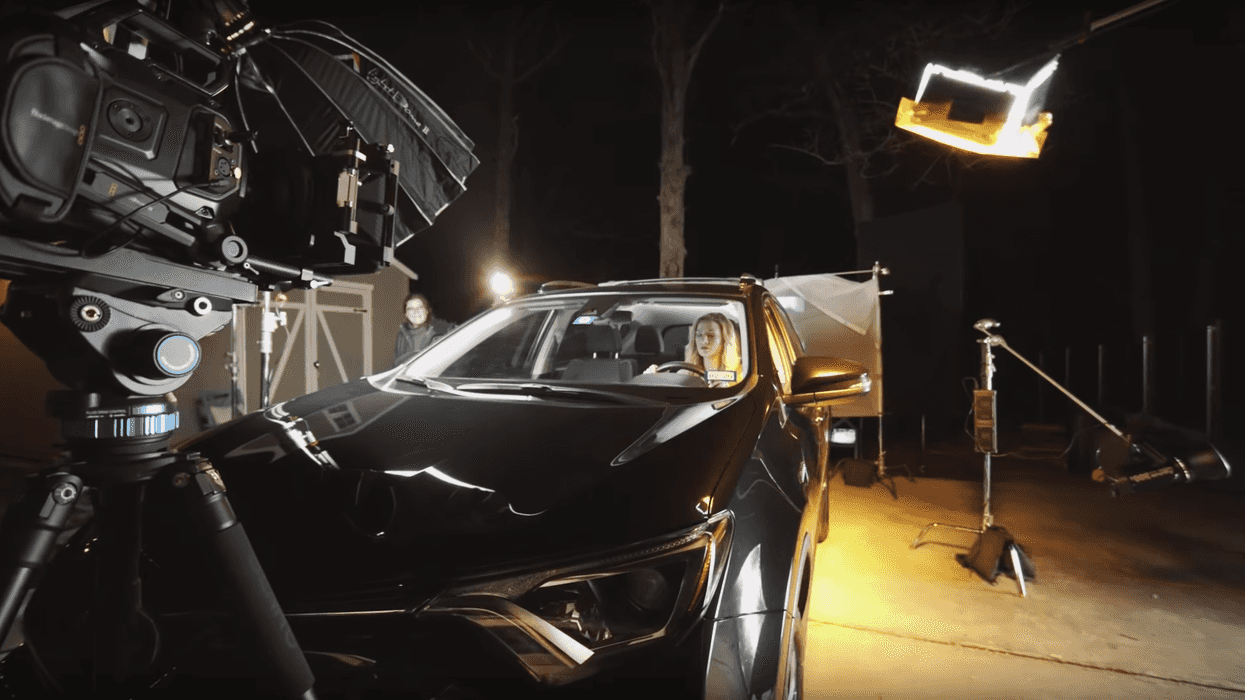
One of the more difficult problems to solve with shooting and lighting car scenes is kinetic lighting. If you're shooting a driving scene, especially at night, you'll need to find a way to not only replicate the look of passing lights, including headlights, street lights, traffic lights, and storefronts, but also do it in a way that 1.) is realistic, and 2.) makes your subject and shot look the way you want it to.
The easiest way to do this is to just move your lights around. As you can see in the tutorial, you can use handheld LED lights and lightweight light modifiers to do it without a whole lot of effort.
Dynamic Weather
Another helpful tip Blankenship includes in the video is how to add some weather effects to your car scene.
If your scene calls for rain, you can go the super zero budget route and just turn your garden hose on full blast and point it toward the sky. (Pointing it upward instead of toward the car allows the water to fall more naturally.) If you're not into the zero budget route, you can build your own rain machine for as little as $15 using some PVC pipe.
If you want to add a little lighting to your scene, you can do so manually by quickly turning on and off or adjusting the brightness of the light(s) you're using to create the effect, or you can get yourself a light that has lightning effects programmed into it, like the Aputure Amaran AL-MW.
Lewis McGregor gives a few tips on how to pull off this effect in this video. (It's an oldie but a goodie.)
Practical Effects.
Cars move when you drive them and your hair blows around when the windows are down. This is where practical effects come in. Using the same idea behind moving lights while shooting a car scene, practical effects will help you sell the illusion that, yes, your subject is in a car, and yes, the car is moving, and yes, all the lighting is totally natural.
As Blankenship demonstrated in the tutorial, you can use a makeshift lever system to move your car around to mimic the natural movement of a driving vehicle. (You can just have a few crew members gently push and bounce the thing, too.) A great choice made by Blankenship was to keep the driver's side window down. Why? Because that way he can add an element that actually works to sell the illusion: a fan blowing the passengers hair around.

What are some other helpful tips for shooting and lighting car scenes? Let us know down in the comments.
Source: Shutterstock Tutorials