Build a Beautiful Book Light with Shane Hurlbut, ASC

It's been said time and time again, and it's worth saying again -- Shane Hurlbut (and his blog at Hurlbut Visuals) is a strong resource and great friend to the DIY and independent filmmaking communities. This really can't be overstated, because Shane provides everything from custom lighting-kit tutorials to explanations of various shot-types and composition styles -- all important functional knowledge for those of us tasked with the creation of motion imagery. Now, once again, Shane provides us with a walkthrough of great magnitude, this time in implementing a book light to accentuate a "beauty shot." Read on for the run-down.
It's interesting and worth noting that Shane, as he says in his post, ascended to the role of cinematographer coming from the grip & electric side of things, as opposed to the camera department. All these sub-departments are equally important to the creation of the final image, but I've often wondered (and asked people who know more than me, of which there are many) whether it's the gaffers or the camera ops who eventually become the DPs. Of course, the answer is both, depending on the case, but as Shane points out, the latter is more common.
I had actually wondered this of Shane in particular, because some of his posts got really into the nitty-gritty in terms of G&E -- explaining which types of rigging and grip gear used to achieve certain lighting setups, something DPs normally leave to the gaffer. Depending on the size of the movie, roles can start to become a bit consolidated -- I've worked on at least one set in which the gaffer was essentially dual-duty filling the role of key grip. On even smaller productions, it's certainly possible for the DP to get his hands really dirty, gaffer-style. All that said and keeping this stuff in mind, let's get to Shane's post.
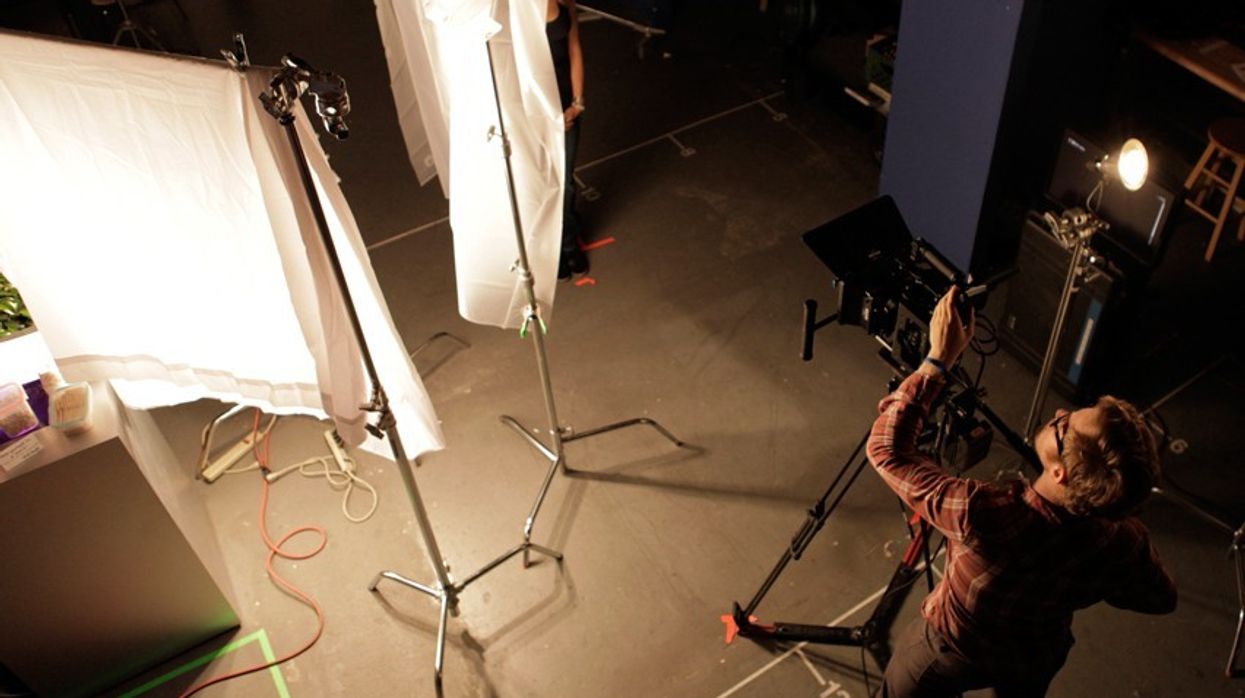
It was on that same set I mentioned earlier that I learned what a book light was (and since I was working G&E swing, the sooner I knew this, the better). Essentially it is when some form of bounce is used as the source, and then diffused again, creating a beautiful, ultra-soft light. Shane provides a simple and easy-to-see and understand clip illustrating the effect of moving the diffusion layer even further from the bounce-source, and closer to the subject:
Shane's post exhaustively lists the type of bounce materials available, plus DIY-style varieties. This is key (no pun intended) information, because the type and size of bounce material -- plus that of the diffusion material (which Shane also breaks down, in detail) -- all affects the spread, size, and overall quality of your book light. The other consideration to make, of course (assuming you have options from which to choose here, which you hopefully do), is what light to use at the core of the book light. The DIY varieties Shane lists for key are 150-400W Sodium Vapor, 150-400W Metal Halide, and 150W Halogen clamp lights. Here is the photo breakdown Shane provides for creating a standard sort of booklight (be sure to check out his full post for overhead diagrams as well):
Below is the type of effect achievable with the book light -- keep in mind, rotating the whole lighting setup on-axis around the subject, flagging off the spill to other areas of the scene, tweaking the configuration of the book light, and choosing different materials for each layer of it are all options (among even more) for scene-fitting customization.
To explain any more would be doing an injustice to Shane's post, so be sure to check it out for the extensive details he's provided us (and while stopping by, consider thanking Shane for sharing such a great amount of information! :)
When have you guys used book lights, and to what effect? How often do you find yourself on a set, pulling multiple duties -- and which ones? When have you found yourself creating soft lighting with things like old silk curtains you borrowed from your grandmother, or maybe some foam-core poster-board for bounce (hey, if it works, it works)?
Link: Creating a Beauty Light with a Book Light -- Hurlbut Visuals


