Watch: How to Make Your Own Compact Dimmers
Take control of your lighting with this cool DIY project.
It's easy to spend a lot of money when you're investing in lighting equipment. There are, however, plenty of budget-friendly options.
If you're willing to invest the time you can save a lot of money by building your own equipment. Bellow, we'll take a look at how to create a compact dimmer. If you already have the tools, these dimmers will run you less than $35.
Parts Needed
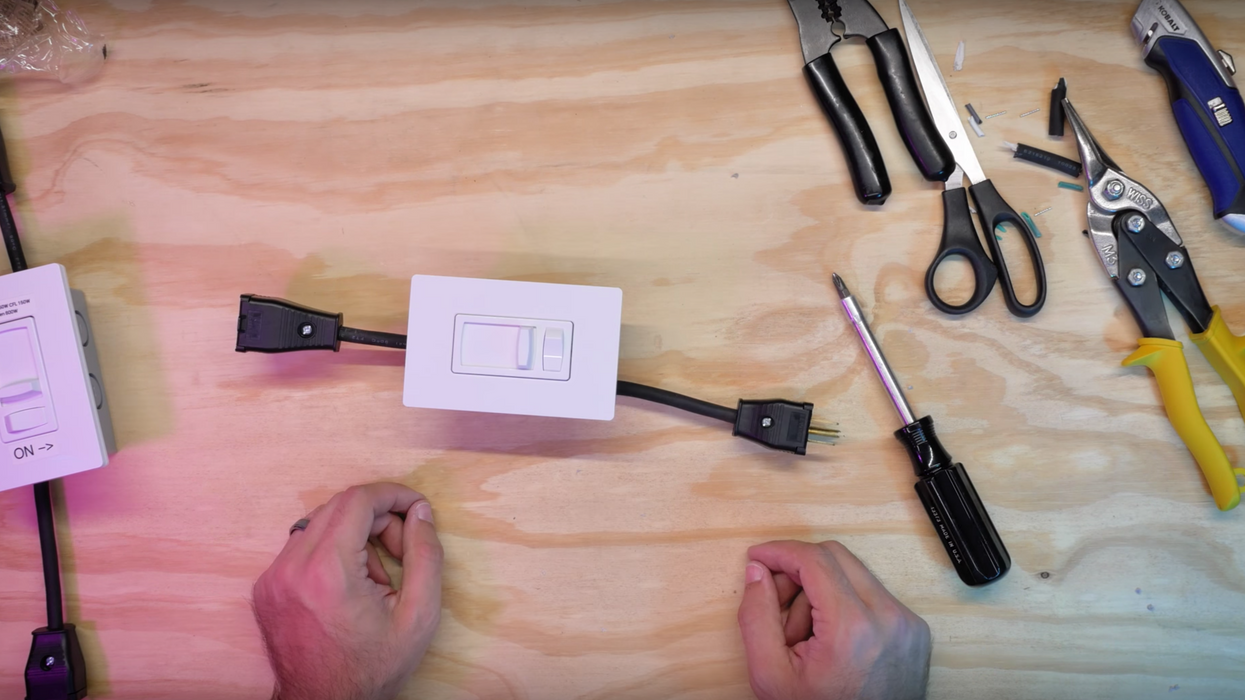
Tools Needed
- Box Cutter
- Screwdriver w/Phillips
- Wire cutter/stripper
- Tin Snips
- Scissors
- Drill
- 7/32 & 5/16 drill bits
Step 1 - Drill the Holes
Take the gang box and use the 7/32 bit to drill a pilot hole in the top. Next, widen and bevel the hole with the 5/16 bit. Punch in one of the tabs at the bottom of the gang box, without fully removing the tab. Cut the 16/3 Wire to the appropriate length and then run the wire through the bottom of the gang box.
Step 2 - Prepare the Wires
To access the wires, use the box cutter to score the rubber in the middle of the cable. Pull the sheath of the cable back just enough to access the wires (3" is a good amount). Use the tin snips to cut both the green and black wires in half, and then strip a 1/2 inch off of the tip of each one using the wire cutters. Now it's time to connect everything.
Step 3 - Make the Connections
We want the rocker switch to be at the bottom of the dimmer, so position the switch and the gang box next to each other appropriately. The switch comes with two screws and several wire caps. Screw the blue wire cap over the red and white wire that's attached to the dimmer. Connect the black wire from the dimmer switch to the lower black wire of the cable via a wire cap.
Next, connect the red wire of the switch to the other black wire of the cable via another wire cap. For the last connection, bring all three green wires together under one wire cap. Be aware of the positioning of the wires as you need to fit everything inside of the gang box. To put everything together, bring the cable through the top hole of the dimmer and then screw the switch onto the gang box.
Step 4 - Attach the Plugs
Next, we'll connect the male and female connectors to the cable. Use the box cutter to score each end of the cable and remove a small section of the sheath so you can fit the wires into the connector plugs. Use the wire strippers to remove the ends of each individual wire.
When you open up the plugs, you will see three different colored screws. The green screw connects with the green (ground) wire, bronze is for the black (hot), and silver is for white (neutral). Connect the female plug at the top of the dimmer and keep things neat keep by placing the ground wires facing down.
Step 5 - Fine Tune the Range
Depending on the light source you're using, you might need to fine tune the range of the dimmer. The dimmer comes with a slider on the side which you can use to make adjustments.
Be sure to test the light with the dimmer before adding the faceplate. You want to get that range tuned in to exactly where you want it. And voila, let there be light.