10 Techniques That Will Turn You into a Rock Star in After Effects
Take your Adobe After Effects game to the next level with these (mostly) quick and easy tricks.
It's always a good idea to make sure your editing arsenal is stocked with new, efficient techniques for a wide range of different tasks, whether it's smoothing out keyframes more quickly, or throwing down a sweet ass text animation with almost zero effort. In this super helpful tutorial, Shutterstock's Todd Blankenship offers up a ton of great tips and tricks that you can use in Adobe After Effects for a myriad of different applications. Check it out below:
Let's quickly go over the tricks Blankenship goes over in the video:
- Smooth Keyframes: Right-click on the keyframe you want to smooth out, go to Keyframe Assistant, and select Easy Ease. That will gradually slow down the final motion of your graphic, but if you want to make it even smoother, open the Graph Editor and edit the speed graph by dragging the handle of your keyframe until you're satisfied with its buttery smooth movement. (Didn't intend that to be a poop joke, but...here we are.)
- "Null Stacking": Keeping the animations for your null objects organized can be a real challenge, but this method allows you to keep everything separated and therefore easy to edit.
- Quick Vignettes: Throwing down an adjustment layer and double-clicking the ellipse tool will create a perfect vignette shape (or at least a good place from which to start). From there, add some feathering, adjust exposure, and customize your mask as you see fit.
- Fix Banding Issues: Banding is not pretty...nobody wants to be able to see each stripe of a gradient. There are a couple of ways to fix this. Blankenship says that for Gradient Ramps, you can turn up the ramp scatter. However, putting down an adjustment layer and adding a little noise (he suggests 3% or 4%) will help reduce any banding.
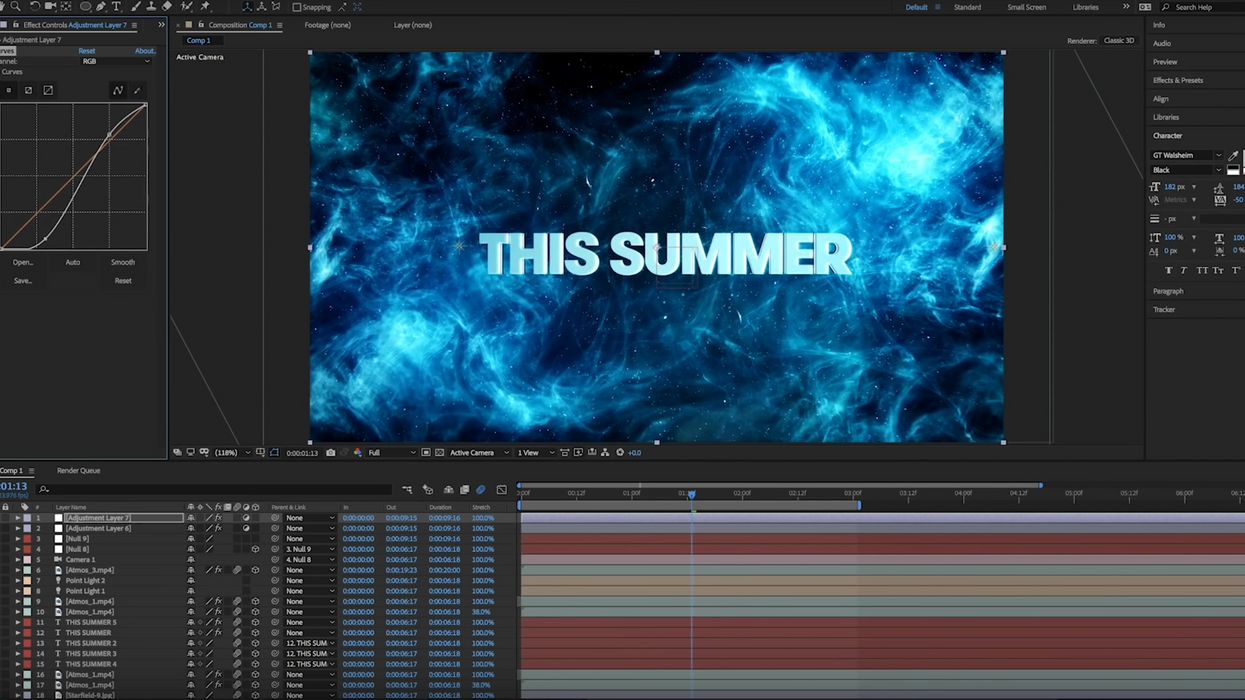
- Easy Text Reveals: Blankenship uses shape layers as alpha mattes to help him create cool text reveals. You can even make your shape layer, which is also an alpha layer, use itself to reveal itself.
- Quick Photo Border Template: You can basically create a photo border template by duplicating your photo layer, go to Effects > Generate and add the Fill effect to the bottom layer, then scale it up until it strikes your fancy. This will act as your template. When you want to add a different asset, even an image with different dimensions or aspect ratios, you can select both photo layers, hold down ALT, and drag your new asset onto the highlighted layers. Boom! New photo with the same effects.
- Organic Camera Motion: You can add realistic camera motion to a graphic by...well, adding actual camera motion. Let me explain. Using footage you shoot yourself, you can track the movement to a null object. Once that's done, you can parent your graphic to the tracked motion using the null object to give your composition a real handheld look (because it's actually real).
- Final Color Correction: One way Blankenship approaches his final color correction is by adding two adjustment layers to his composition: one for Curves and one for Tint. By doing this, you're able to really control how much contrast and saturation you apply to your graphics.
- Giving Elements and Text Texture: Want to make your chalk text look like actual chalk? Duplicate your background layer and put that layer above your text, then select Luma Inverted Matte in your Track Matte pull-down menu. After that, apply Curves and go nuts with contrast to bring out the texture of your background.
- Scale Wipe Transition: Here's a cool trick you can use for your graphics, especially lower thirds. Create a solid or shape layer and move its anchor point to one of its edges. Then, create a position keyframe and move your solid to the opposite side of the anchor point until it's out of frame. After that, unlink the solid's scale properties so you can adjust the solid's scale independently (length and width), create a scale keyframe where you want it to animate, and change the length or width percentage to what you want it to be.
Phew! That was a lot of great advice from Todd Blankenship. Hopefully, you found at least some of these helpful to you in your day-to-day editing routine. If you want to take things even further, check out other After Effects tutorials we've covered in the past.
Source: Shutterstock Tutorials