You Can Already Pull the Depth Map from the iPhone 13 Cinematic Mode
Filmmakers have been excited for the new cinematic rack focus mode in the iPhone 13 Pro, and techies have already figured out how to extra the depth map to make it more usable.
Like a lot of filmmakers, we were super excited about the new Cinematic Mode features in the iPhone 13 Pro. In fact, for the first time ever, we waited in line the first day you could get your hands on them to test the new features out.
One of our biggest takeaways was that, while the feature is super cool, it's a little frustrating when objects get further away from the lens, and that we hoped we would eventually have the tools to manipulate the depth map in post-production.
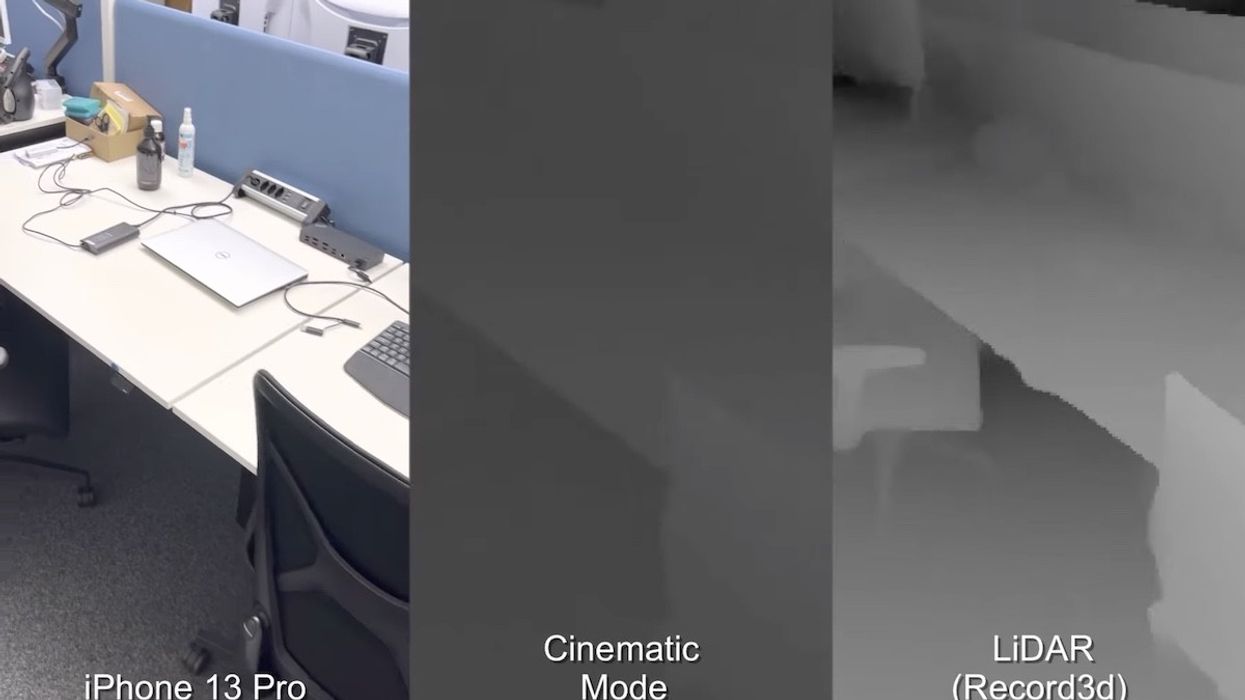
Zurich-based digital researcher Jan Kaiser has already figured out how it all works. In a great tweet thread, he lays out that the depth data is recorded as just another video stream in the .mp4 wrapper.
Video formats often allow for multiple streams (at least one for audio and one for video, but often one for subtitles, another video for stereo 3D, etc.), and Apple takes advantage of this by embedding another stream for the depth map, which with a bit of technical trickery and the ever-useful FFmpeg app you can extract.
The tech details here are interesting even if you won't ever extract it yourself.
The big things for filmmakers to know is that it is much lower resolution (only 320x180, vs the 3820x2160 of 4K video) and that it's calibrated to give the best data up close. The lower resolution didn't seem to be that big of a deal for us on the closer shots; the internal processing seemed to deal well with it. But that calibration for closer data is the interesting thing for filmmakers to understand.
First off, this makes sense. Apple says in their demo that they studied filmmaking and cinematography to help design the system, and one thing we all know about working with shallower depth of fields is that it gets even shallower the closer a performer moves to the plane of focus.
Depth of field changes are much more dramatic in close-ups. So if you are designing a system to emulate depth of field racks, it makes the most sense to focus on close-focus detail, in contrast to, say, doing LiDAR for a self-driving car, where you likely want to focus more on objects further away.
As always, the big takeaway is understanding your tools makes you better able to use them. With this knowledge in hand, you can plan more effectively for Cinematic Mode rack focus shots by ensuring that they are shots where the actor is closer to the lens.
Want a dramatic depth of field change? Walk them into a close-up. You're going to see a lot less effect from farther-away actors, which mimics actual cinema lenses. On top of that, some of you out there will experiment with pulling the depth matte and adding it as a matte in your compositing and coloring applications, which will also be useful to see.
Thanks to Jan Kaiser for sharing this amazingly helpful info.

 'The Amazing Spider-Man' (2012)
 'Jaws' (1975)


