An entire core production team weighs in on the benefits and challenges of shooting and editing in 8K.
[Editor's note: No Film School asked EP Kathryn Schwarz to put together her team’s thoughts about shooting 8K in Peru.]
8K resolution and HDR images are on the horizon and within a few years will likely be the working standard for many in the film and video world. However, both formats are still relatively new, and that poses some interesting problems and opportunities for creativity.
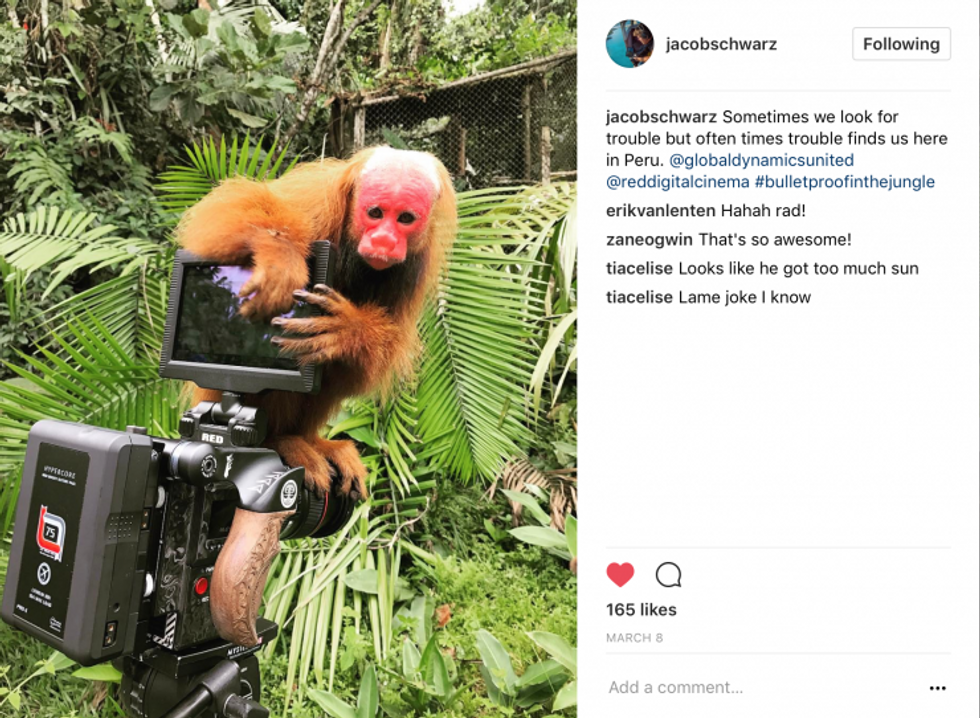
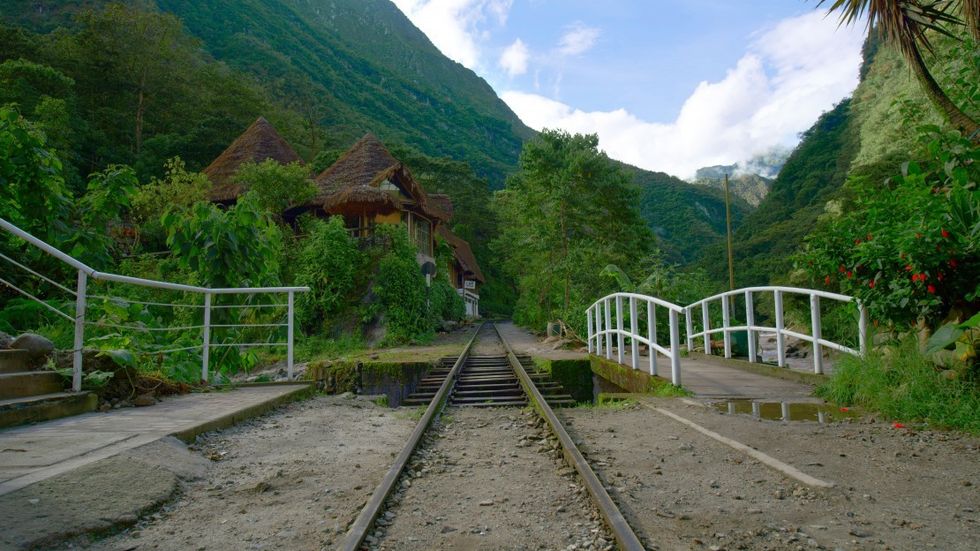
My production house, Mystery Box, is known for publishing some of the first YouTube content in 4K, HDR, and now 8K. We love to adopt and experiment with new technologies and the benefits they have to offer, so naturally, we jumped at the chance to take a 10-day shooting trip in Peru to capture the country's breathtaking beauty in 8K and HDR.
Our Peru video is below, and read on to hear from each core team member about our process, including some of the challenges and lessons learned from that experience, and how shooting with the intention of finishing in 8K and HDR affected every aspect of production.
Katie, Executive Producer
We love being on the forefront of technology and we get a high on trying out new gear, workflows, and equipment. When the 8K camera capabilities were released, we immediately wanted to go back to Peru (where we had shot before) and film the landscapes that would shine in the high resolution. We believe the more data we get in the image, the better the final picture. We are junkies for crisp, colorful images and we needed to prove it.
We booked out our shoot planning for nine days in Peru, allowing two days in each location, and tested the equipment. For gear, we packed the 8K RED Helium Camera. To maximize the variety and amount of footage we got, we outfitted the RED to mount on a Movi, tripod, monopod, and planned some handheld.
To shoot 8K time lapses, we brought the Sony A7RII and the Syrp Genie Mini, as well as the DJI Phantom 4 Pro+ for a small, light, 4K aerial camera option. Most of our travel took us to areas that forbid drones, so we didn’t see the benefit of packing a bigger drone with 8K possibilities. We prepped, tested gear, and counted hard drive space about five times before we took off.
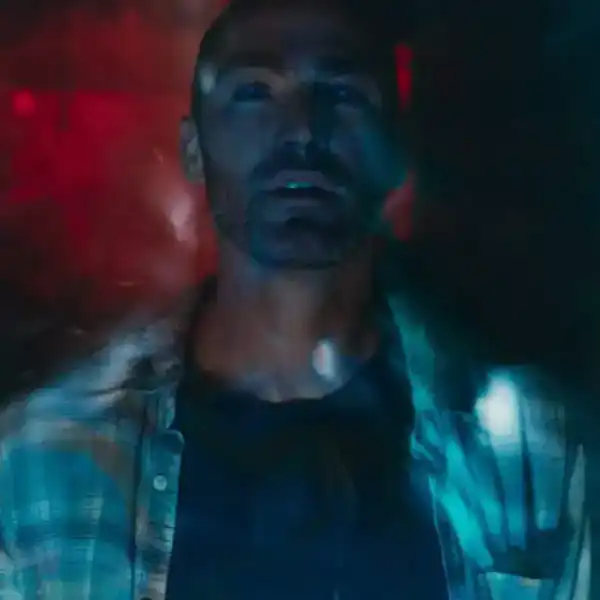
Credit: Mystery Box
Jacob, Director/Cinematographer
One of the most important things to consider when shooting at 8K resolution is the resolving power of your lens. If you want to make a true 8K delivery, you need to make sure the lens you are putting in front of the camera can resolve the resolution you are shooting at. However, if you plan on delivering at 4K, 2K, or 1080p but shooting on an 8K sensor, you really don’t have to stress as much about your lens choices.
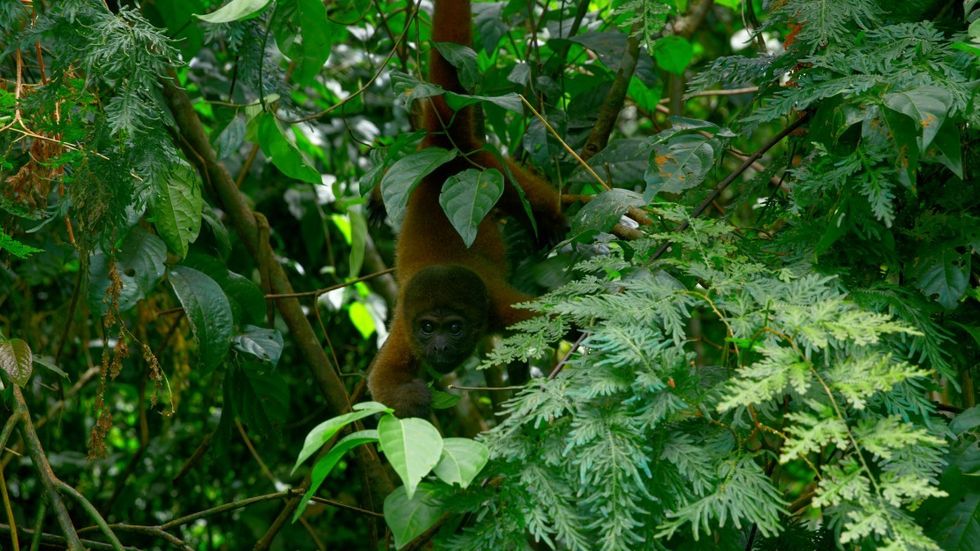
When shooting on location, we want to stay small and compact, and we always take zoom lenses if possible. When shooting nature, things are happening in real time and you don’t always have the luxury of moving in closer and swapping lens. By the time you do, either your subject has run away or your lighting changed and the perfect moment is gone.
With these requirements in mind and a fair bit of testing with lens resolution charts, we decided to go with the Zeiss Classic 15mm Prime, which was a our primary lens for all Movi shots, the new Canon 16-35mm MKIII for general landscapes, the Canon 24-70mm MKIII as our portrait lens, and the Sigma 150-600 for our wildlife lens. While none of these lenses are perfect, they checked enough boxes for us in terms of resolution, size, and weight so they were the best tools for the job.
Willem, On-Site Producer and Timelapse Shooter
Anytime we go somewhere beautiful, the first gut reaction is to shoot anything and everything. The digital age of filmmaking has made this even more doable as cards and hard drive space are getting bigger and faster. However, when shooting 8K while traveling, the amount of data can quickly become a bottleneck if you aren’t prepared for it.
Because of this, we made sure to be very selective in what we shot. An individual shot may only take 10-15 seconds to shoot, but it can take up to an hour to dump, make proxies, edit, etc. This knowledge provided a filter through which we ran all our decisions, and helped prevent unnecessary shooting stress. This was especially important when getting timelapses, as getting the shot would take anywhere from 30 mins to 3 hours. We often asked ourselves “Is this shot worth it?”
We estimated we would shoot about 2 TB a day, which meant shooting a total of 18 TB. We brought 36 TB to allow a redundant backup. Looking for speed and versatility, we decided to bring 2x 8TB Seagate hard drives for our main storage, 4x 4TB Western Digital hard drives as the backups, and 2x 2TB SSDs.
Dumping terabytes of footage can be quite time-consuming, especially when you have a tight sleep/work/travel schedule, so we relied heavily on our 2TB SSDs. Every night, we would dump the footage from the RED mags, the A7RII, and the drone onto a 2TB SSD, which took anywhere from 20-40 minutes. From there, we would go out to dinner or scout and run a copy and verify the footage onto both an 8TB and a 4TB Backup.
If an issue were to arise (because nothing ever goes wrong with computers), and if the copy was unsuccessful, we still had all the footage from that day stored on the 2TB SSD so it didn't prevent us from formatting cards and shooting the next morning. We would then backup the footage the next night from the 2TB SSD backup. It was quite a process but ultimately it meant more sleep and more security because we knew the footage was safe.
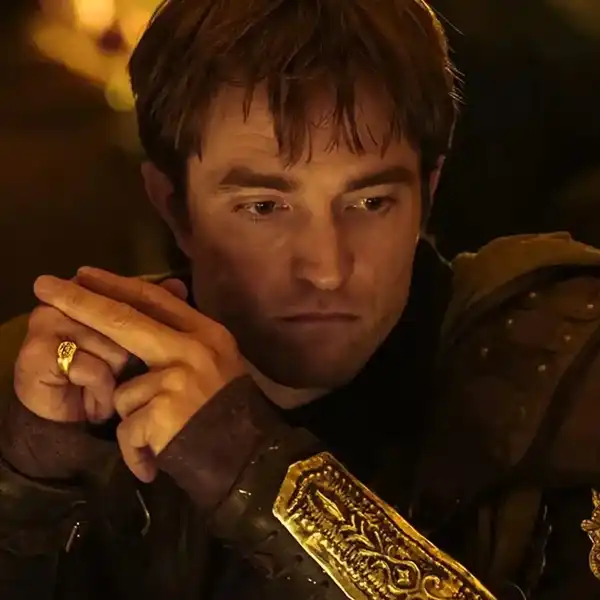
Credit: Mystery Box
Sam, Post Production
For editing, we opted to use a traditional offline proxy workflow rather than editing with the RAWs because of the speed of working with the proxies in Adobe Premiere across a few different computers throughout the assembly: it was far easier to pass off a few hundred gigabytes of proxies on a shuttle drive than move the RAID with the terabytes of RED RAW.
Once the edit was done, we exported the XML and brought the entire project into DaVinci Resolve for our color grade. Technically, DaVinci 12.5 doesn’t officially support 8K mastering, but if you’re willing to be patient with a few crashes and limit your render rates on the output, it’ll handle 8K footage quite well. And it still offers a much broader toolset for the color grade than editorial programs like Premiere and Final Cut, which is especially useful for HDR color grading.
We used RED’s new IPP2 color science for our RAW interpretation, using RedWideGamutRGB and Log3G10 for our color primary and gamma curve on the RAW, and immediately adding a LUT to transform RWG into BT.2020. We’ve found this gives us the best color rendition starting point for all of our RED work, especially when grading for HDR, with Log3G10 sitting perfectly within the HDR grading space.
We graded targeting HDR10 spec, with BT2020 color primaries and the SMPTE ST.2084 HDR grade because of its phenomenal latitude, monitoring the 8K timeline in 4K. When mastering in 8K, it’s okay to monitor at a resolution a step down, since the color perception will be essentially identical to the final 8K version, so long as you’re dealing with an 8K decoded image, which we were.
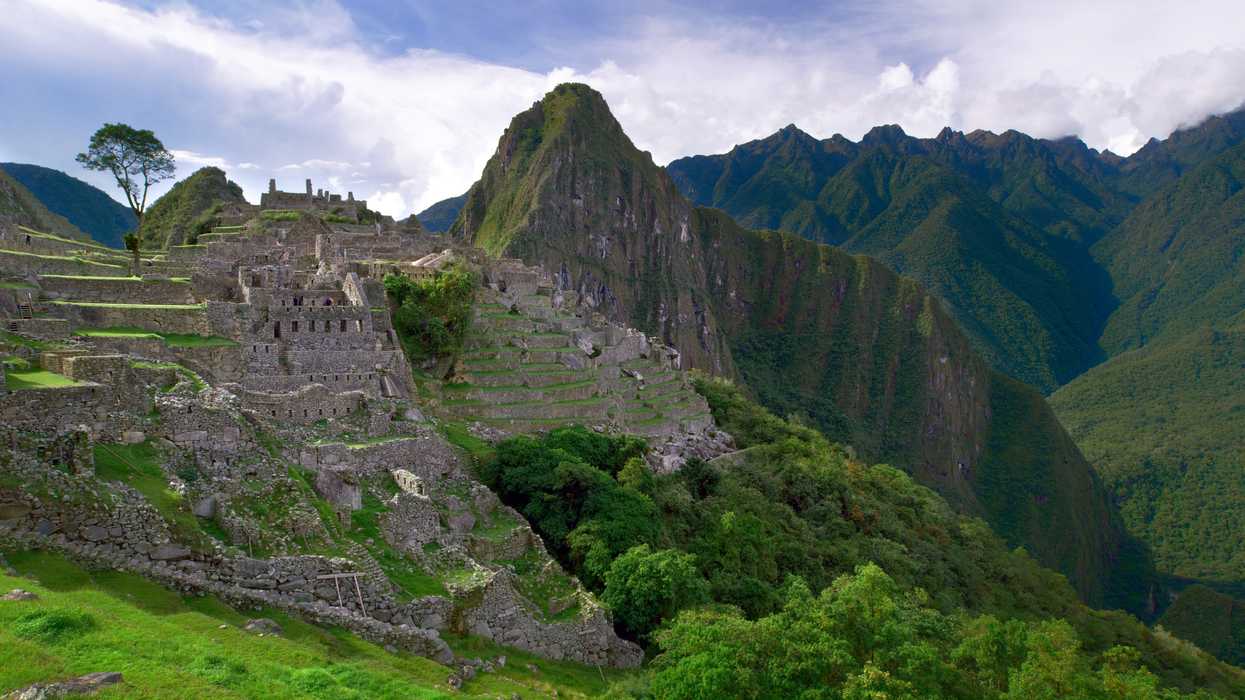
Credit: Mystery Box Out of DaVinci, we prepared a 10b DPX intermediate for additional post work, which as you can imagine is pretty hellish on data rate. We manage a solid three-to-four frames per second out of DaVinci on our custom built grading machine specifically designed for rendering, and each frame was 133 MB in size. Since the video was around 5:38 in length the clip-separated intermediate ended up right around 3 TB, once time ramping was taken into account.
After some minor stabilization and other post work on the shots (done in After Effects), we reassembled the entire reel in DaVinci on the Mac side to convert the intermediate into ProRes 422 LT for upload to YouTube. While we did sound design in Premiere and used Premiere to pair DaVinci’s output with the audio, we don’t recommend rendering 8K out of Premiere. Its render engine ends up running extremely slow when processing any codec transformations, color correction, or overlays in 8K to the point where you’ll save yourself hours or days using DaVinci instead.
From the final QuickTime master, we added the necessary HDR metadata and Lookup Table for HDR to SDR color conversion that YouTube requires for HDR uploads, using YouTube’s HDR metadata tool. As it happened, we discovered that 24-bit audio, which we’d used, would be corrupted by YouTube’s tool, which we discovered after the upload. Fortunately, we were able to work with their technicians to get a working stream attached to the video before making it live.
Do you have any additional tips about working with 8K in production or post? Let us know in the comments.
My thoughts exactly. Looked like a European soap opera played on a North American TV. Now, off YouTube and on a huge auditorium screen, I am sure that it is magnificent.
All I could think while watching this was how much better it would have looked at 24p instead of 60p. Gorgeous visuals, but I can't help feeling like it's a cheap soap opera simply because of the framerate.
I apologize for this negative comment, but the footage looks quite bad. Shooting in 60fps was a huge mistake. I suppose there is value in shooting 60fps to use as stock footage but it makes the images themselves look cheap. Also, for all the in-depth technical information about the color grading process, the color grade itself looks very not good. All the colors are far too saturated and the contrast is very displeasing and unnatural. I understand this is supposed to be HDR but it does not look good at all. The visuals would have looked far better if you had shot in 24fps and not done any color grading. That the highly compressed, 4k footage from the Phantom looked as good as the RAW, RED footage should tell you that you made a huge mistake with the RED footage. Sorry, guys. Hopefully you will make your money back from stock footage licensing.
Some amazing shots, colours, visuals, and people. I would loved to have seen how this would have looked, had it been shot on Kodak Vision 3 and scanned at 8K.
Nice images. I personally find the 60p export pretty hard to look at. I'm sure just re-exporting at 24p would fix much of the issue, apart from the lack of motion blur.
This is actually incredibly helpful to see as a cautionary tale, you can have the best gear and get incredible shots, but if the color correction/grade/LUT's aren't handled properly you might as well shoot on a handicam. I actually think the 60FPS is the right decision for this type of project, nature documentary is the ideal situation for both the resolution and frame rate. This isn't supposed to look like a film, it is supposed to look like a window into this country.
The 60 fps format is just fine for documentary footage. 24fps is fine for transporting one from reality. The footage in this piece should transport you to reality. My complaint is the color. Too cartoonish and greens, especially, are unnatural.
There are a lot of nice candidate shots in this. But yeah, I'd have to agree with everyone here about the motion and the color. The good news is that the spot can be fixed. He should just knock it down to 24p and let it be a slow motion spot. He'll have to trim clips if he wants to maintain musical timing. But it will help with the motion and the mood significantly. Then maybe knock down the saturation on the color a bit since it pops too much. The green channel feels too hot in a lot of shots and the foliage looks cartoonish. He should drop the overall saturation down a few notches to bring it back to reality. Overall, it shouldn't take much to fix things, should the filmmaker read these comments and choose to listen to them. I know it can be hard to get lashed with criticism in cinematography forums, especially when you work so hard on something for an extended period of time. The piece is really close to being a very pretty spot, just needs some tweaking. Nothing too crazy.
"..., the Canon 24-70mm MKIII as our portrait lens..."
Since when is there a MARK III Canon 24-70?! Lens? Do you have a prototype from Canon that you're using?! I thought there was only a MARK II out?
For a company that heralds themselves as cutting edge masters of 4K, 8K and HDR, they did an abysmal job correctly exposing, color correcting and grading these images. The number of over and under exposed images was surprising, and the 60p seems pretty pointless for these applications. This looks to me like a group of people who have allowed their equipment to make their stuff what it is, not their creative vision or a narrative. Not especially impressed. But, I cannot deny their success, whether or not I agree with how they got there and what they're producing now that they are.
Your Comment
15 Comments
Looks way to sharp for my liking. Just my preference.
June 22, 2017 at 11:25AM, Edited June 22, 11:25AM
My thoughts exactly. Looked like a European soap opera played on a North American TV. Now, off YouTube and on a huge auditorium screen, I am sure that it is magnificent.
June 26, 2017 at 8:30PM, Edited June 26, 8:30PM
Yawn .... what a ridiculous and expensive exercise .... le sigh .... although Peru is completely awesome
June 22, 2017 at 11:51AM, Edited June 22, 12:06PM
Footage is pretty, but I think finishing is 60p was a huge mistake. Completely takes away from it.
June 22, 2017 at 12:06PM
All I could think while watching this was how much better it would have looked at 24p instead of 60p. Gorgeous visuals, but I can't help feeling like it's a cheap soap opera simply because of the framerate.
June 22, 2017 at 1:07PM
I apologize for this negative comment, but the footage looks quite bad. Shooting in 60fps was a huge mistake. I suppose there is value in shooting 60fps to use as stock footage but it makes the images themselves look cheap. Also, for all the in-depth technical information about the color grading process, the color grade itself looks very not good. All the colors are far too saturated and the contrast is very displeasing and unnatural. I understand this is supposed to be HDR but it does not look good at all. The visuals would have looked far better if you had shot in 24fps and not done any color grading. That the highly compressed, 4k footage from the Phantom looked as good as the RAW, RED footage should tell you that you made a huge mistake with the RED footage. Sorry, guys. Hopefully you will make your money back from stock footage licensing.
June 22, 2017 at 1:34PM
Some amazing shots, colours, visuals, and people. I would loved to have seen how this would have looked, had it been shot on Kodak Vision 3 and scanned at 8K.
June 22, 2017 at 2:07PM
Nice images. I personally find the 60p export pretty hard to look at. I'm sure just re-exporting at 24p would fix much of the issue, apart from the lack of motion blur.
June 22, 2017 at 2:13PM
This is actually incredibly helpful to see as a cautionary tale, you can have the best gear and get incredible shots, but if the color correction/grade/LUT's aren't handled properly you might as well shoot on a handicam. I actually think the 60FPS is the right decision for this type of project, nature documentary is the ideal situation for both the resolution and frame rate. This isn't supposed to look like a film, it is supposed to look like a window into this country.
June 22, 2017 at 4:45PM
The 60 fps format is just fine for documentary footage. 24fps is fine for transporting one from reality. The footage in this piece should transport you to reality. My complaint is the color. Too cartoonish and greens, especially, are unnatural.
June 23, 2017 at 8:48AM
There are a lot of nice candidate shots in this. But yeah, I'd have to agree with everyone here about the motion and the color. The good news is that the spot can be fixed. He should just knock it down to 24p and let it be a slow motion spot. He'll have to trim clips if he wants to maintain musical timing. But it will help with the motion and the mood significantly. Then maybe knock down the saturation on the color a bit since it pops too much. The green channel feels too hot in a lot of shots and the foliage looks cartoonish. He should drop the overall saturation down a few notches to bring it back to reality. Overall, it shouldn't take much to fix things, should the filmmaker read these comments and choose to listen to them. I know it can be hard to get lashed with criticism in cinematography forums, especially when you work so hard on something for an extended period of time. The piece is really close to being a very pretty spot, just needs some tweaking. Nothing too crazy.
June 23, 2017 at 9:04AM, Edited June 23, 9:05AM
What type of computer hardware did you use to edit the film?
If you had a Rocket X card, would that of helped you in post?
June 23, 2017 at 9:46AM, Edited June 23, 9:46AM
Well, I enjoyed it :) Congrats to you and your team Kathryn!
One question though:
What type of bag or case did you use to travel with the Movi Pro?
Thanks,
Dominic
June 23, 2017 at 12:35PM
"..., the Canon 24-70mm MKIII as our portrait lens..."
Since when is there a MARK III Canon 24-70?! Lens? Do you have a prototype from Canon that you're using?! I thought there was only a MARK II out?
June 25, 2017 at 4:30AM
For a company that heralds themselves as cutting edge masters of 4K, 8K and HDR, they did an abysmal job correctly exposing, color correcting and grading these images. The number of over and under exposed images was surprising, and the 60p seems pretty pointless for these applications. This looks to me like a group of people who have allowed their equipment to make their stuff what it is, not their creative vision or a narrative. Not especially impressed. But, I cannot deny their success, whether or not I agree with how they got there and what they're producing now that they are.
June 28, 2017 at 2:16PM