Written by Borja Moya
When I set out to make my latest short film "Trapped" I knew the shooting was going to be challenging because of a tiny detail in the story.
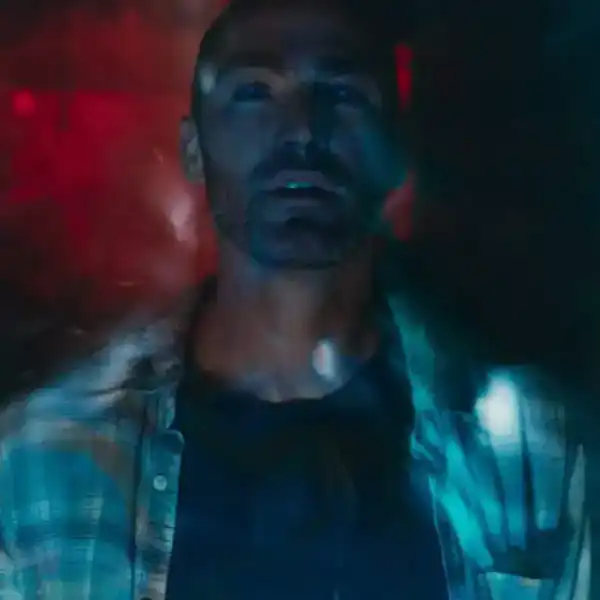
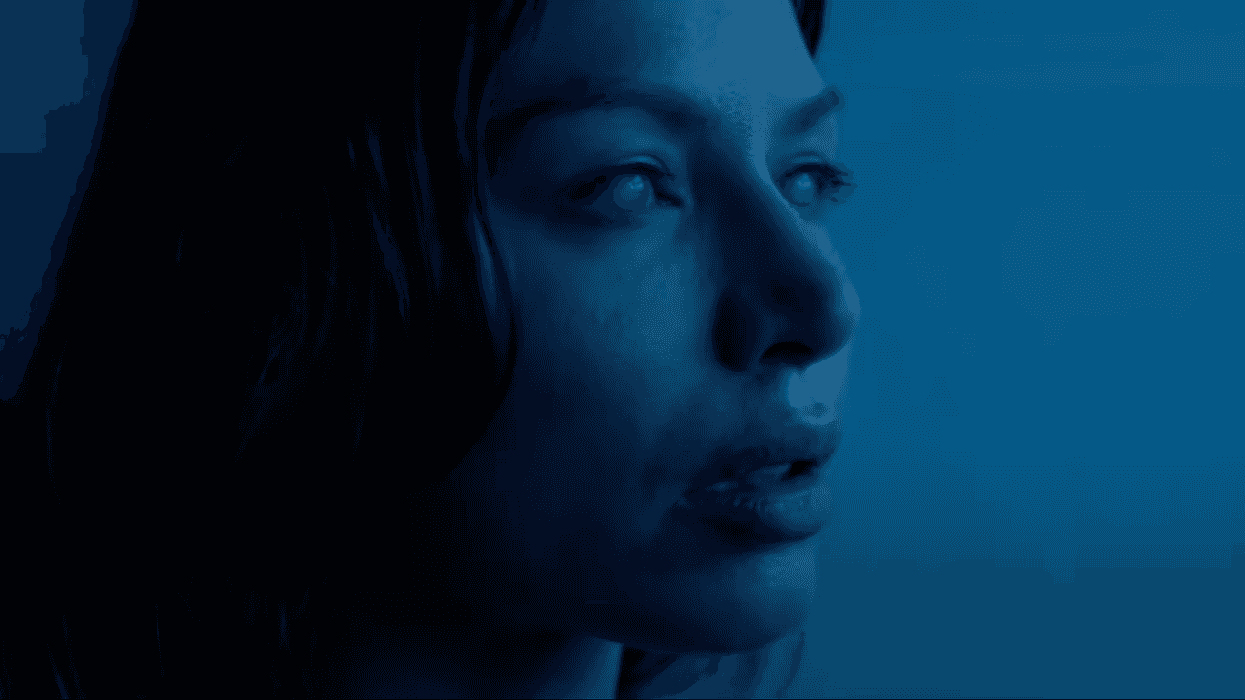
The story is about a blind woman who witnesses a murder, and fears for her life when the murderer comes into her house. (You can watch it here.)
What this means is the following: It’s a night scene and the main character is blind, so there was no reason to have any practical lights on—it would distract from the story. So how do you shoot a night scene in this context?
The question that followed was, "How dark can you push the image?"
This is especially important when you don’t control the viewing environments, and let’s not even talk about streaming compression—it can be deadly with dark noisy images. That didn’t mean I was going to change the way I wanted to see the image, but I had to keep it in mind.
So how can someone like me who doesn’t have a budget nor a crew make this work? That's when I realized I needed to shoot day for night.
How to Shoot Day for Night Below Native ISO
Blackmagic Design
The Day for Night Look
What does "night" look like, exactly? If you look at dozens of movies with night scenes, they all vary. There isn’t a single answer. Personally, I wanted to be as natural as possible, not necessarily realistic.
Having an idea of the night look that I wanted, I started to think about how I was going to capture what was outside of the window (ie, the neighbor’s facade). In normal circumstances you would just light it from the exterior, but in this case I couldn’t place any lights outside of the location. So if you have indoor lighting, anything outside the window would be completely dark. Which meant that I had to go the day-for-night route.
Now, the day-for-night look is just one of those things that can either work really well or fail miserably. There are a few things that give it away, mainly when actors squint, but personally I like the look. And for my taste in night scenes, I really like when you have deep blacks in the image. I don’t mean crushed shadows, I mean deep shadows with some dynamic range in them… That was challenge #2.
Why (and How To) Shoot Below Native ISO
Try this at home: shoot something at native ISO and zoom in the shadows. It’s likely that you’ll find quite a lot of noise. For a day-for-night look you need to lower the exposure quite a bit in post, and when the shadows are noisy, it just doesn’t look good—even when applying some noise reduction.
Now try this: shoot with the lowest ISO you can, and zoom in the shadows. I bet they’re noise free.
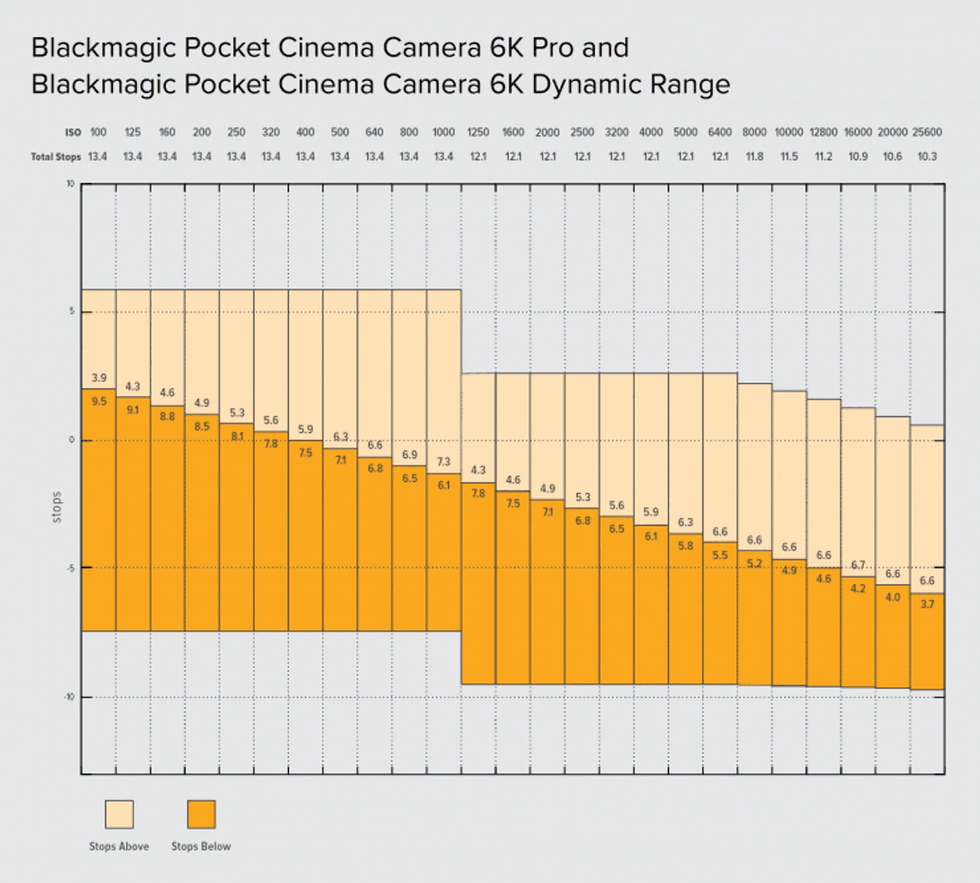
That’s because when using an ISO lower than the native of the camera, you have more stops of dynamic range in the shadows. As you can see in the chart below, the dark orange columns represent the DR stops in the shadows. But there’s a trade-off: those stops you gain in the shadows are taken away from the highlights. So you have to be careful, it’s very easy to end up with blown highlights.For me it was a perfect trade-off, because the short doesn't have strong highlights.
So, in order to get clean shadows, I shot at the minimum ISO of my camera 200 (sometimes going up to 400 if I needed a boost of exposure).
As you can imagine, I needed a lot of light. It might seem counterintuitive, but you need a lot of light if you want to get clean shadows. It’s not only to accommodate the decrease in exposure of a lower ISO. It’s also that you need to lower the overall exposure in post for the day-for-night look.
Shooting Day-For-Night? Use This Gear

Borja Moya's "Trapped"
The location was very tiny. It didn’t just present a lighting challenge for the lack of indoor space to accommodate the lights. It was also a camera challenge. I didn’t want to go wider than 25mm, so I needed a full-frame sensor that could give me the widest field of view possible.
Well, I had a BMPCC4K that I used for other shorts, but even with the speedbooster I couldn’t get the field of view that I needed. So I decided to use my photography camera (at the time), the Sony A7IV. This camera paired with the Zeiss Batis 25mm was exactly the look I envisioned for this film. (I used the 25mm for most shots, except for two shots in which I used the 40mm version.)
This camera allowed me to go very minimal. I didn’t have a crew, I was by myself and I didn’t have a budget, so the autofocus and sensor stabilization came in handy. So it was just the camera, a tripod, a dolly on PVC pipes, and a bunch of Godox TL tubes.
To be honest the camera wasn’t the best choice because it can’t shoot RAW. In other words: I had to commit with the white balance. There was no room for error.
But with careful and meticulous planning I was able to get it done.
It’s worth mentioning that developing a custom LUT was fundamental. I used an Atomos monitor simply for monitoring, not for recording. Otherwise it would have been very hard to expose correctly.
Lighting Setup
The lighting setup was simple but extremely complicated. As I said before, I couldn't rig lights outside of the attic. That would've been perfect with a big beefy light. But since the location was so small, I didn’t have much space to put the lights where they needed to be.
The setup consisted on a C-stand with 4 x Godox TL60s and 1 x TL120. Sometimes that wasn’t enough light, so I had to increase the ISO to 400.
The lights were set up at 5400-5600k (and the camera at 2800K). The color temperature coming through the windows probably varied, but I didn't worry too much about it.
Other than that I used a small paper lantern with a tiny led inside for the light in the eyes, and sometimes to boost a bit of exposure on her face. But most of the time I just used it to add a little reflection in the actress’ eyes.
I believe that audiences have more tolerance for darkness when they can see the actors' eyes. So as long as people can see the reflection in the eyes, the image feels alive.
Breaking Down the Shoot
In this breakdown you can see all the steps I took from the Slog3 image to the final look.
Again, the night look is very subjective, everyone does it differently. But for me the most important part in a day-for-night is selling the illusion.

The obvious areas in which you sell the illusion is for example adding light to the neighbor’s window—which you wouldn’t have achieved during the day, and I didn’t have access to that house!
But I also paid attention to little details, like the light coming from the screen of the phone. If the scene is dark the screen should be brighter.

The skies were replaced as well. Like I said before, shooting below native ISO gives you great shadows by sacrificing dynamic range stops in the highlights, so all the skies were blown out.

Some of you might be thinking that putting some NDs over the windows would be the easiest thing to avoid blown highlights. But the tradeoff is that you lose a lot of the natural light that comes through the window—that was light that I needed, because I didn’t have enough lights and no place to rent them. Luckily there was an easier solution:
You can either replace what’s outside of the window:

Or you can just grab some plates at a lower exposure and composite them in post. This can be pretty straightforward if it’s a lockdown tripod shot.
Making this short was a great learning experience that confirmed to me that it doesn’t matter what limitations you face, there’s always a way to make things work. But I also learned that lots of filmmakers get too fixated on gear, but sometimes it’s the little tricks that can make something work.
Nowadays you can grab basically any new camera and shoot something great, as long as you understand how to light things and how to properly capture the images. And sometimes it’s the most counterintuitive thing like shooting below ISO to get clean and clear shadows.
Let me know what you think in the comments. If you’d like to reach out, you can say hi at borja@borjamoya.com. I’d love to hear from you and what you thought of the film.
- How to Shoot Day and Night Scenes with One Setup and White Balance ›
- Need to Shoot Day for Night? Follow These Tips ›
- How DP Hoyte Van Hoytema Reinvented Day-for-Night in 'Nope' ›
- 5 Movies That Mastered The Day-For-Night Filmmaking Technique ›
- 5 Tips for Shooting Night Exteriors ›