Light is a powerful tool that can shape the mood, atmosphere, and storytelling of a scene.
While the spotlight often falls on the key light, there's another essential player in the lighting setup: the fill light.
In this article, we'll delve into the concept of fill lights, exploring their purpose, placement, and techniques to master their use.
Let's get started.
How Can Fill Light Help A Dark Scene Look Cinematic? (On Any Camera)www.youtube.com
Fill light definition

Fill Lighting
Fill light is a type of lighting used in photography, videography, and filmmaking to balance the overall lighting of a scene, particularly when dealing with shadows or areas of low light contrast.
Its primary purpose is to soften shadows and reduce the harshness of the main light source, creating a more pleasing and balanced visual.
The Three-point Lighting Setup
 three pointing lighting
 Credit: Wikipedia
The key light, backlight, and fill light all make up the three-point lighting setup. Three-point lighting is a standard method used in visual media.
By using three separate positions, the cinematographer can illuminate the subject any way they want while also controlling shadows produced by direct lighting. It uses key lighting, backlighting, and fill lighting to accomplish all of that.
But there's some nuance in the way you use each light.
How to Use a Fill Light
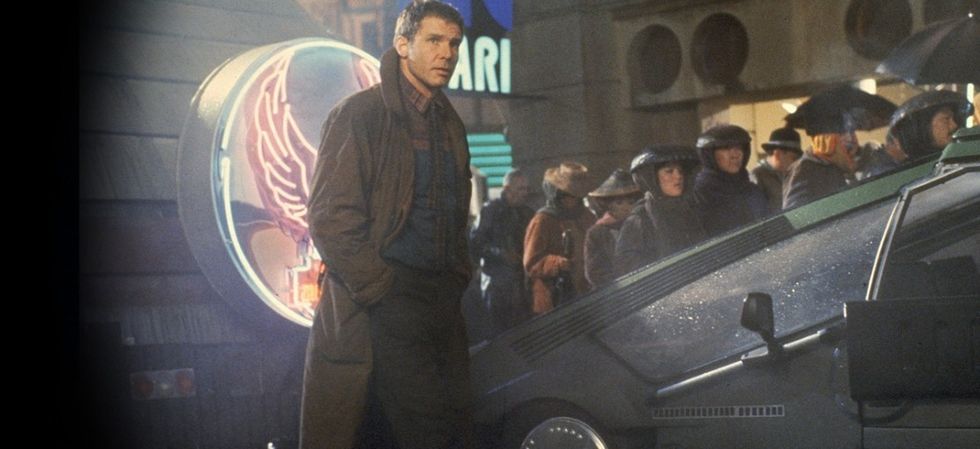
'Blade Runner' has some great fill light
Credit: 20th Century Fox
Fill lights are usually positioned opposite the main light source (key light) and are generally less intense than the key light.
To use them properly, take this into account:
- Placement: Position the fill light on the opposite side of the subject from the key light. This helps to illuminate the shadows created by the key light without completely eliminating them. The fill light should be positioned lower and at a shallower angle than the key light.
- Intensity: The intensity of the fill light should be lower than that of the key light. It should provide enough light to lift the shadows and reduce contrast, but not so much that it overpowers the key light and eliminates all shadows.
- Softness: A common approach is to use a diffused light source for the fill light. This could be achieved using softboxes, umbrellas, or diffusing materials. Softening the fill light helps to create a more natural and even illumination while preserving some degree of shadow detail.
- Color Balance: Ensure that the color temperature of the fill light matches that of the key light. This helps maintain a consistent and realistic color tone in the scene.
- Subject: The use of a fill light might vary depending on the subject and the mood you're trying to convey. In some cases, you might want stronger or weaker fill lighting to achieve specific artistic effects.
By using a fill light effectively, you can create a more balanced and visually appealing image or video that maintains both highlights and shadows while minimizing the extreme contrast that can be introduced by the key light alone.
Understanding the role of fill lights is essential for any cinematographer aiming to master the interplay of light and shadows.
By strategically placing and adjusting fill lights, you can elevate your visuals, enhance facial expressions, and create a more balanced and visually pleasing composition.
So, the next time you're setting up your lighting scheme, don't forget about the unsung hero—the fill light.
- Types of Film Lights (and How to Use Them) ›
- How to Master the Three-Point Lighting Setup and Lighting Techniques ›
- 13 Film Lighting Techniques Every Filmmaker Should Know ›