At least once a week I can see someone in my social feed asking about the best dynamic, smooth, or seamless transitions pack. Over the years, I developed a kind of a love-hate relationship towards them. I think there was a time when I was excited about using them in my videos and then I hated everything about them. Nowadays, I know that these transitions can be very effective if you use them correctly.
In the following video, I talk about why it's important to stop and think before applying any "crazy" effects. (Also, I'm using a transition pack for Premiere Pro I've found on VideoHive.)
The "WHY" behind using transitions
Let’s imagine you write a scene and you use an exclamation mark in every single line. Will it work as intended? My guess is that after a few lines each exclamation mark draws less and less attention. Eventually, we'll treat it as a new status quo.
The purpose of any transition should be to reinforce and emphasize something and either we accomplished that goal depends on the context and the expectations that the audience has.
The purpose of any transition should be to reinforce and emphasize something.
A few months ago I’ve read a script for A Quiet Place and I loved the way they used this rule. When you barely have dialogue, you need to depend much more on the punctuation, including exclamation marks. It breaks the rules of screenplay formatting to really emphasize what’s going on. Each line is a separate page. Font size increasing on every single one. It does a great job of creating suspense on the page and we as editors can learn a lot from it.
Let us remember that film is a language and unless we want something to be a relevant grammar element of the story we’re telling, we should be constantly motivating the use of any dynamic transitions, light leaks, and so on.
But I’m not saying that there’s no place for ready-to-go templates. I’m just saying that it’s one of those rules that should be broken with caution.
The film is a language and unless we want something to be a relevant grammar element of the story we’re telling, we should be constantly motivating the use of any dynamic transition.
I actually have bought these transitions on VideoHive myself because I’ll be posting 7 very short videos with Premiere Pro tips without any narration on my Instagram profile. Just screenshots and text. The videos will be watched without sound and browsed between other videos and photos, and I think that these eye-catching transitions might do the job. Here's the first tip.
It's time to check out this 1000+ transitions pack, what’s cool about it, and what is the best way to import and use them in Premiere Pro.
Opening for the first time
The first time you want to use any template project you get from someone else, it’s good to resave it on your machine. So, just open the file, hit Ctrl + S (Cmd + S) and replace the original file.
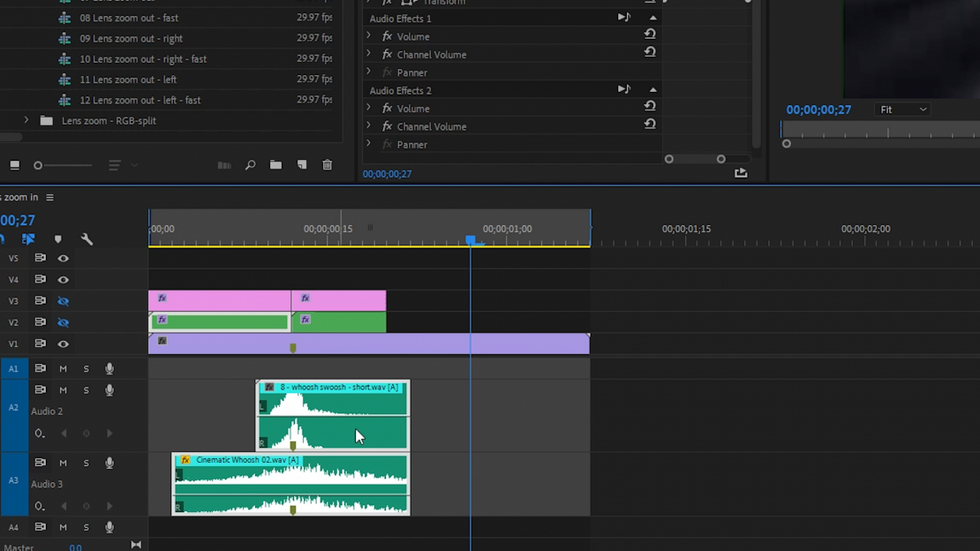
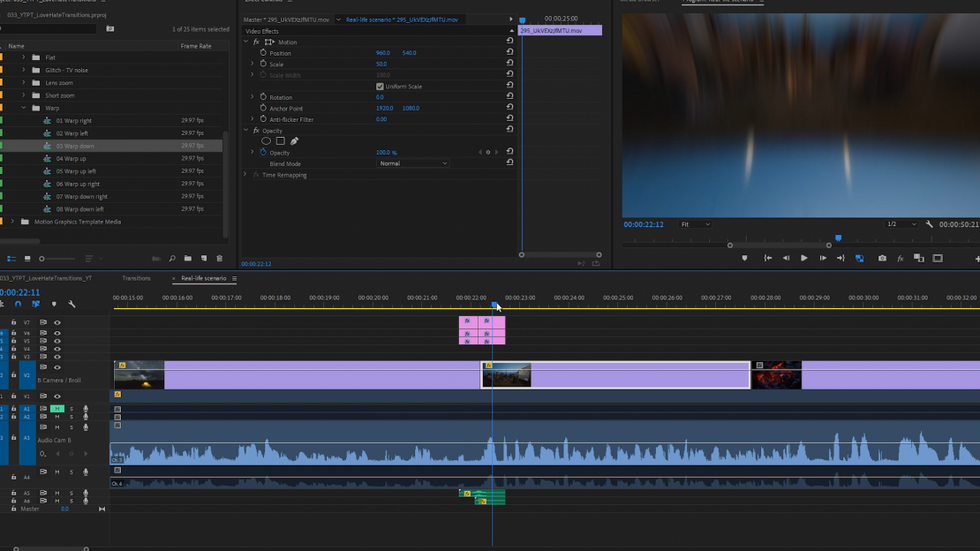
These transitions are created as sequences. As you can see there are two stock images on the first video track and some clips that are used as containers for effects on tracks above. Thanks to these images on track one, we can actually preview the transition before we apply it. Also, what’s really special about these transitions is that we already have sounds effects in place.
Previewing transitions
To preview transitions just open any bin with them and drag it to its own panel. Activate thumbnail preview (or freeform view) view by default. You’ll be able to hover over these thumbnails and preview what a given transition does.
Importing into the project
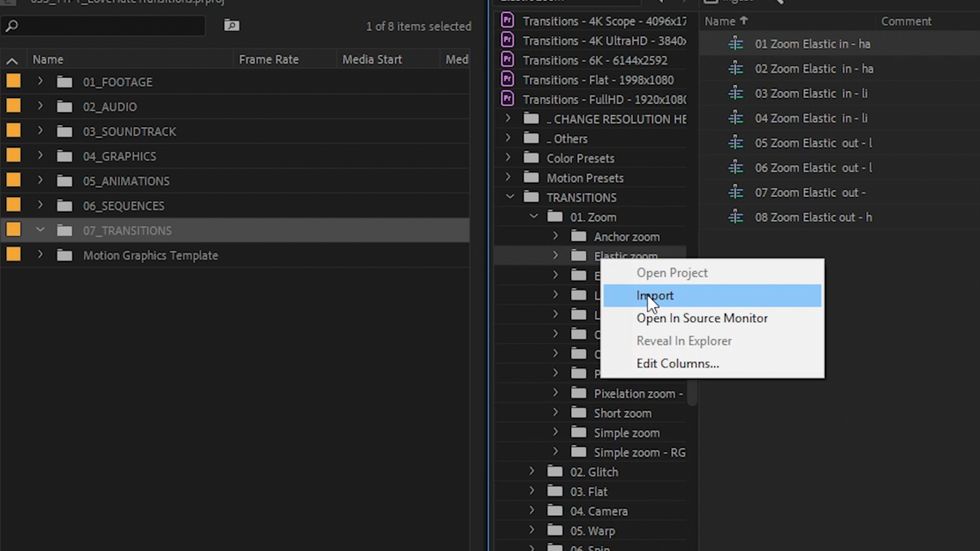
Start your project like any other. So if you use a template project, go ahead. Edit the video like you normally would to the point when you’re ready to add transitions. Then open the Media Browser panel and navigate to the transitions project for your resolution. Drill it down and select only the bin for the transitions you actually want to use, right-click, and import it to the project. This way you don't import all of these transitions to your project which could potentially slow down the project (and cause some stability issues).
Source Patching
Before you drag these transitions to the timeline though, you need to take care of nesting and source patching.
So uncheck the first button for timeline behavior to make sure that you place individual clips rather than nested sequence. If you don't know what I’m talking about, check out this article.
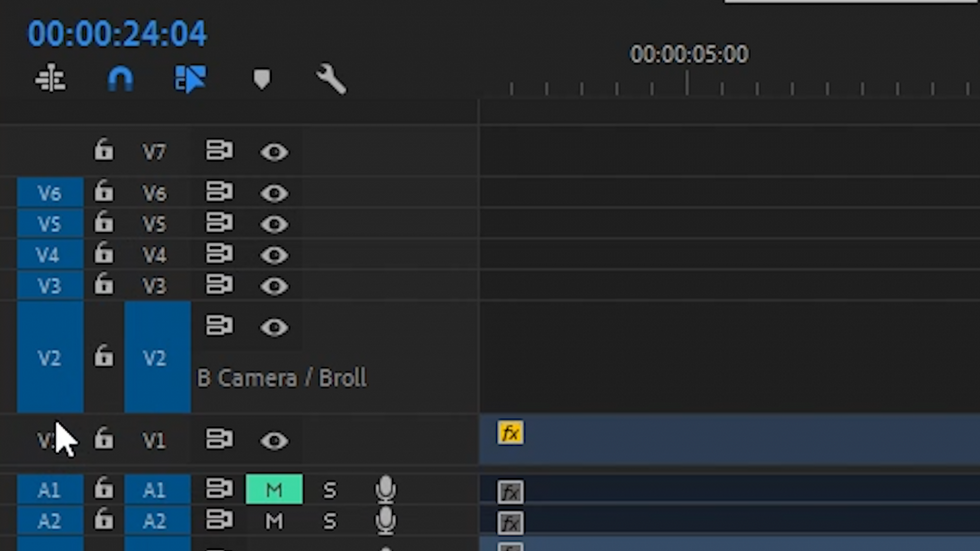
We obviously don't want to place stock images in our sequence, as well. The setting that controls which tracks will be inserted or overwritten in the timeline is called source patching and we need to deactivate it for the 1st video track (see the image above).
Applying the transition
We're ready! We can just drag and drop transitions onto the timeline or even use overwrite command using period on the keyboard directly from the Project panel.
Let us know what you think about using dynamic, smooth transitions in film and video in the comment section.