
Whenever you walk onto a set, you will always find a C-stand (or Century stand). Unless you’re working with a very tight budget, that is. How they got the name is up for debate, but there are two popular theories.
The first is they were named after Century Lighting, one of the first companies to manufacture them. The second theory is that they were named after wooden easel-type non-telescopic stands which held light modifiers. They came in several sizes, with 100-inch being a popular choice. One hundred years, a century, century stand, bam.
The latter story comes in different flavors, but you get the picture.
But the name is not important. The stand is here to stay. We’re here to teach you how to use one. So let’s begin.
Be warned, there will be a ton of slang.
The Basic C-Stand Setup
Modern C-stands come in four pieces—a base, the column, a grip head, and a grip arm.
A simple setup includes the removable base (called a turtle base), with three legs of different heights that swivel, and the telescopic rod or the column with a pin on top. Pop one into the other, and you have yourself a simple C-stand. This can extend twice.
 A standalone spring loaded turtle base from MatthewsCredit: Matthews Studio Equipment
For a complete C-stand, you will also need the grip head (also called a gobo head), and the grip arm (also called a Hollywood arm), which is a grip head welded to a 5/8-inch rod.
The top of a C-stand column has a non-removable 5/8-inch pin, which the grip head attaches to on one side using a connection point. The other side of the grip head usually includes relief points for 5/8-inch and 3/8-inch attachment pins. Some even include 1/4-inch reliefs, but that will depend on the brand you are using. These reliefs can swivel in one axis around the circular head. The rod of the grip arm is inserted into the 5/8-inch relief on the grip head.
 A complete C-StandCredit: Savage
Safety, Safety, Safety
First, wear gloves. Always. Got them? Good. Now we can safely prepare a complete C-stand for use set.
- Insert the column into the turtle base and put the stand in front of you with the tallest leg facing directly away from you. Make sure that all of the twist knobs are on your left side. This is important.
- Then attach the gobo head (not the grip arm) on top of the 5/8-inch pin of your column. Make sure that the large twist knob is on your right side. Also important.
- Next, take your grip arm and slide the rod into the 5/8-inch relief. Make sure the attached grip head is on the top, and the large twist knob is also on your right side.
- Finally, attach your light to the grip head on the arm using a separate 5/8-inch pin, which is also called a baby pin. Then put a sandbag over the tallest leg of the base.
You did it. You’ve made your first complete C-stand. Let’s pat ourselves on the back!
But wait, why do we do it this way? Because of safety, safety, safety.
To start, you never want to attach a light to the 5/8-inch rod of the grip arm, even though all industry-standard lights have a 5/8-inch attachment point. This is because there is no relief cut into the rod, and lights may slide off and hurt someone on set. I say may, but with enough time making movies, it will eventually happen. Don't do this.
 Not this end. The other end.Credit: Avenger Grip
Let’s continue. When we have our attached light, we always extend it over the highest leg of the base. This is the steadiest part of the base and the first leg we put a sandbag on. The sandbag might not touch the floor, and that’s okay, as all the bag's weight is on the stand. Furthermore, when you extend your light over the tallest leg, the weight of the light will lean on the gobo head, which will tighten the head even more. If the light is extended in the opposite direction, the weight of the light will loosen the gobo head instead, and everything will fall apart. Literally.
Setting up the C-stand in this way ensures that everything is safe but also increases your efficiency on set. Remember the twist knobs on the left? They raise your stand. The knobs on your right tighten your grip arm rod and control your light attachment. The left is for the stand, and the right is for light.
 The weight of the light tightens the grip headCredit: Voyage Pro
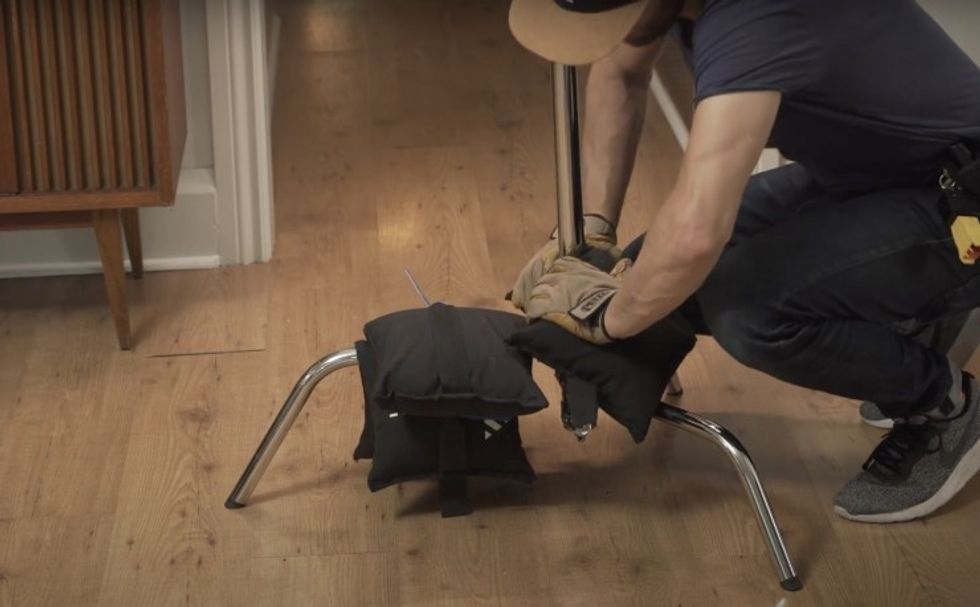
How to Use Sandbags
Remember, your C-stand load should always hang over the tallest leg of your base. There are exceptions to this rule, but that’s advanced stuff we’ll cover down below. This is why you should always start bagging the tallest leg first. This will create a very stable, low center of gravity for your setup. If the bag is hanging off the leg and swinging, all of its weight is used to support the stand.
For bigger lights, a second sandbag should be used and will go on top of the first bag. If you need a third bag, it will go around the column on the opposite side. The sandbags should never touch the floor. If they do, they’re not doing their job.
If you need a fourth sandbag for the job, you’re using the wrong stand. Yes, C-stands are not the end-all, be-all tool.
 The right way to triple bagCredit: Vistek
Advanced C-Stand Use
So, you have your C-stand. It’s got a light and a sandbag. Is that all you can do with it? Heck, no! But if we start listing all the ways you can use a C-stand, this would be a book. So we found two amazing videos for you to check out.
Below, Seth Miranda does a video for Avenger Grip. While he goes through the basics as we did, he does touch on using counterweights and attaching reflectors, diffusion, and bounce to your stand.
Lastly, we have Dale Sood on the Vistek YouTube channel. He also goes through the basics but dives in-depth on bagging, unique setups, creating a sketchy-looking menace arm, some slang, how to store multiple stands, and how to safely carry one around set!
C-Stand Brands
Okay, you got this far, but you don’t have a C-stand. Where do you get one, and which brand should you buy? There are a few brands out there, but we’re partial to a few industry staples and some newcomers to the market.
First, we have American Grip C-Stands. This company has been around since the mid-80s, and its stands are rock solid. They’re missing some bells and whistles of other brands, but they’re built like tanks and feel like they’d survive a nuclear apocalypse. With how things are going these days, you might want a few just to be safe. I have a pair of these, and they’re a joy to work with.
Next, we have Matthews Studio Equipment C-Stands. This well-known brand hails from the late 60s. It saw the moon landing and went to Woodstock. Matthews C-Stands are more affordable, reliable, and have excellent build quality.
Moving on, we have Kupo Grip C-Stand from New York. Founded in the late 70s, the company has been around the entertainment industry since Cheers. These stands are in line with Matthews and offer solid options for creatives.
Finally, we have Avenger Grip C-Stands, which is part of the Manfrotto brand it seems. I don’t know the exact details of this company, but their C-stands have some nice features for flags, and they helped out when researching this article, so let’s give them some love.
When Not to Use a C-Stand
Let’s wrap this up with a few thoughts on when not to use a C-stand. While they are great options for lights and flags alike, a C-stand can only hold so much, especially when you have to extend a light over a great distance. If that’s the case, consider using a dedicated light stand.
Other times, you may not have the footprint for a C-stand or even a standard light stand. Remember that you can always attach lights directly to your set using a plate with a welded baby pin. If you don’t want to ruin your location, you can always run speed rail. Or just go handheld!
However you rig your set, just be sure to be safe. Take it slow, and don’t break anything, be it equipment or crew.
Happy rigging, and don’t forget to wear gloves!
Check out weekly specials, deals, and rebates: Pro Video Gear, Pro Audio Gear, Lighting


