You shoot something on a modern camera, and it comes back flawless. The scene is sharp from corner to corner, clean in the shadows, with color that holds up under any light. Yet somehow, it feels flat, more like video than film.
The problem is that perfect has no character. For a century, the look of moving images was shaped by the limits of the gear that captured them. Think of the flare of light bouncing around inside a lens or the grain of film stock. Recall the soft halation that swells around a highlight and how magnetic tape signal erodes a pinch more with each pass. Modern sensors removed almost all of this and erased the character with the flaws.
Creating looks is about putting that character back, on purpose and with control.
There's a blunt name for this craft: making it look terrible. Laugh if you like, but most audiences agree about what looks terrible and almost never about what looks beautiful. Thus, terrible is the easier, freer place to start experimenting. You can do that experimenting in After Effects with the Red Giant toolset running as effects right on your layers.
Think in a Damage Chain
Before reaching for any single effect, it helps to know where imperfection comes from. Picture the path light travels to reach a viewer and ask what degrades it at each stop. In front of the lens, there’s atmosphere and flare. Inside the lens, chromatic fringing and distortion intrude. At the film stock or sensor, expect grain and noise. Storage adds tape wear and/or compression. Not least of all, transmission introduces signal break-up and glitch.
Each stage of that havoc maps to at least one Red Giant tool. Skill lies in picking the few that tell your story instead of stacking everything you own on a clip and hoping for the best. For example, a surveillance feed wants sensor noise and a scan line, right? A dream or memory might call for halation and a soft, slow flare. A hacked broadcast wants compression artifacts and a tear. Choosing how damage affects the image keeps a look coherent rather than merely busy, and it gives you a reason for every effect on the layer.
Lens Flaws That Tell the Truth
Start at the front of the chain, where light first begins to lose its purity. A lens flare is not decoration sprinkled on in post. In a real camera, flares are evidence of light misbehaving inside the lens, as when bouncing between glass elements, blooming across coatings, or reacting to a bright source just outside the shot.
Real Lens Flares brings that behavior into After Effects as an effect on your layer. You set the type, position, and intensity of a light, then the engine calculates what each successive glass element in a real lens would do with it. Presets capture that physics as repeatable math and deterministic output. Some presets are simulations of real lens prescriptions. Stylized presets with names like Dream State, Grunge, Horror, and Thriller map more to creative moods.
Because the flare's light source lives in your comp, it can animate like anything else in the comp to better echo real life. For example, imagine when an object passes between a light source and the camera, like a subject walking through a view of the Sun. As they block the light, the flare should collapse, then bloom back the moment they clear it. Real Lens Flares handles this with Obscuration, which uses luminance or alpha data in your shot to let image areas act like solid objects that block the flare's light. The flare now reacts to the shot instead of floating over it.
In a 3D-tracked scene, you can go even further. Set Locate Flare By to AE Light. This causes the flare to pin itself to an actual After Effects light in your scene, even respecting the direction of spot and parallel lights as the camera moves.
The goal is to make selected moments feel photographed instead of assembled. That’s the same job grain and glitch do later in the chain, but here it happens at the optical stage.
Expressions Bring Imperfection Alive
Keyframes and expressions are among the biggest reasons to build looks in After Effects, and they work on a wide range of tools and effects. Perhaps the handiest such trick is a one-line expression you probably already know: wiggle.
You can add a wiggle to a static lens flare and make it flicker a few times per second in the same way a real, struggling light source never quite holds steady. Add that same wiggle expression to the red, green, and blue channels of a chromatic aberration to create fringing pulses, so the image strains while something powerful happens on screen. When the moment passes, keyframe the aberration back to nothing to revert the scene to normal. This sort of flicker isn't a canned preset. You animate it and time it to the story.
Color, Degraded
Much of what reads as a "film look" is really the color limits of vintage film and video. Instinct says to make color prettier and more vibrant, but the savvy move here is to make color tell a story. You might tint the shadows a different hue than the highlights, push a scene toward the orange and teal that sit opposite each other on the color wheel, or commit to a single dominant color with a meaning, like the yellow and black your hindbrain reads as danger. You can even sharpen only the brightness of a shot and leave the color soft for that slightly cooked, over-processed vibe.
In After Effects, this is a two-step job. Start with Colorista, Red Giant's color correction toolset, to set the base color pass. If the technical details of shot balancing aren't in your comfort zone, Colorista's Guided Color Correction walks you through it in a few steps and leaves you with a neutral, balanced image. Set that base before you add any of the degrading effects in the next section, because grading on top of grain or a glitch just makes every color adjustment fight the texture beneath it instead of building on a clean foundation.
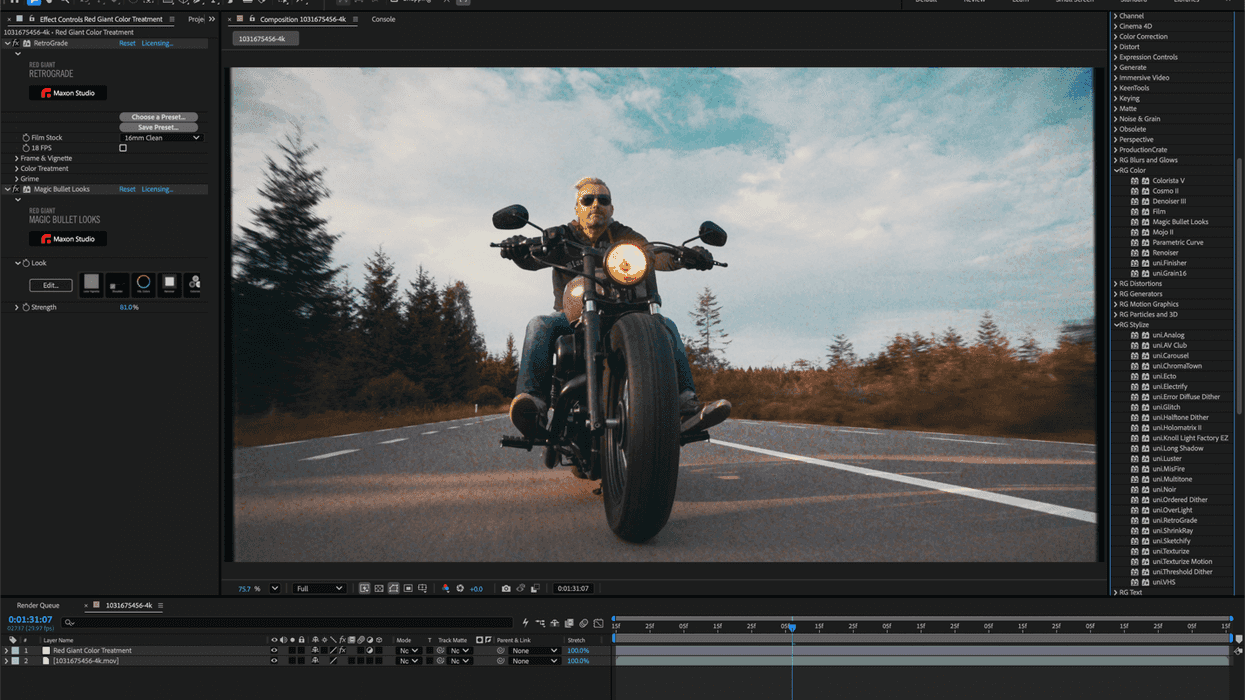
Next, create your stylized look with Magic Bullet Looks, Red Giant's grading environment that lives inside your comp. Start from its vast library of presets or build a custom look from scratch with bundled tools, stacking the tints, curves, and diffusion your story calls for.
Once a look works, you shouldn't have to rebuild it shot to shot. Looks can save the whole stack as a preset you apply to the next clip in a single click. Smarter still, apply Looks to an adjustment layer so one effect carries your treatment across every clip beneath it.
Grain, Glow, Glitch, and the Analog Past
The middle of the damage chain is where texture lives. Say the shot should read like an old-timey broadcast. The Analog effect will do most of the work by aging footage to appear like an old CRT television broadcast, scan lines and all. But you can't simply slap the effect on like a bandage. Instead, pick a preset that's closer to the vibe you're after, perhaps a preset in a tool like Analog, and then tweak the settings to make it fit your project. The adjustment layer then becomes a master mix knob for the whole look. Even better, because everything beneath the layer ages in tandem, a composited element that floated oddly on the image a moment ago now sits naturally inside the shot.
Order matters, too. Say our antiquated broadcast should also break up. Glitch, the Red Giant effect that tears a frame like a corrupted stream, covers the transmission end of our make-it-terrible chain. Apply Glitch on the footage before the Analog adjustment layer, so Analog ages the tear along with everything else. This way, the damage looks like it happened during the broadcast rather than being pasted on after. If you flip the order, the illusion breaks. And if the story calls for film rather than broadcast, swap Analog for Red Giant aging tools like Retrograde and Misfire on that same adjustment layer, or even Grain16 to see the shot age into real 16mm grain.
Chase the Happy Accidents
Sometimes, fun starts when you point the toolbox at the wrong target. For example, the Heat Wave tool was built to put rising heat ripples into footage. But if you "accidentally" apply Heat Wave to a block of text and pull the heat blur way down, your clean type will jump and scribble like nervous handwriting. It's like berries and balsamic vinegar. Sometimes, you put an effect on a subject where it has no business being, and incredible things just happen. Or it's a mess. There's only one way to find out which.
Part of the craft is recognizing and keeping those results when you find them. Array Gun, a Red Giant generator, was built to make grids and patterns, but some artists have stumbled into using it as a displacement map to scramble text artistically or lay it over a photo as a halftone texture. Nobody designed those uses. Somebody just found them, and the tool was flexible enough to merit keeping them.
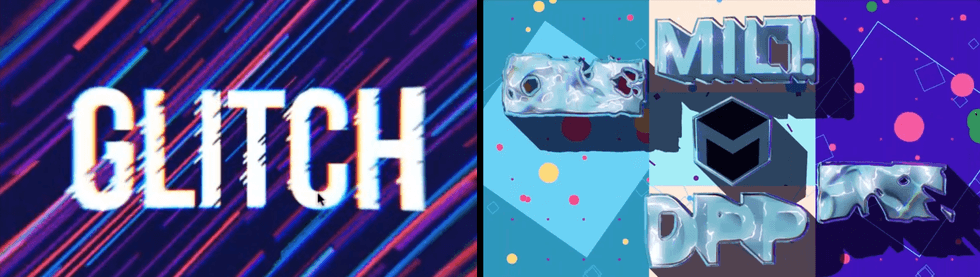
CG director Shimon Tanaka designs the live visuals for the Japanese band BABYMETAL. "The tools in [Red Giant] Universe simplify effects that would normally require complex processes," he says, "often producing unexpected results that surpass my initial expectations, which is why I enjoy using them." He grades nearly every project with Magic Bullet Looks and calls the Red Giant tools essential for After Effects users. Read how he builds BABYMETAL's live visuals.
After Effects is the Canvas
Everything in this piece starts in After Effects. The comp is the foundation on which you audition ideas and experiment with emotion. Red Giant's tools run as standard effects on standard layers, so they join that process rather than replace it. You keep the workflow you already have, and the work comes back with character it didn't have before.
Just remember: Perfect is forgettable. Visual character, whether starkly sterile or deliciously dirty, is a choice and something you can build.
If you want to watch these treatments come together, Cineversity offers a wealth of short Red Giant walkthrough videos, including building cool abstract looks. And when you want to try it in your own comp, Red Giant offers a free trial, so you can start putting the grain, glow, and glitch back into your next shot and finally make your work look terrible with purpose.